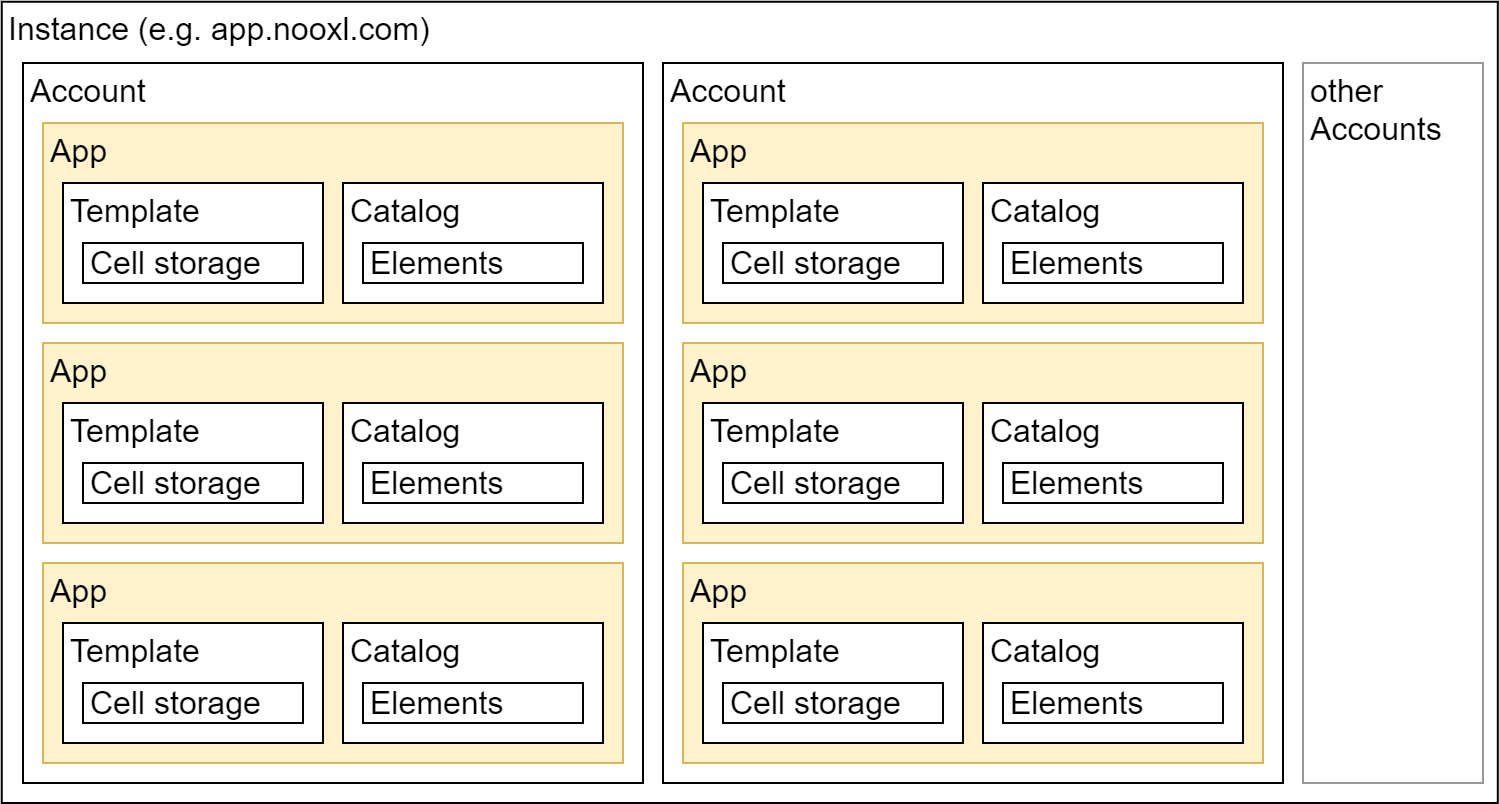
General stucture: Instance, Environment, App, Model, Label
The following sections highlight the various aspects of the use of Nooxl. Furthermore, the topic App Design with Nooxl is treated in more detail than it is the case in the chapter App Design Basics.
The following illustration gives a schematic overview of the different building blocks of Nooxl and how they interact. This schema is reused per section to illustrate where you are currently located.
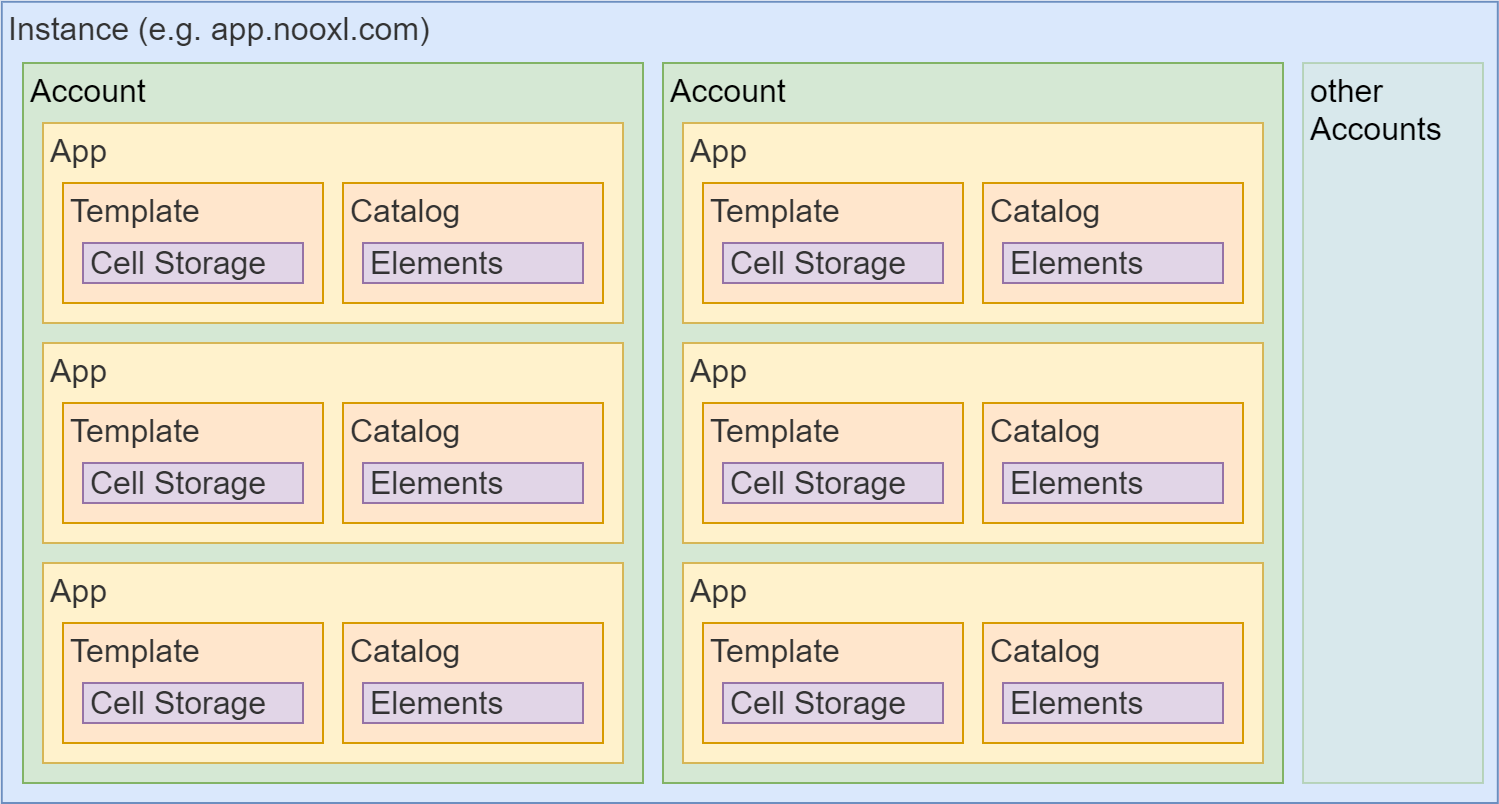
Instances
A Nooxl instance is accessed via a unique URL in the web browser, e.g. https://apps.nooxl.com. Instances can contain any number of accounts and these in turn can contain any number of apps with any number of templates. They therefore represent the highest logical order in Nooxl.
Interaction between instances is not possible, except copying existing apps from one instance to another.
A Nooxl instance is not the same as a physical server. Several instances can run parallel on one server.
Likewise, several instances can share a URL and can then be accessed via different ports.
Accounts
Accounts in Nooxl host the actual apps in which the users work. Each user in Nooxl has access to at least one account, but can be invited to additional accounts at any time by other users with the appropriate rights via the Collaboration area .
If a user has access to multiple accounts or is admin for the instance he will see the following after login:

If the user has only access to one account and is not admin for the instance, Nooxl will automatically forward the user to the account.
Create a new account
Depending on your permissions and the licensing your company choose, it is possible that you are not allowed to create new accounts.
You can create new accounts right after you signed into Nooxl in the account overview. Here you find the button New Account.
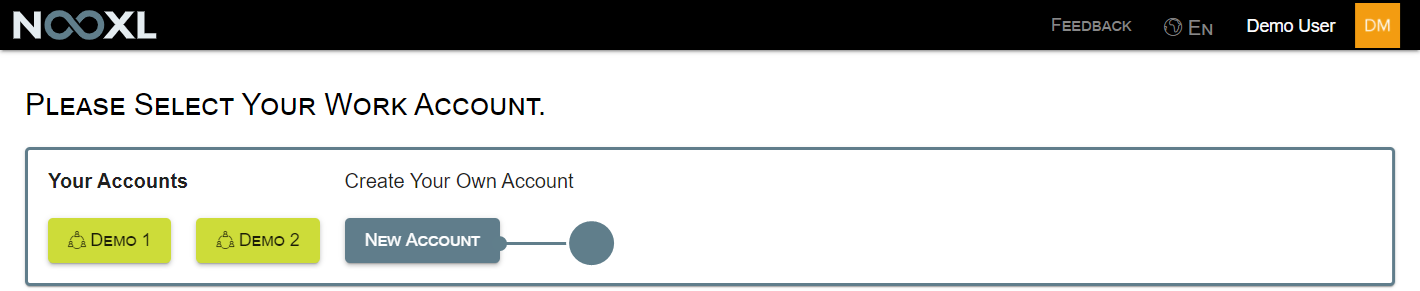
When you are directed right to your App after you signed in, please click on the account name to get to the account overview.

After this you will find an additional Account with your name in the overview.
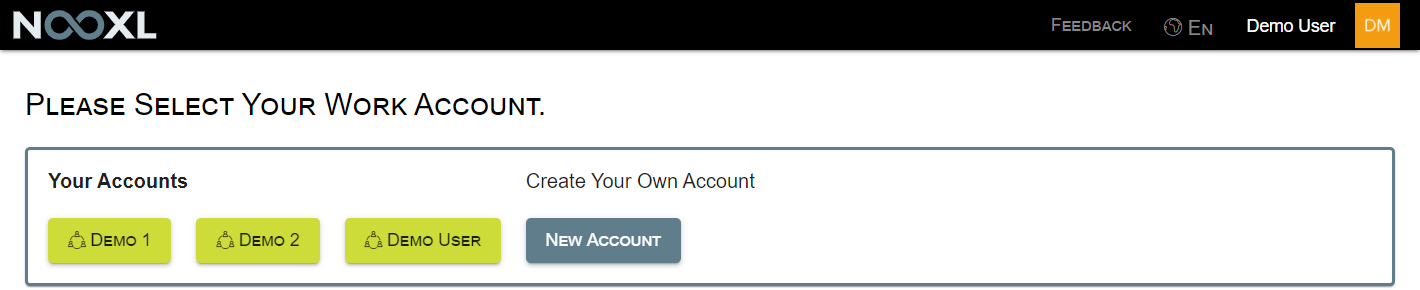
When you create yet another account it will have your name followed by "#1".
Next steps
Next you might want to rename the new account .
Edit account details
Currently you can only rename your account. To do this, you have to click on your user name (1). In the menu hover your mouse over Account (2) and then choose Rename (3).

Delete an account
To delete an account, click on your user name (1). In the menu hover your mouse over Account (2) and choose Delete (3).

You can only delete accounts without any Apps. So make sure to delete all apps
prior to deleting an account.
Apps
Apps combine different templates and normally form something like a programm. Once you logged into an account you see the App overview where you can open an App from the list (1). As soon as you entered
the design mode you can also copy an App (2), edit or delete an App (3) or create a new App (4).
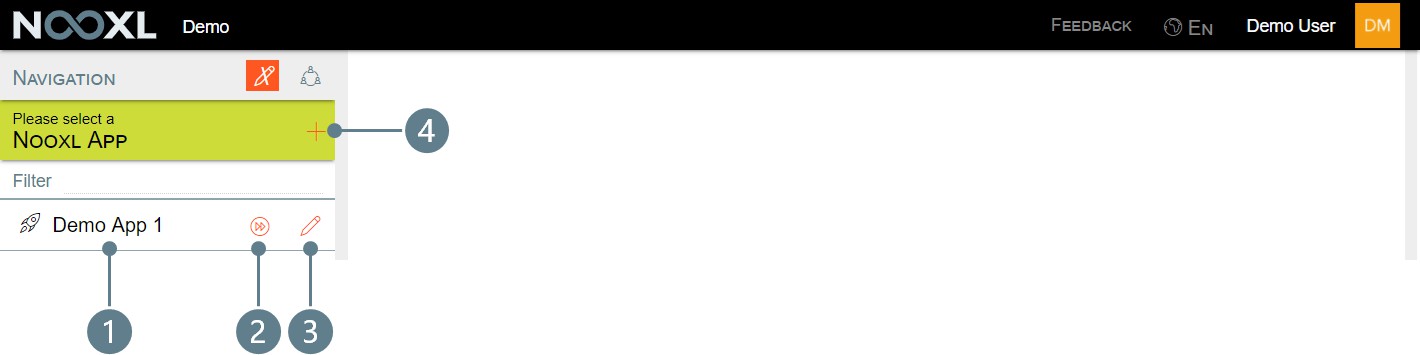
If you do not see this screen after you entered your Account, only a single App exists and Nooxl automatically transferred to this App. If this is the case, just click on the App Name in the left navigation pane.

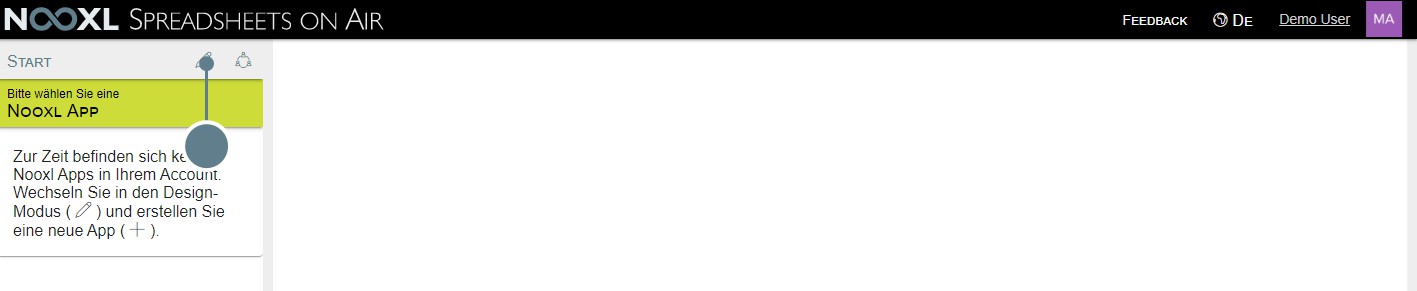
Create an App
After you have logged in to Nooxl, you will see in the left navigation an overview of the already existing apps or a note that there are currently no apps in your account and an app should be created accordingly.
To do this, click on the button with the pencil icon to switch to draft mode.
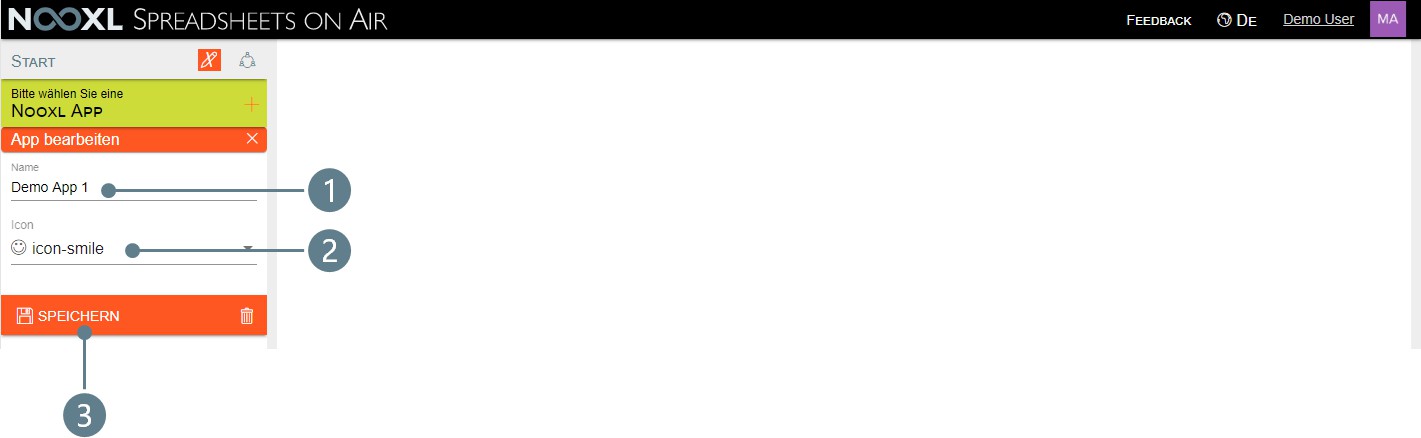
In draft mode you have the possibility to create a new app in your account by clicking on the red plus.

In the creation mask for new apps, you assign an app name (1), select an icon for your app
(2) and then save (3) your entries.
After you are returned to the App Overview, leave the draft mode by clicking on the red pen icon.

You can then open your app by clicking on the entry.

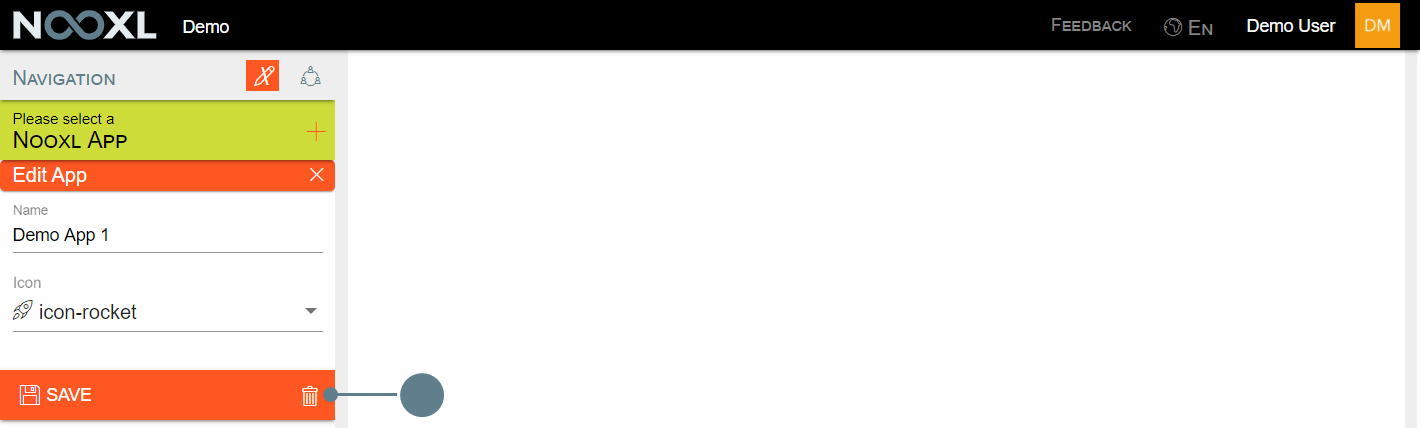
Edit an App
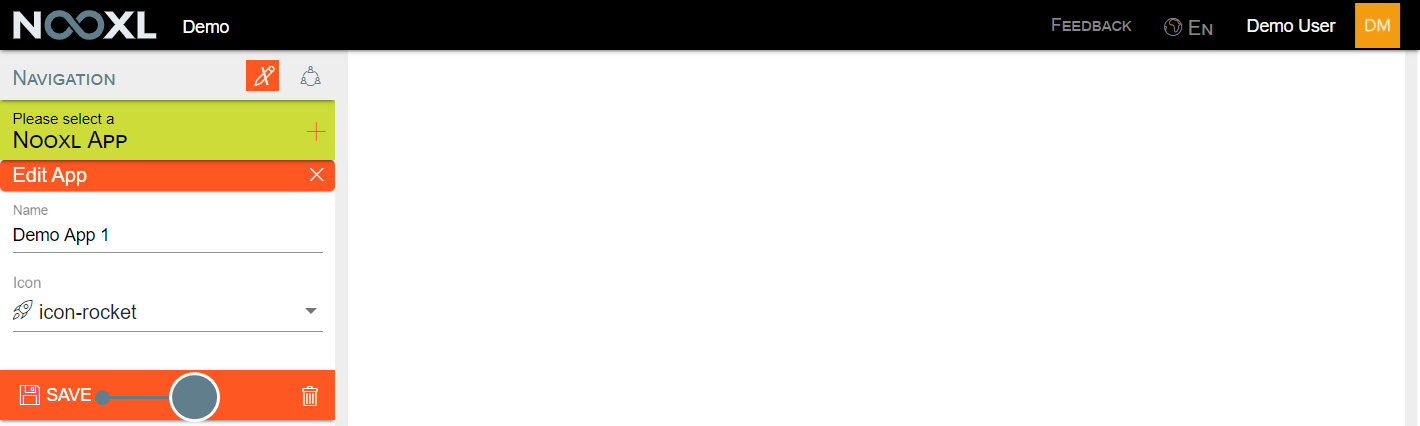
You can always customize the name and icon of an existing app. To do so, click on the pen to enter the design mode:

Then click on the red pen to the right of the app you want to edit:

Make the desired changes to the name and icon and save them by clicking Save:
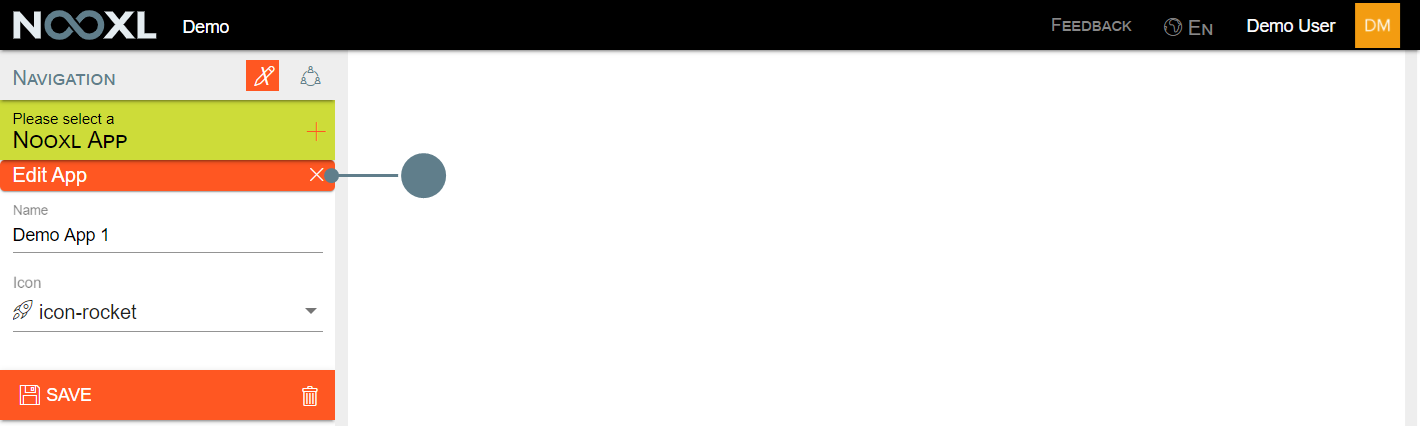
To cancel your edit attempt click on the x.
Copy/ clone an App
You can copy apps including all content and data at any time. This is useful, for example, if you need to quickly set up a training environment for employees that is separate from the productive environment to prevent accidental data loss.
To copy an app, click on the pencil to enter the design mode.

Then you can open the mask for copying the complete Nooxl app by clicking on the ![]() icon to the right of the app.
icon to the right of the app.

Clone Nooxl App properties
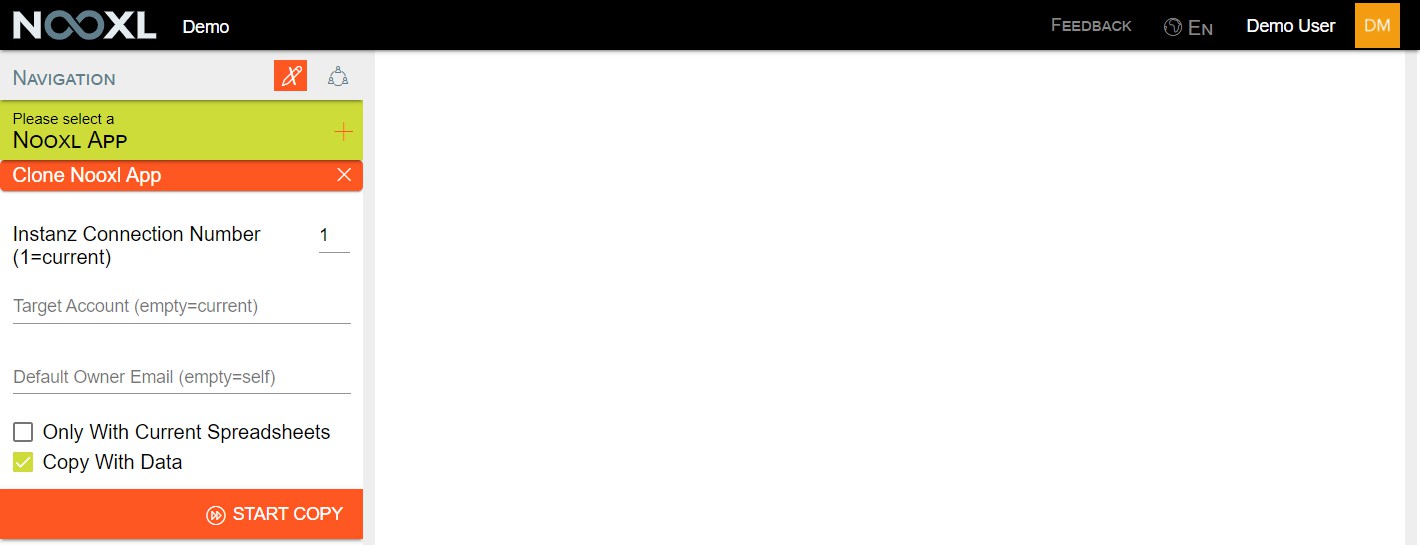
Instance Connection Number (1=current)
If the app is to be copied to another instance (for example from production server to a test server) of Nooxl, the connection number of the target instance must be specified here.
You get the connection number from the configuration file of the current instance.
Target Account (empty=current)
The ID of the target account, if the app is to be copied to another account. The ID of an account can be found in the browser URL after
![]()
Default Owner Email (empty=self)
The email address of the user who is to be the owner of the app. If none is given, the current user is stored.
Only With Current Spreadhseets
If this option is selected, only the latest versions of all templates are copied to the new app.
Copy With Data
If this option is selected, all datasets are copied as well.
Catalogs, catalog elements and selections are copied even if this option is disabled.
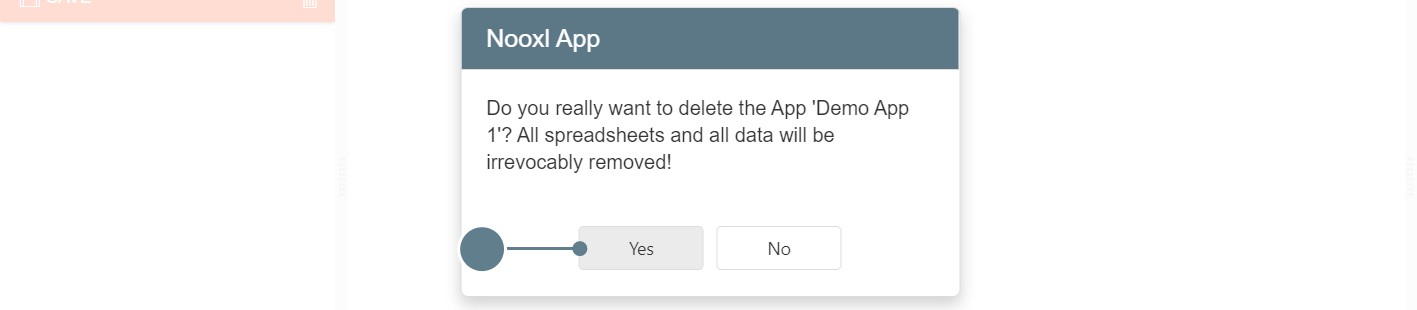
Delete an App
To delete an existing app, click on the pen to enter the design mode.
Then click on the red pen to the right of the app you want to delete.
Click on the trash can on the bottom right.
Confirm the final deletion.