Quick start - Your first Nooxl App
All activities and functionalities of Nooxl mentioned in the following chapter require that you as a user have the designer permissions for the app and its templates.
Designer authorization is granted to Account Owner, Admins and users who explicitly have Design the App authorization.
For more information, see the Permissions section.
Create a new app
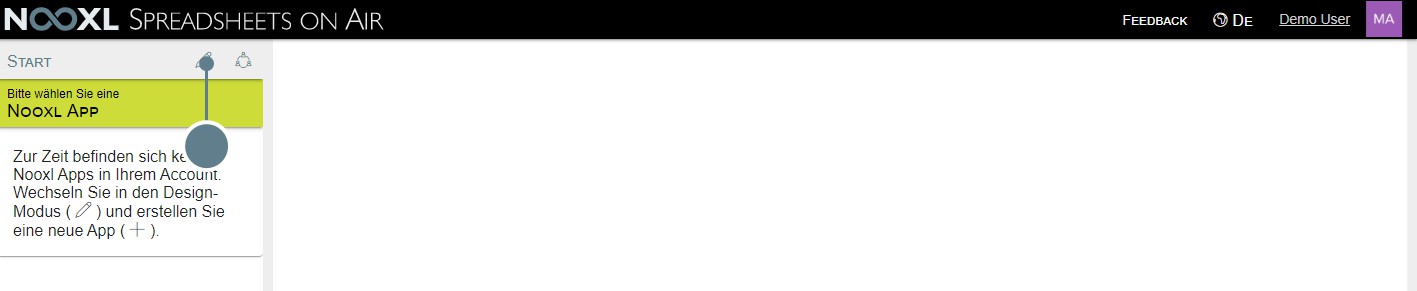
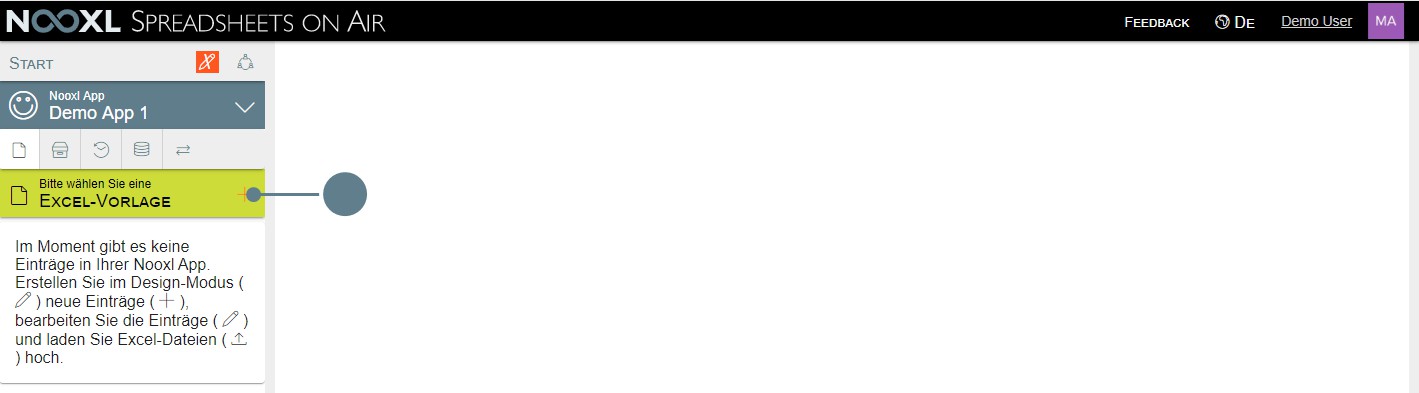
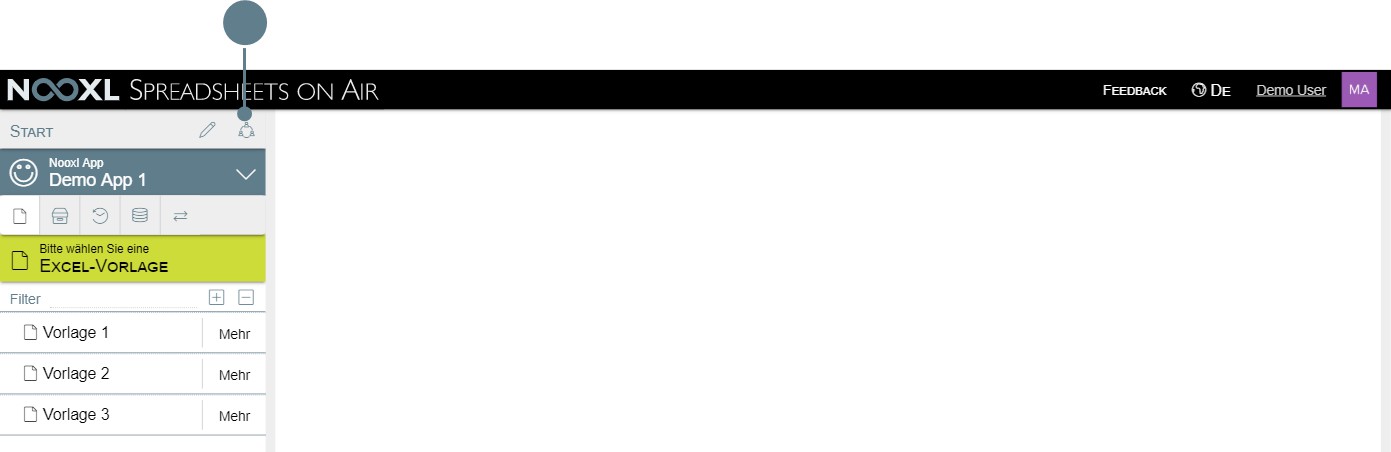
After you have logged in to Nooxl, you will see in the left navigation an overview of the already existing apps or a note that there are currently no apps in your account and an app should be created accordingly.
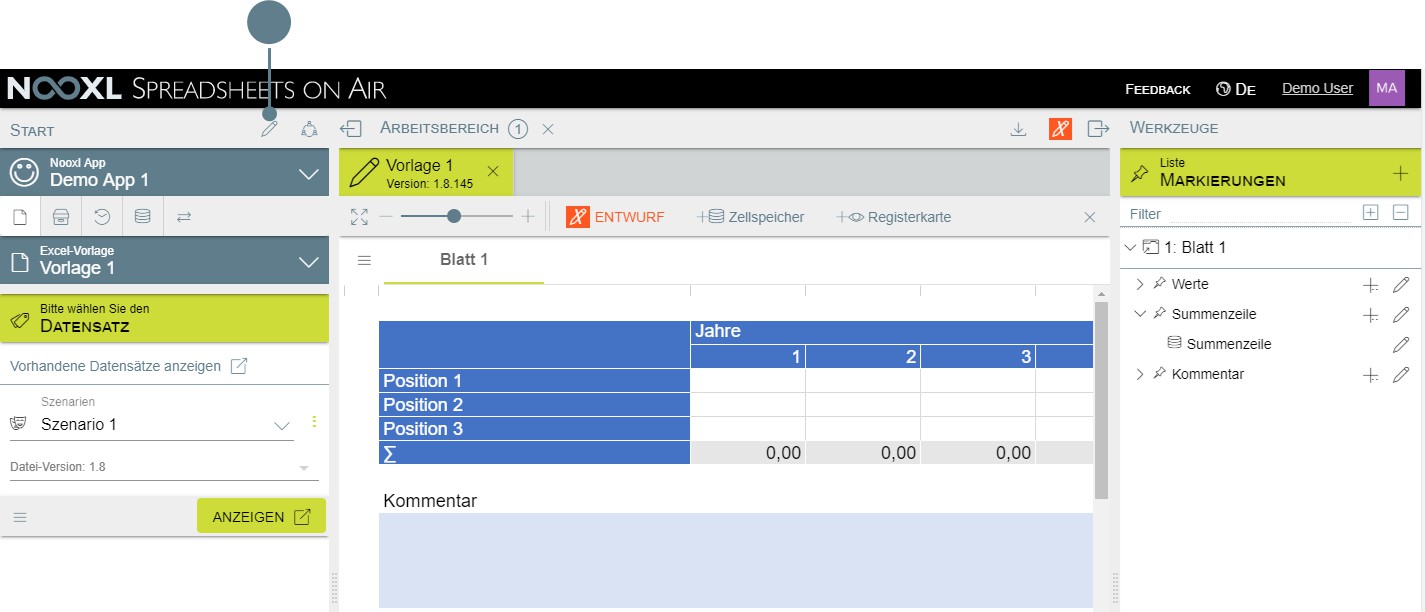
To do this, click on the button with the pencil icon to switch to draft mode.
In draft mode you have the possibility to create a new app in your account by clicking on the red plus.

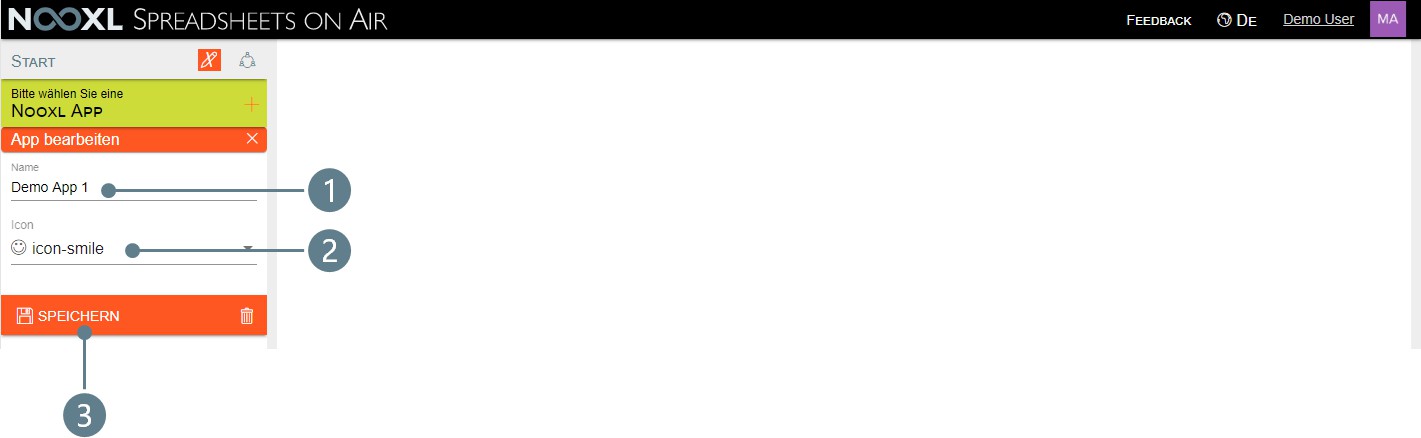
In the creation mask for new apps, you assign an app name (1), select an icon for your app
(2) and then save (3) your entries.
After you are returned to the App Overview, leave the draft mode by clicking on the red pen icon.

You can then open your app by clicking on the entry.

Embed a first spreadsheet in Nooxl
After you have created and opened your first app, it's time to fill it with content. In this chapter you will learn step by step how to integrate a first Excel spreadsheet into your app and how to prepare cell ranges for user input.
Create a new sheet/template
To create a new template in Nooxl, click on the button with the pencil icon in your app to switch to the draft mode of the app.
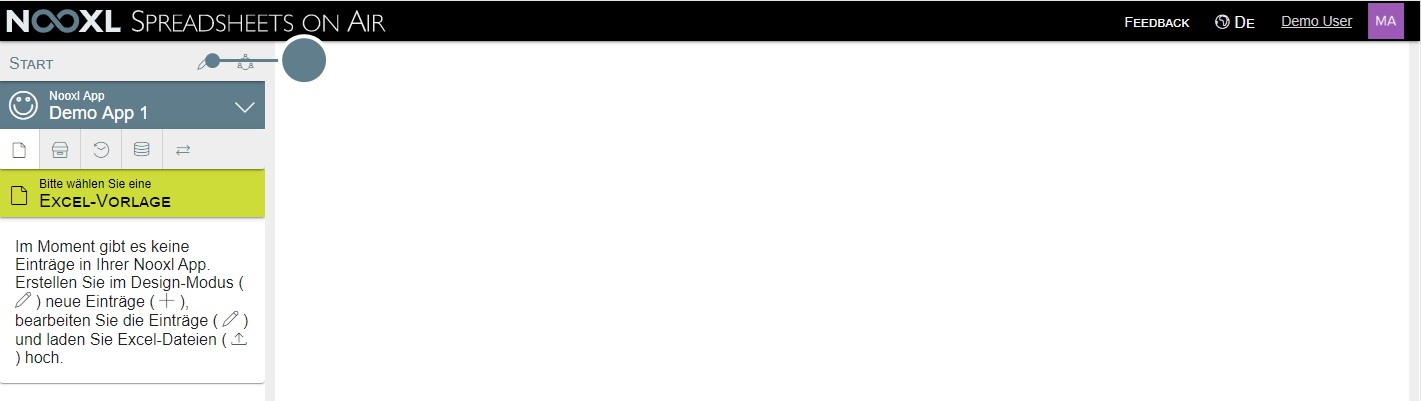
You can then create a new template in the app by clicking on the red plus.
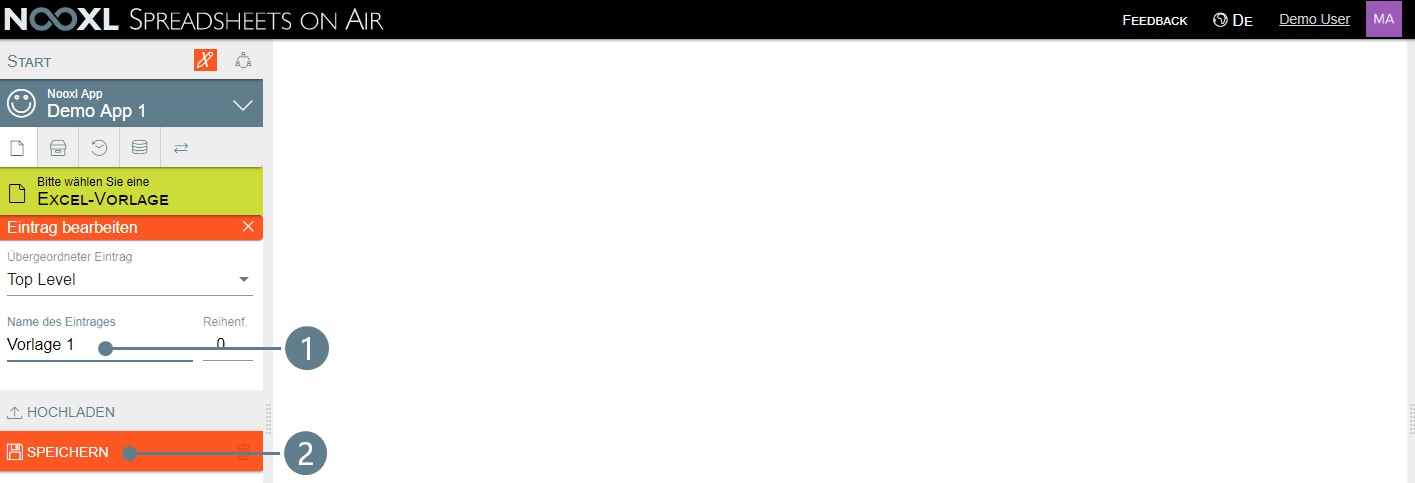
In the investment mask, please enter a name for the template (1) and then click on Save (2) to create the new entry.
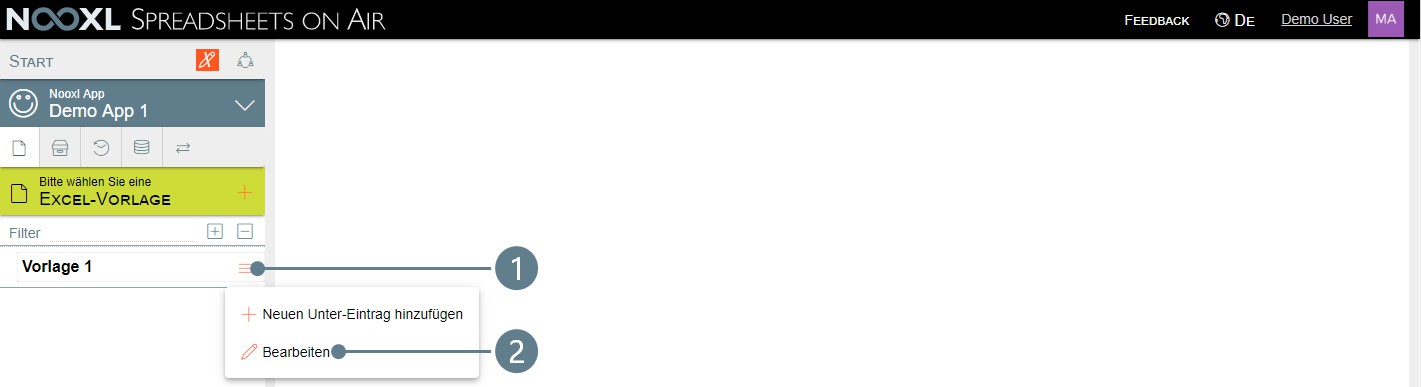
To assign a spreadsheet to the entry, click on the three red horizontal lines to the right of the entry (1) and then select Edit (2) from the menu.
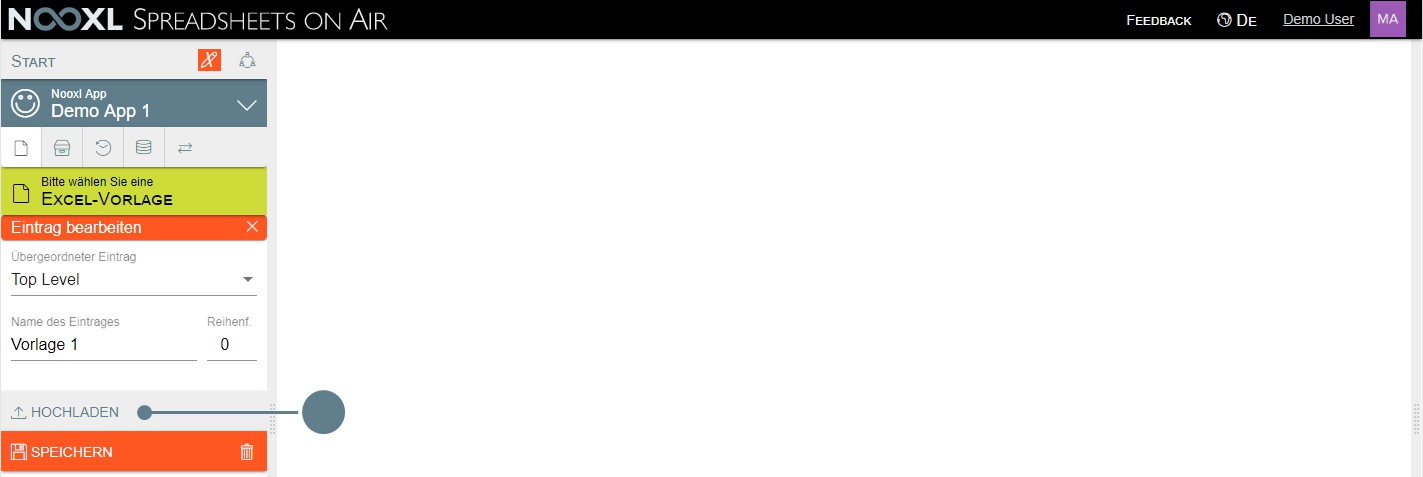
In the mask for editing the entry, click on Upload.
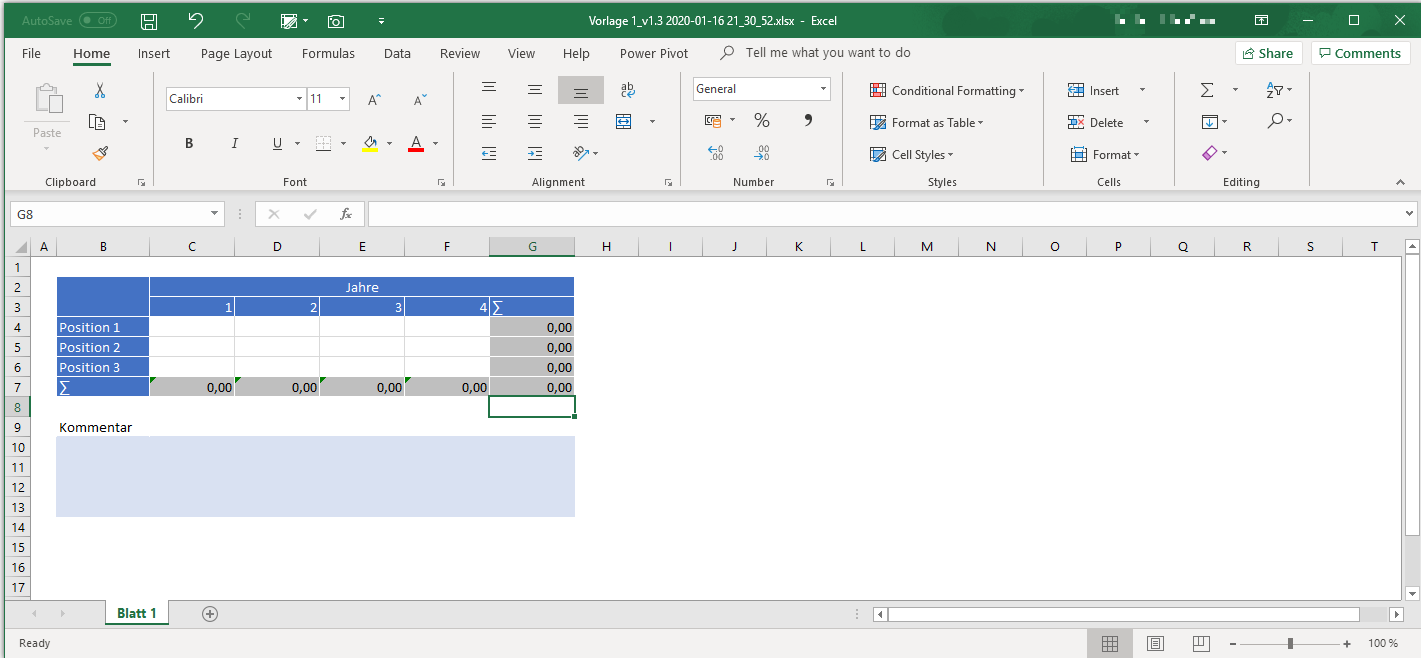
Save the following Excel template to follow the instructions or upload your own Excel template

Vorlage1.xlsx
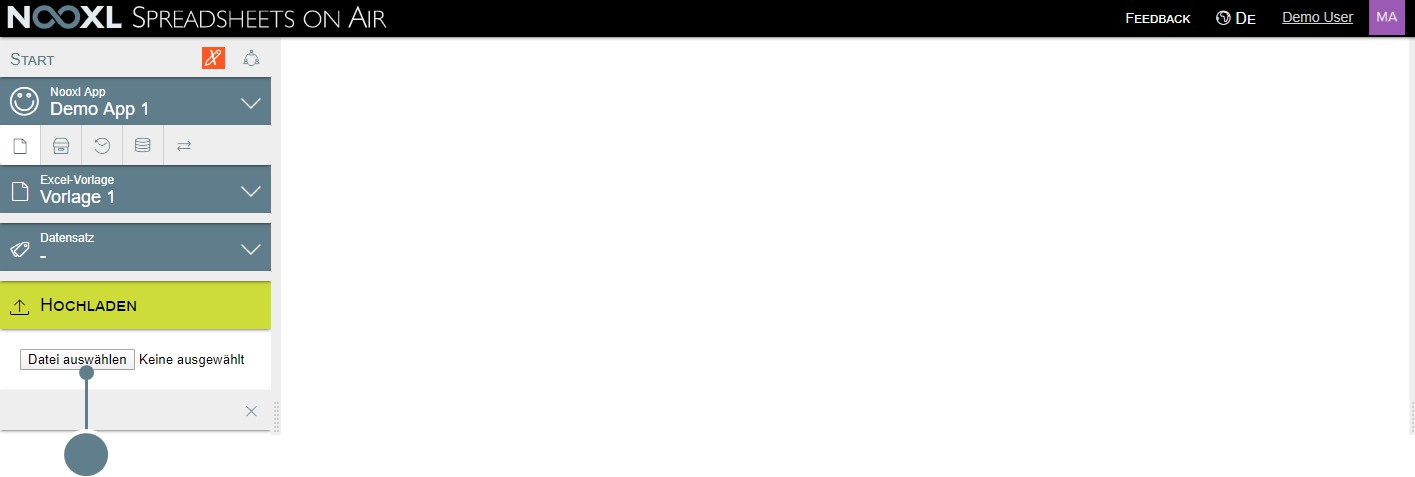
In the next dialog box, click on Upload file and then select your own template or the template provided here.
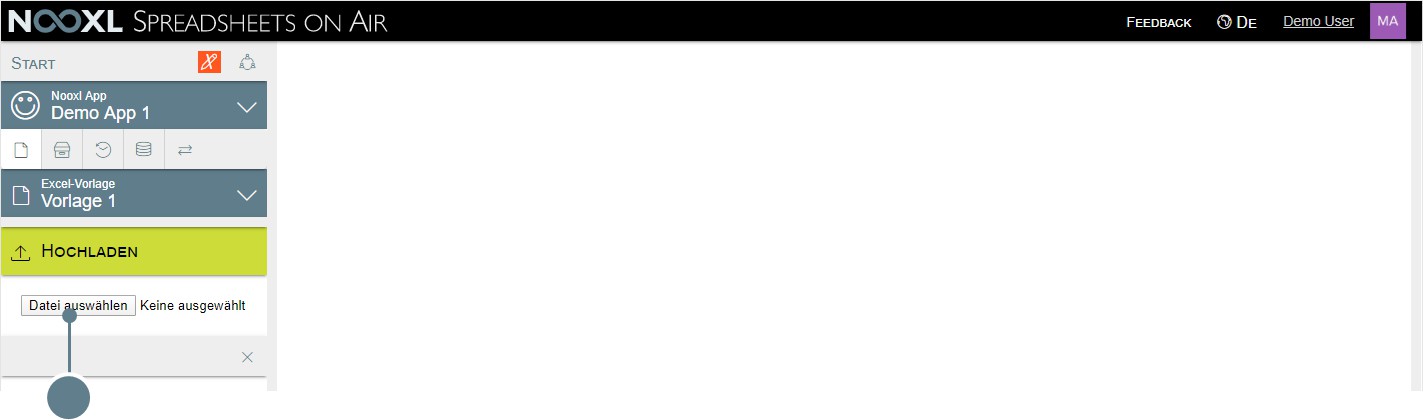
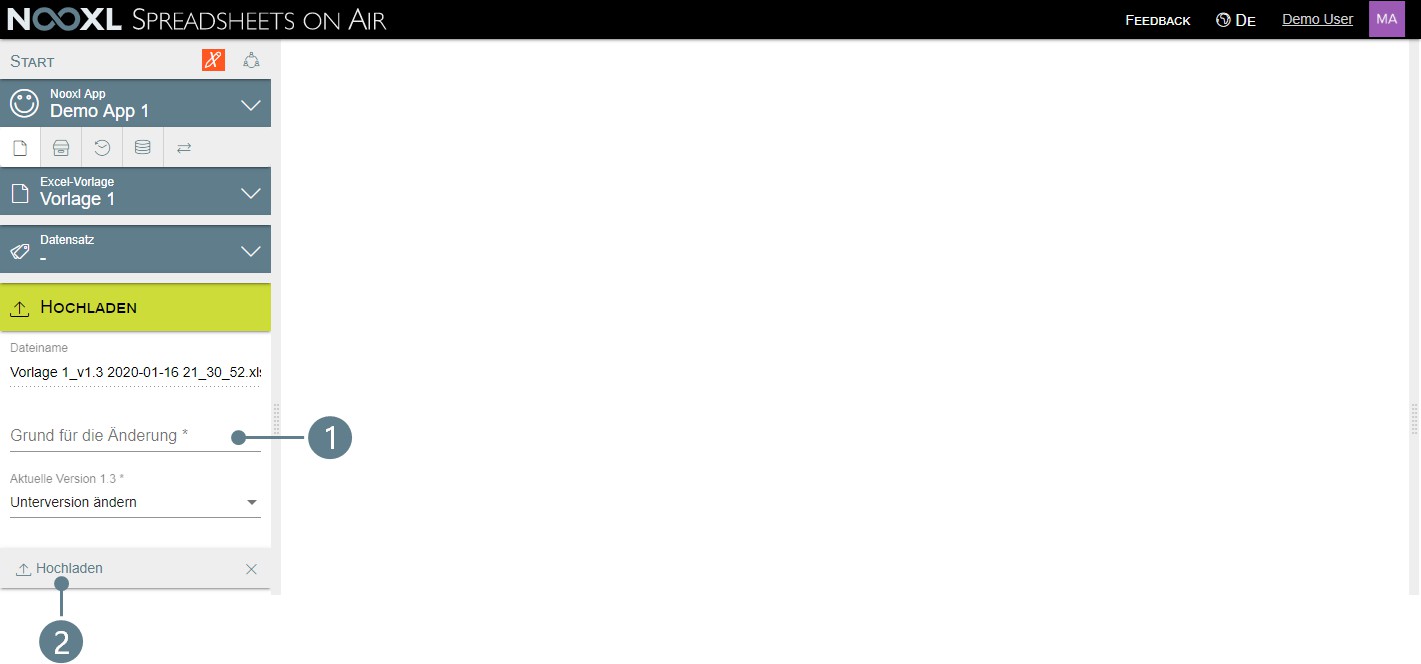
You can then enter a reason for the change (1) and upload the template (2).

Exit the draft mode by clicking on the red pen.
Open a template in design mode
In order to select cells in the template, for example, to release them for input by users or to define them as a display area, the design mode of the template must be opened.
There are basically two procedures for this, which are described below.
Activate design mode from an open template
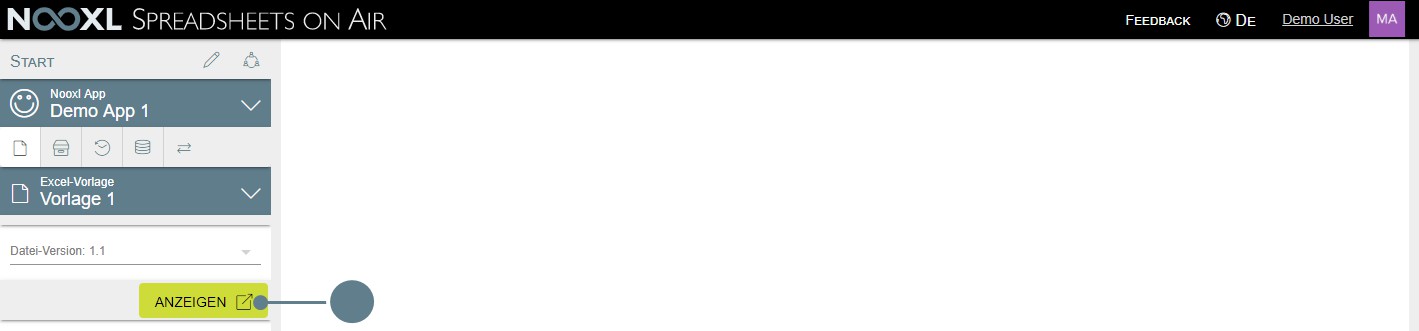
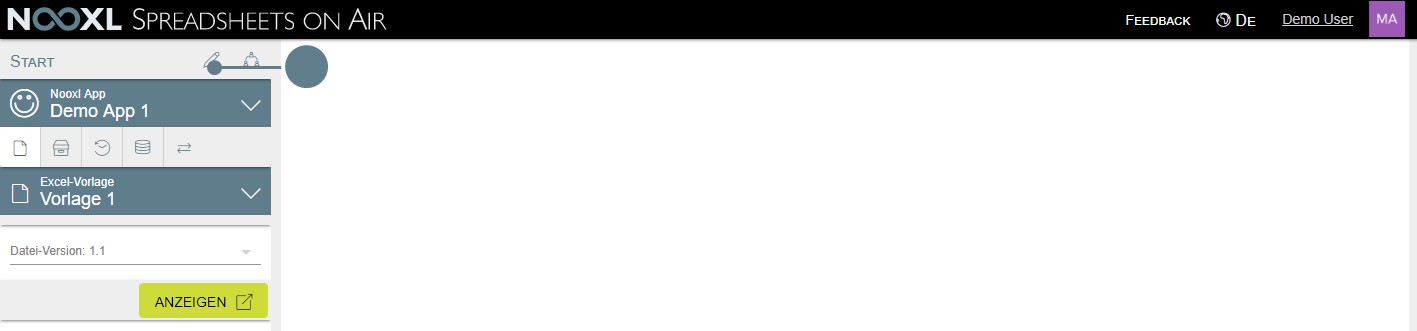
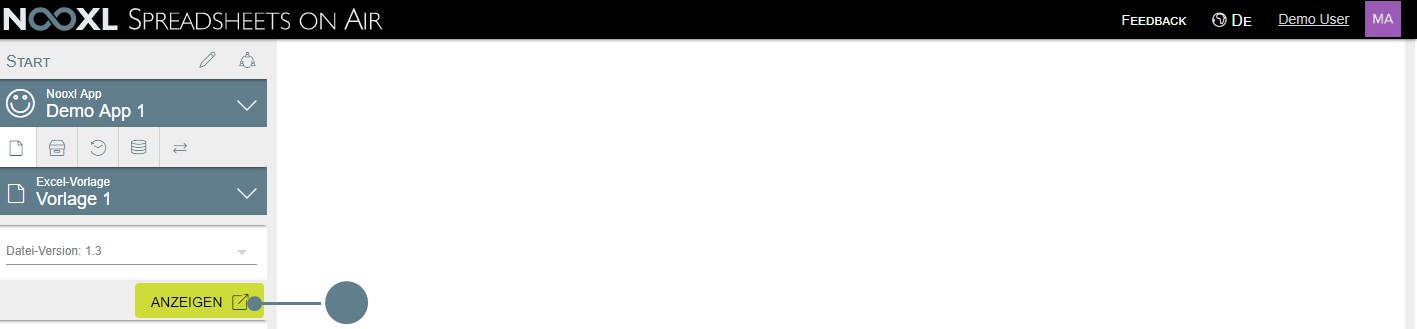
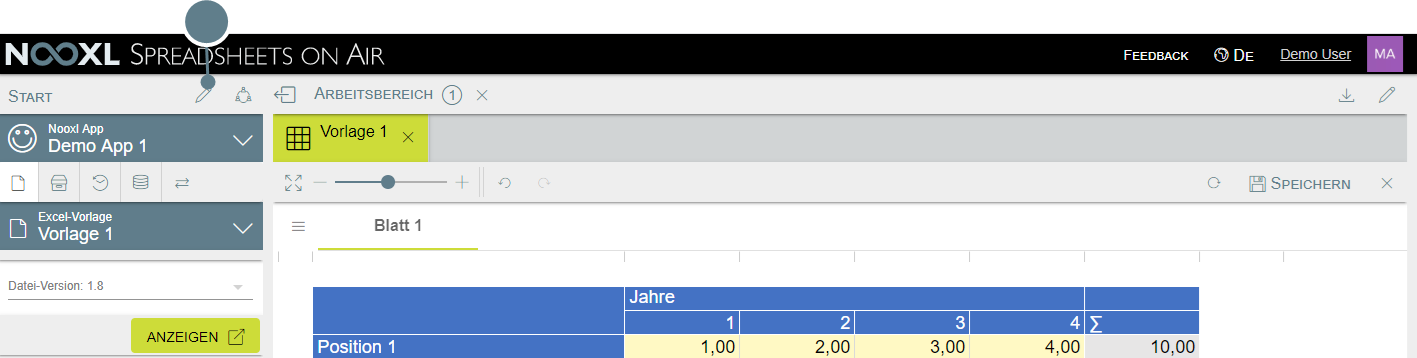
Click on the name of your uploaded template in the left navigation and select a version.
Then click View to open your template.
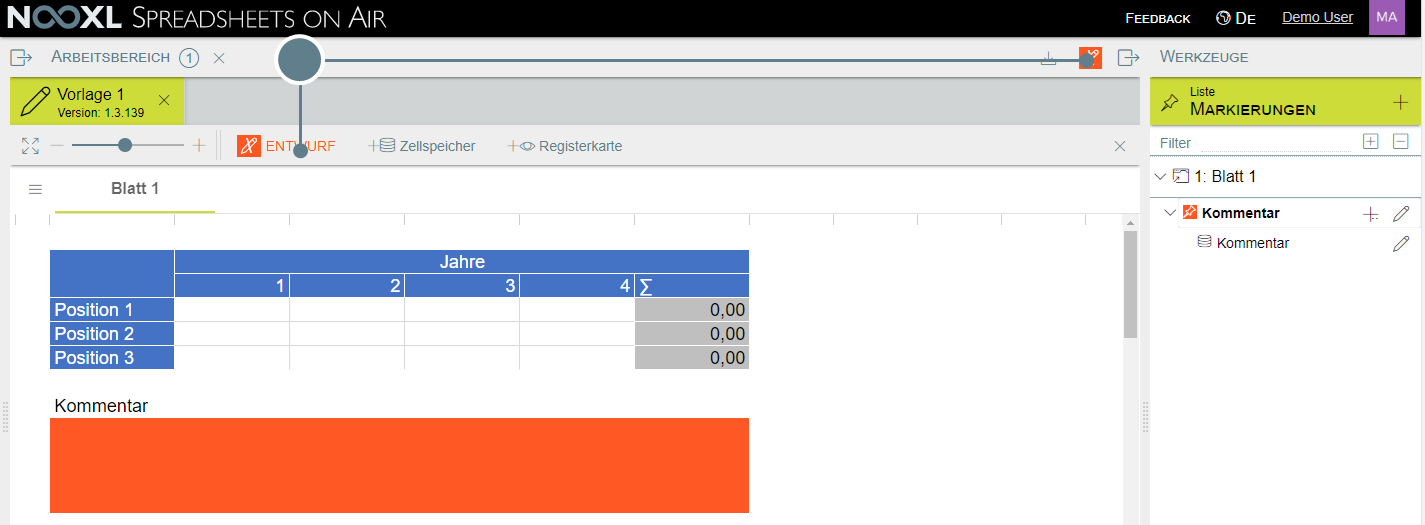
In the display area, the button with the pen is located in the upper right corner again. If this button is pressed, the template opens in design mode.
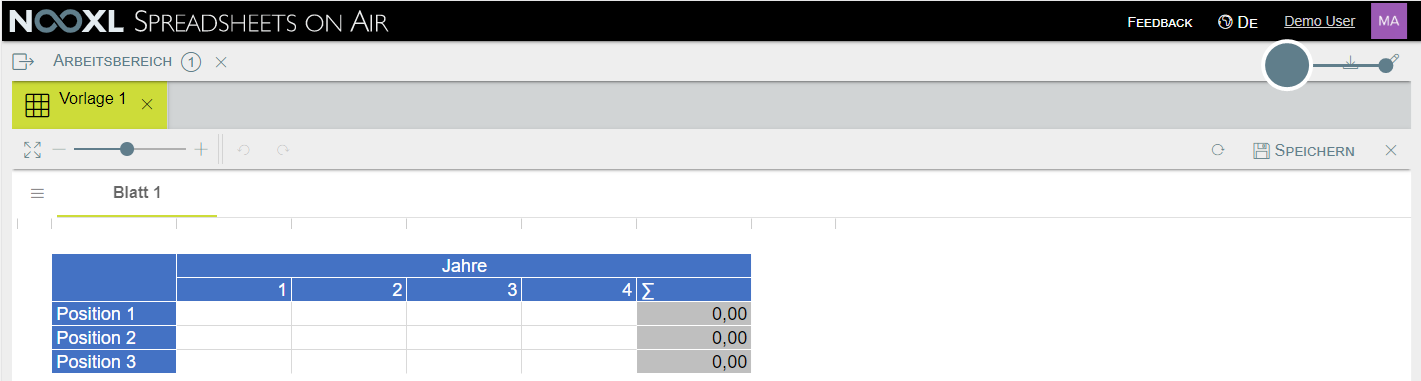
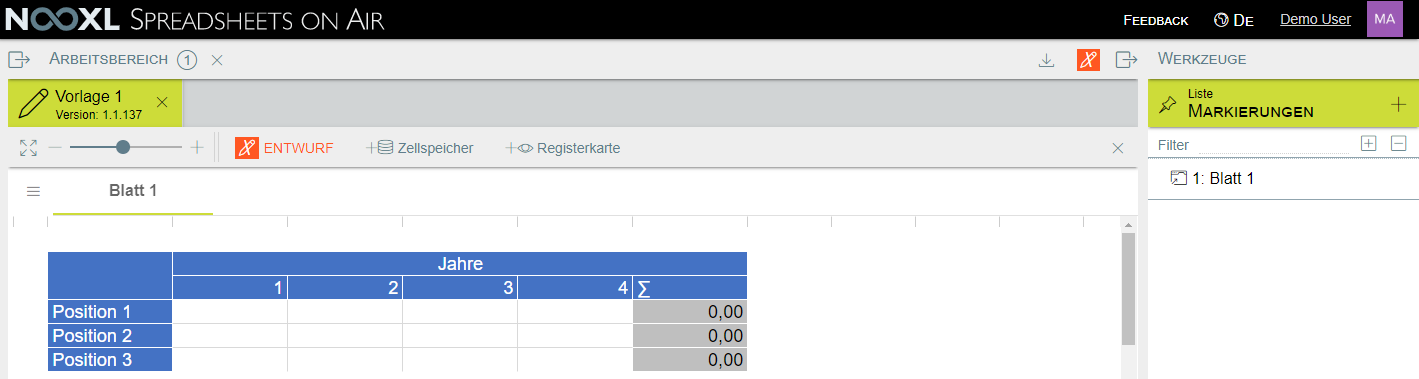
In the design mode, the tools are displayed in the right area of Nooxl.
Activate design mode without opening a template
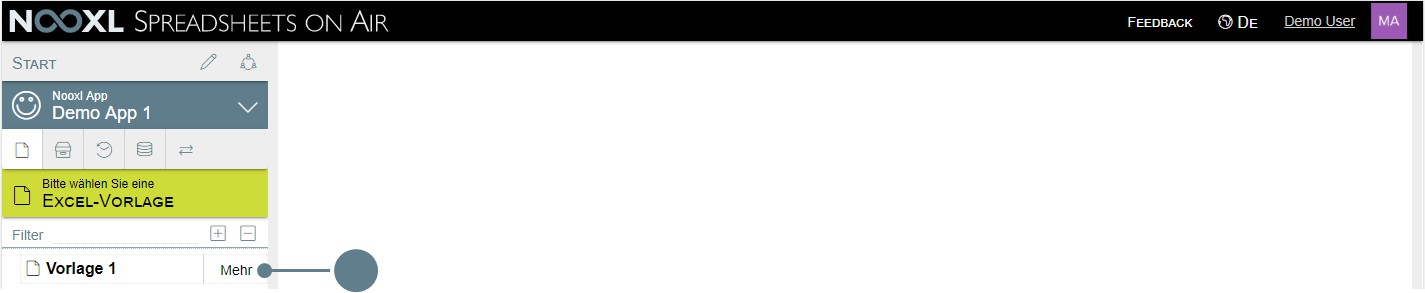
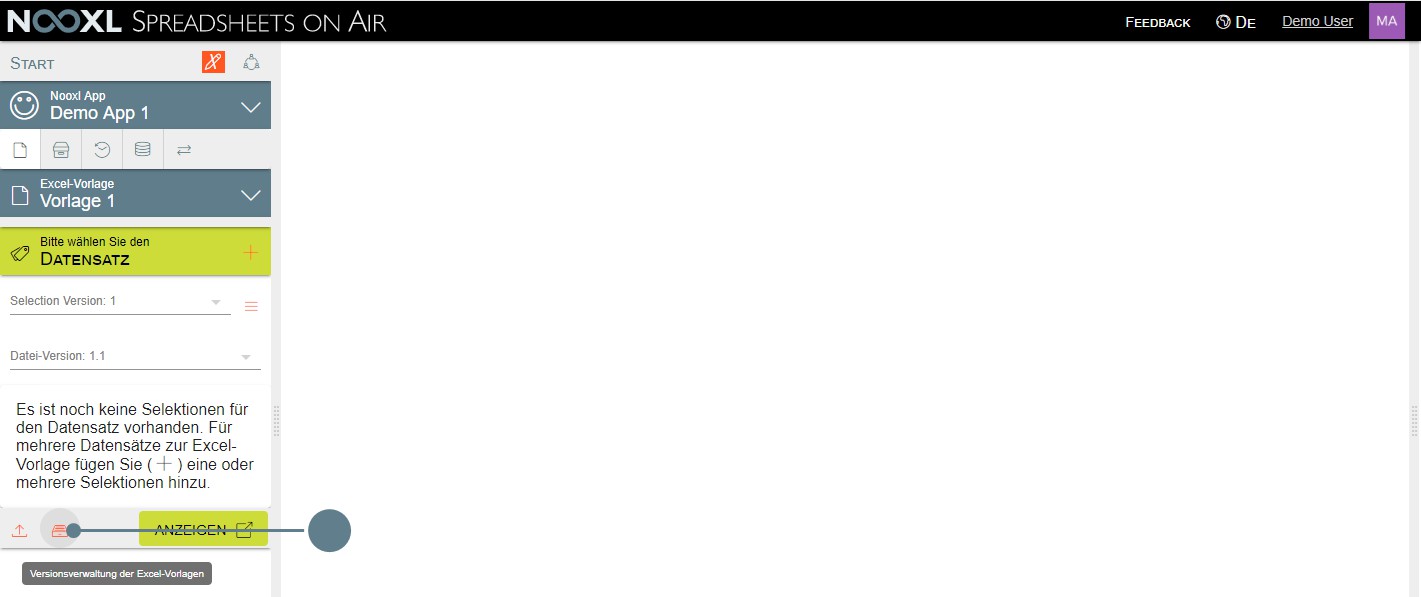
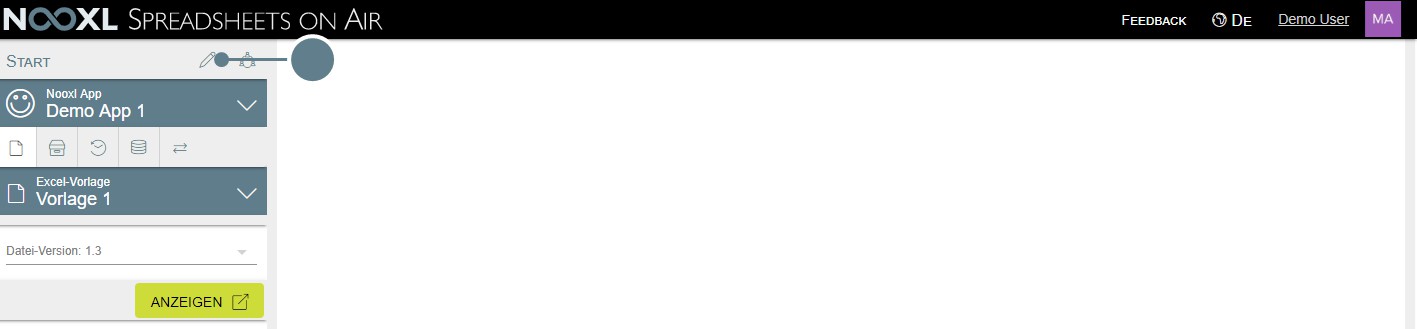
In the left navigation, click on More on the right side of your uploaded template.
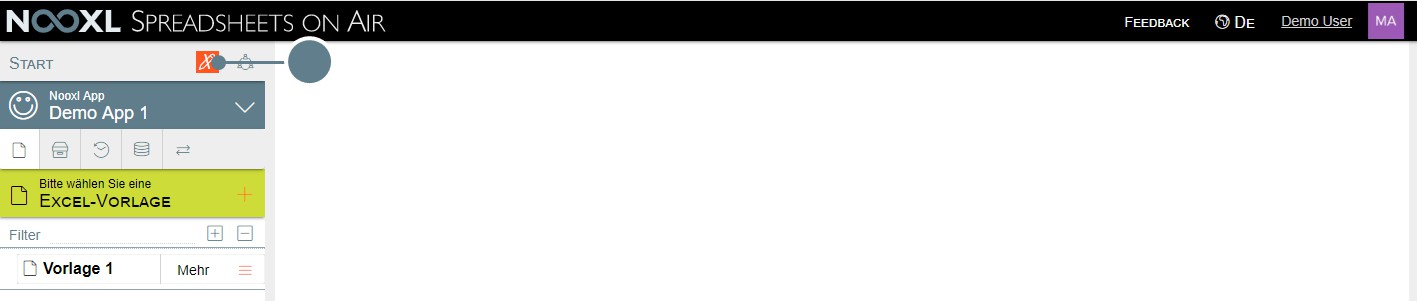
Click on the pen to switch to the app's design mode.
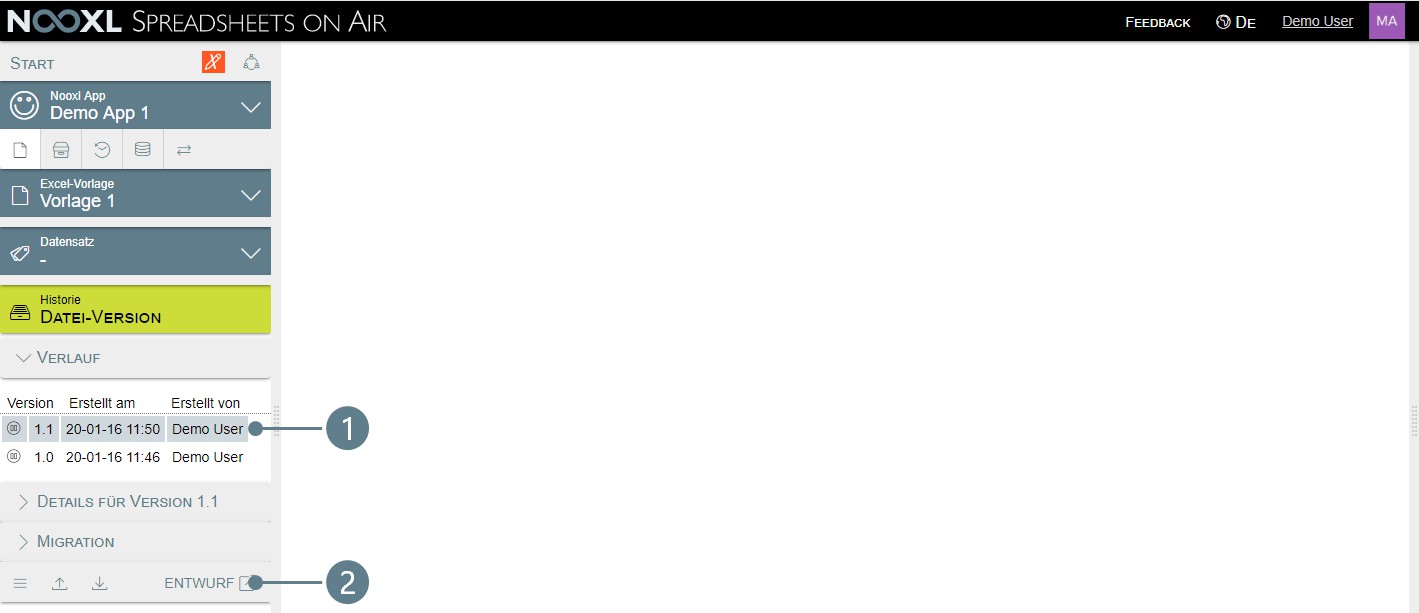
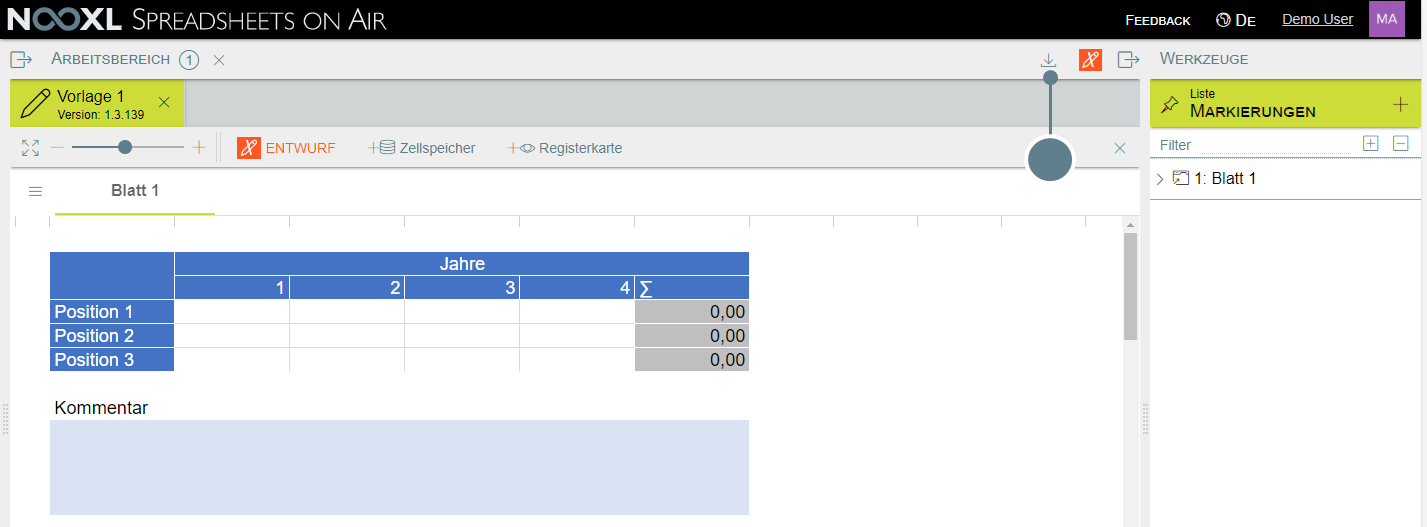
Click on the button for the version management of the Excel templates.
In the history of file versions, the history is automatically expanded and the latest version is selected (1). With a click on the button Draft (2) the design mode can now be opened for these versions.
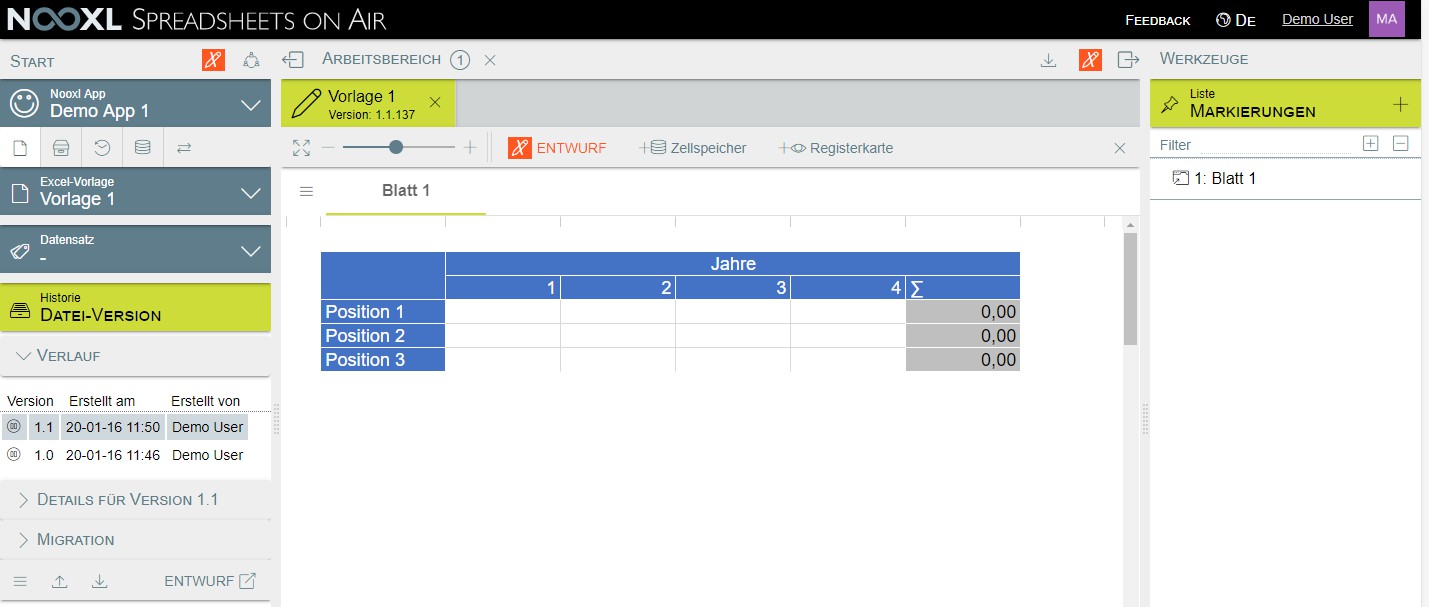
In design mode, the tools are displayed in the right area of Nooxl.
Connecting a cell to the database using a wizard
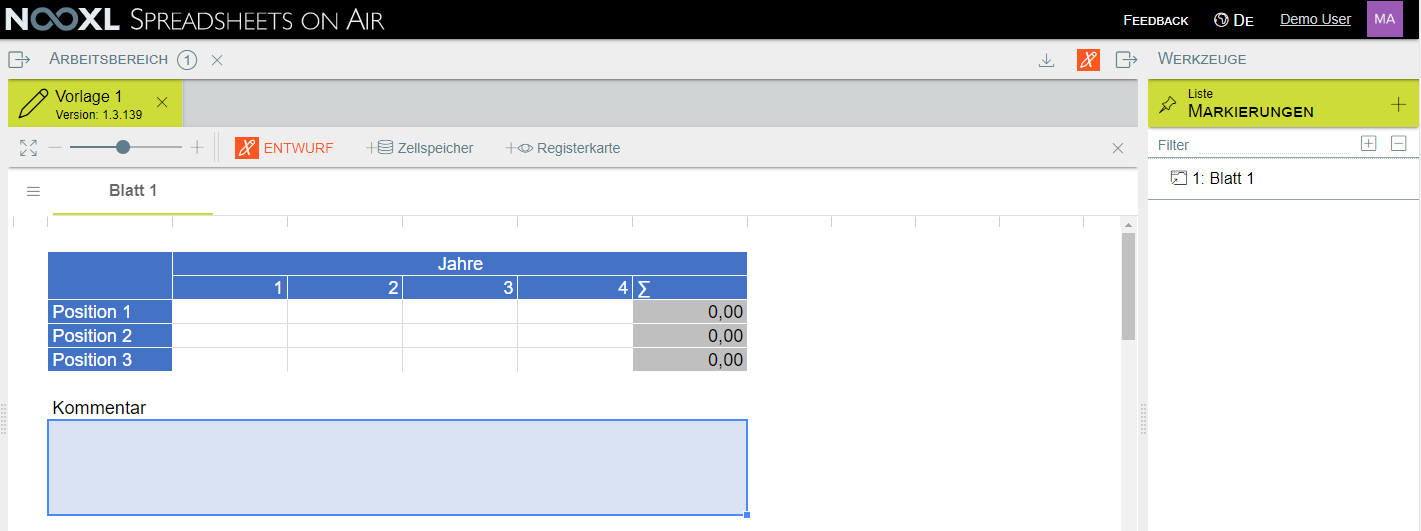
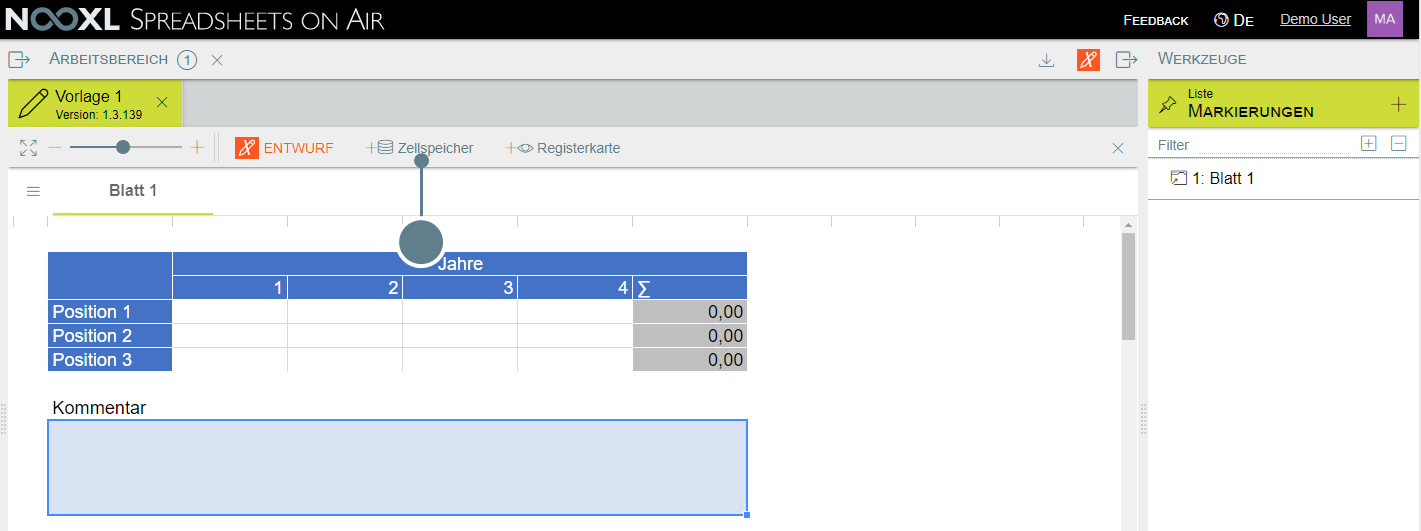
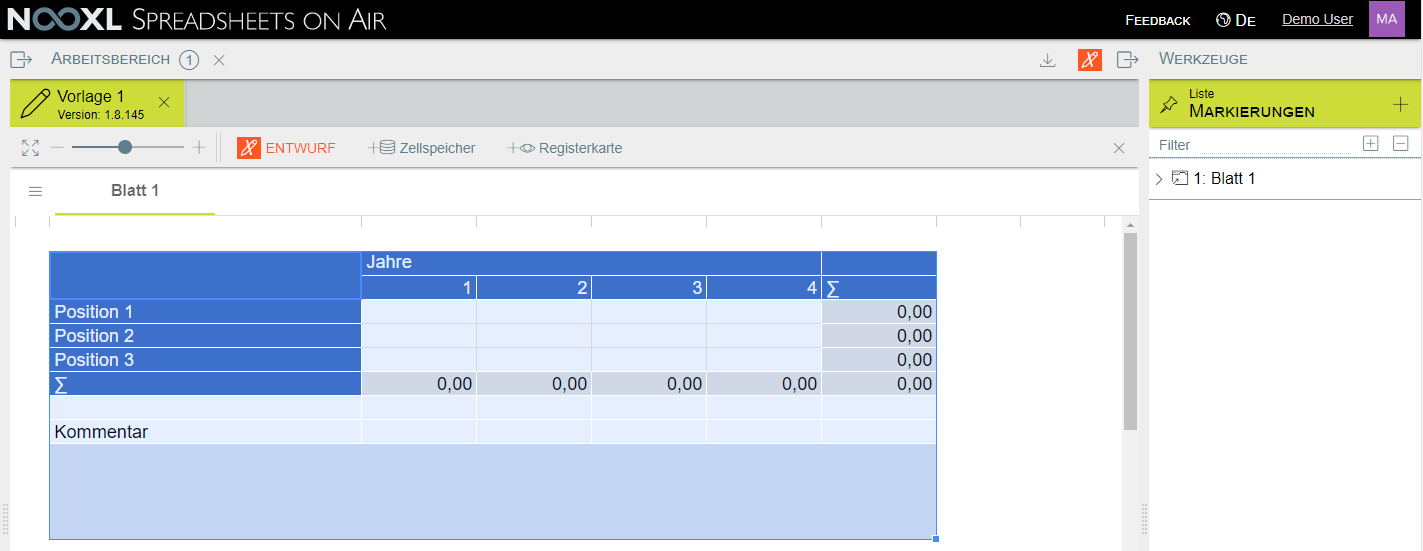
In the draft mode of the template, we will first release the comment cell it contains for user input and at the same time ensure that the content is stored in the Nooxl database.
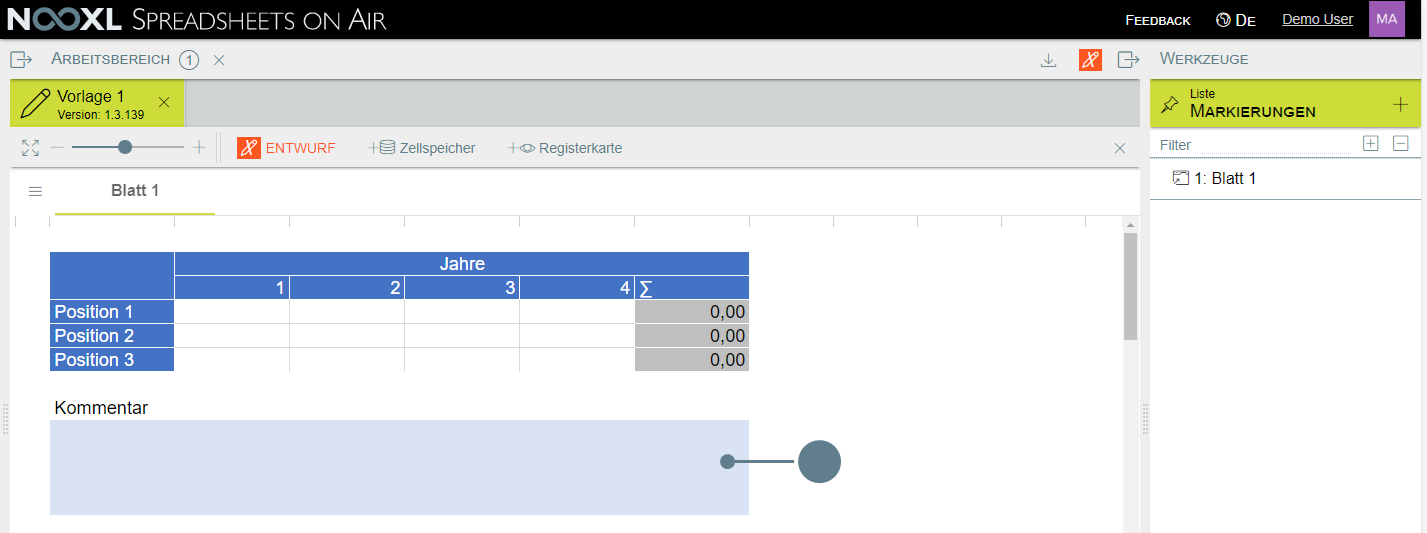
To do this, we select the cell by clicking with the mouse. The cell is then framed in dark blue.
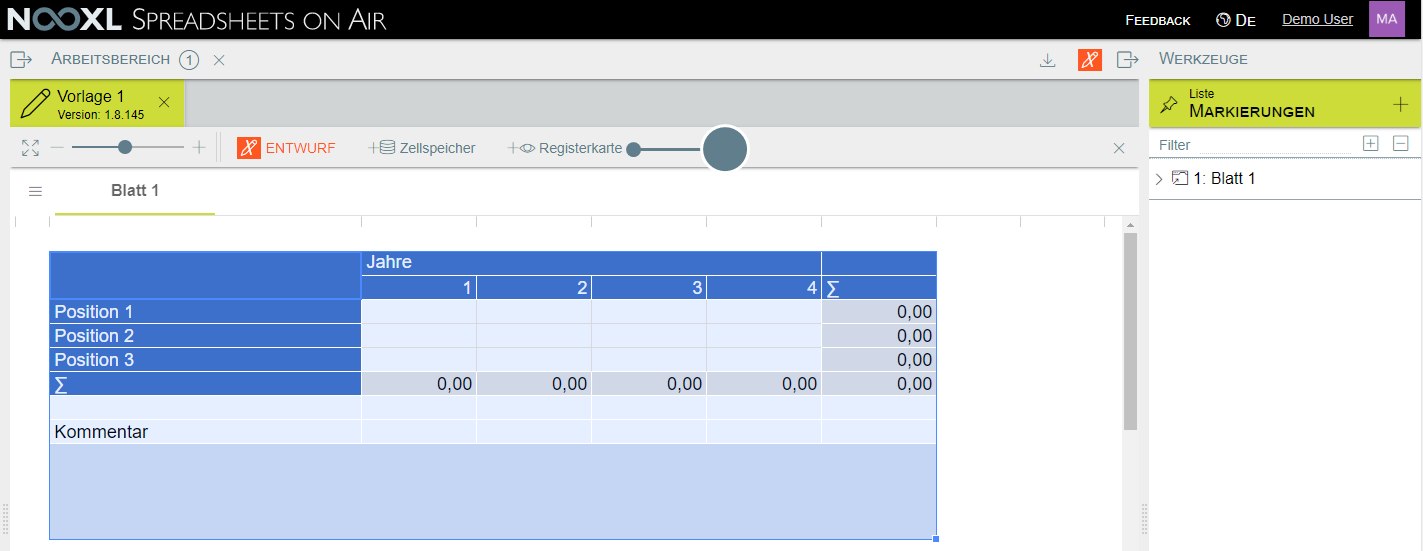
With the marker on this cell, we click on "+cell memory" in the upper menu bar.
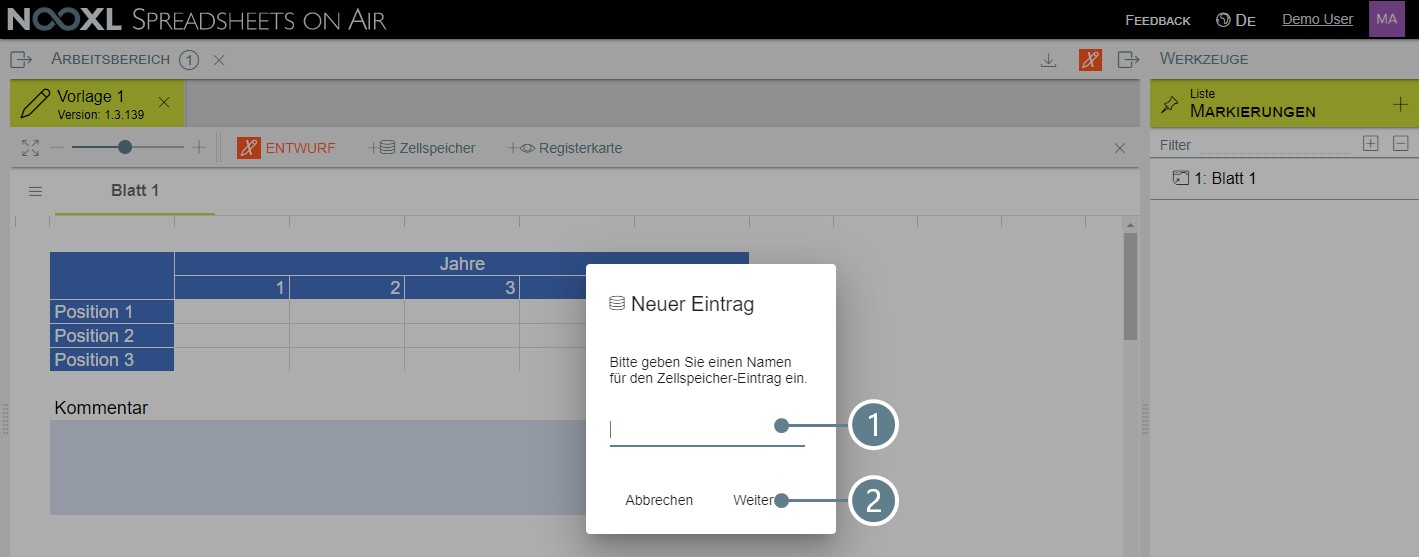
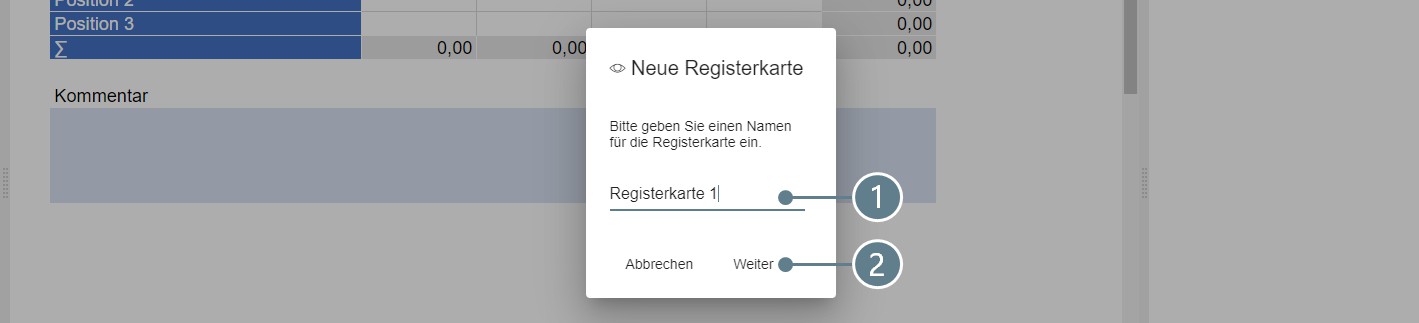
In the dialog box that opens, we enter a name for the entry (1), for example "Comment", and then click Next (2).
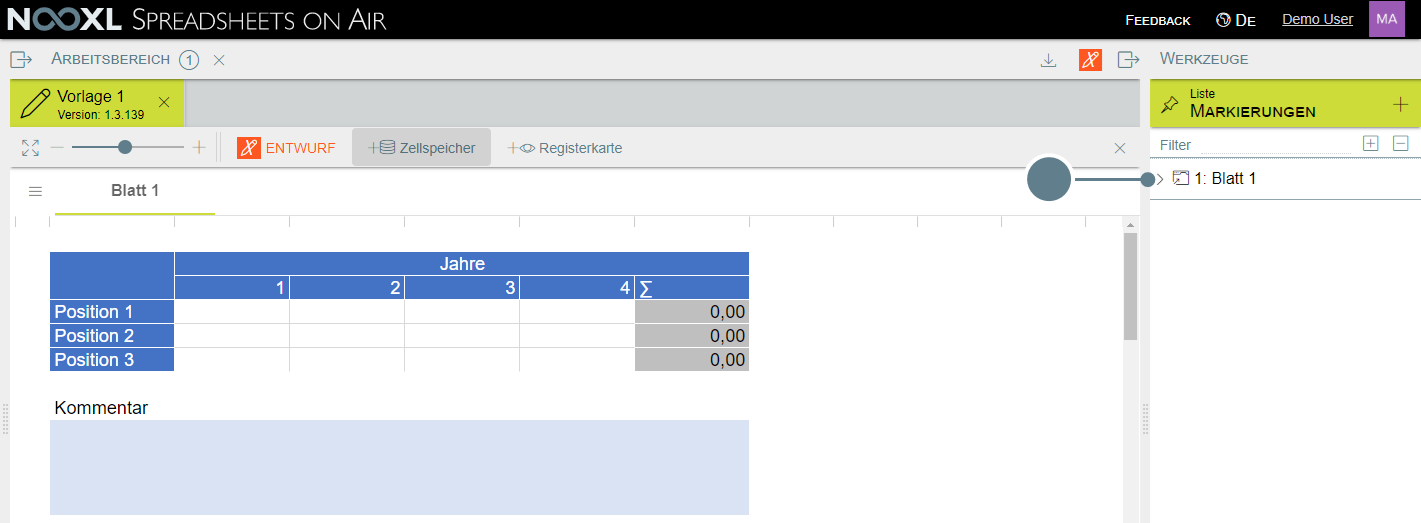
This closes the dialog box and the ">" symbol appears to the left of the "Sheet 1" entry in the tool area, indicating that a new selection is now located here.
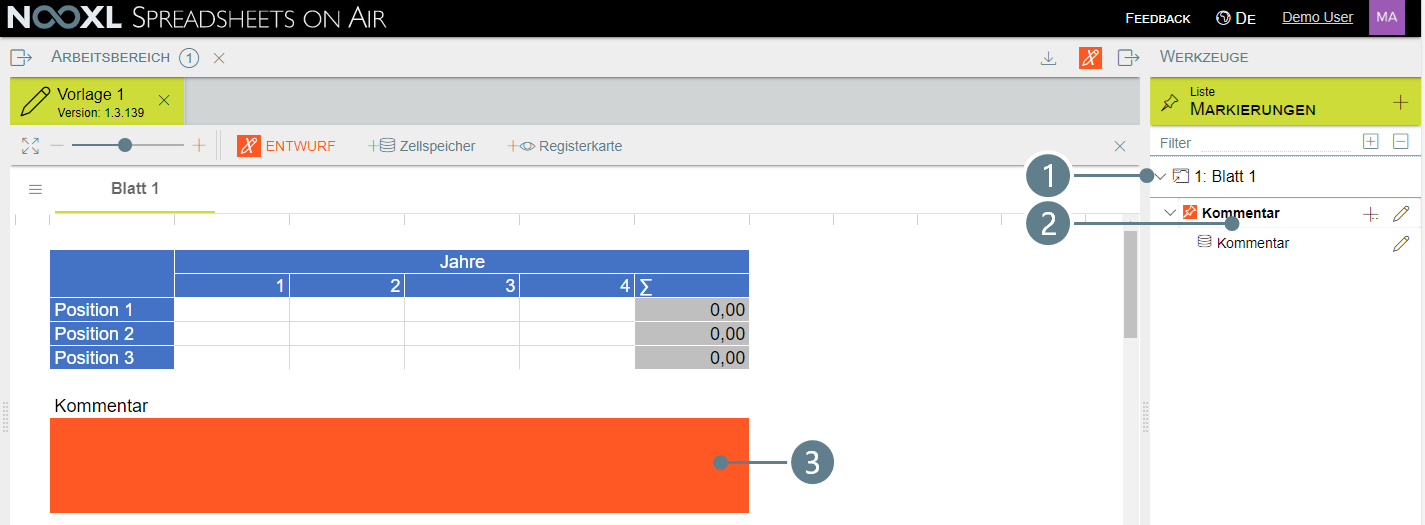
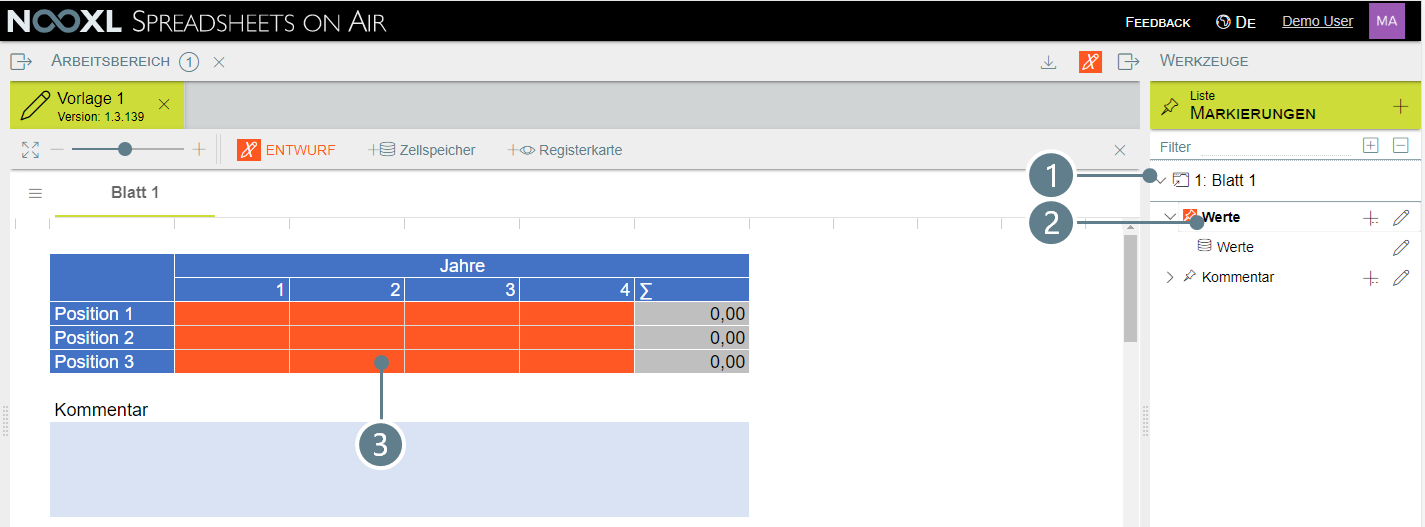
Open the hierarchy by clicking on the ">" symbol (1) and then click on the "Comment" marker (2). This will highlight the cell belonging to the marker in the workspace in red (3).
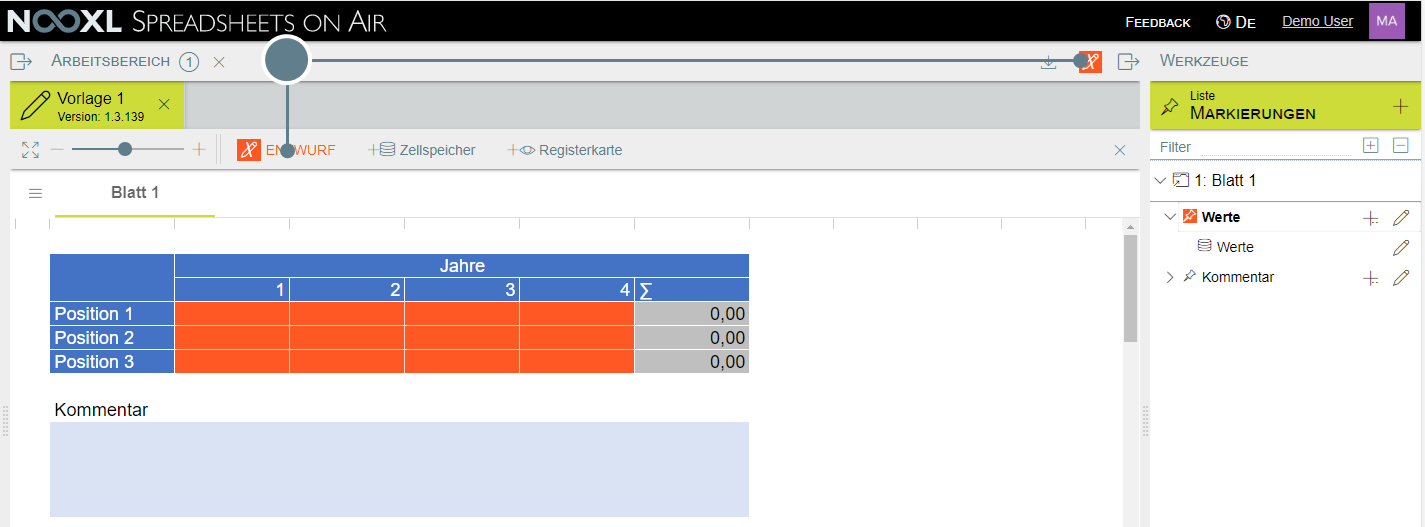
Now click on one of the two red pins to exit the design mode and test the connected cell.
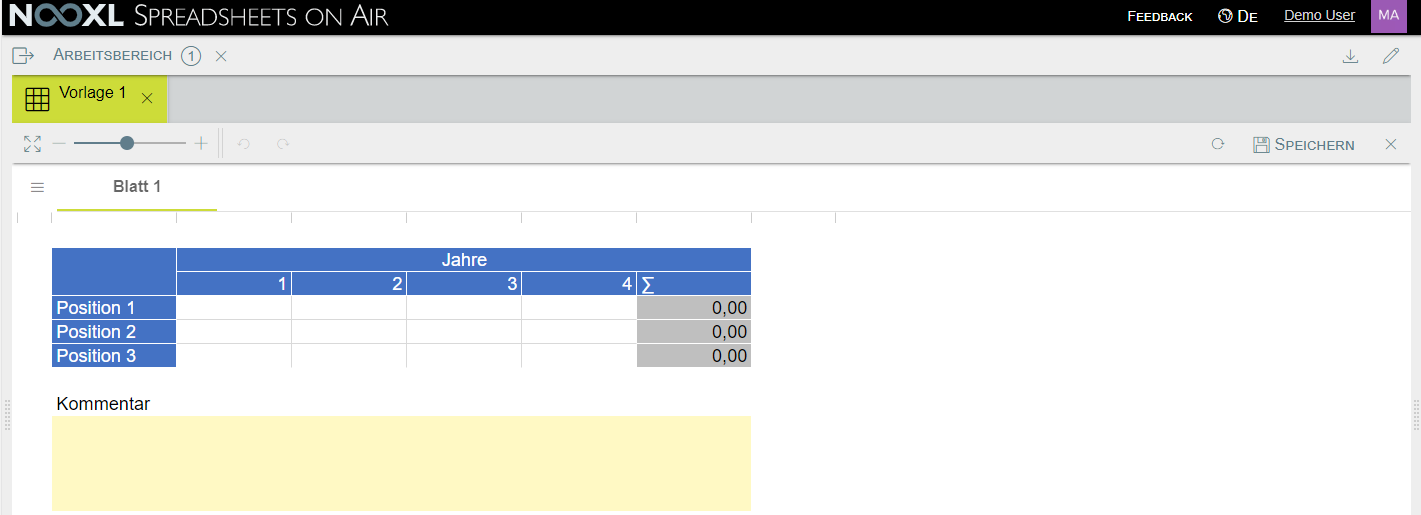
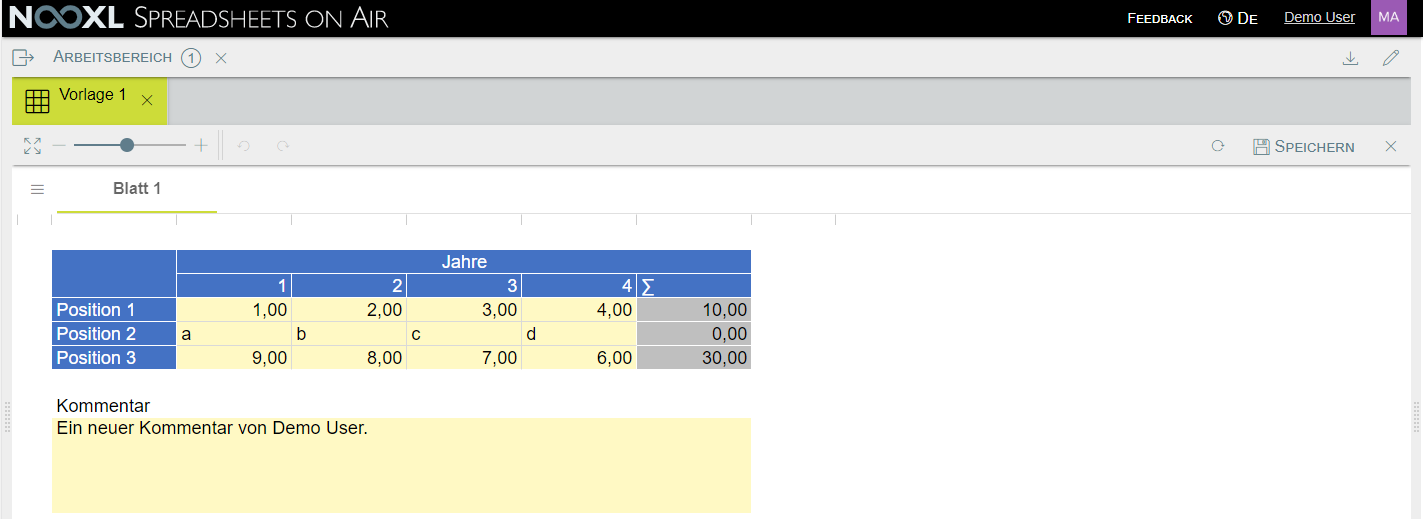
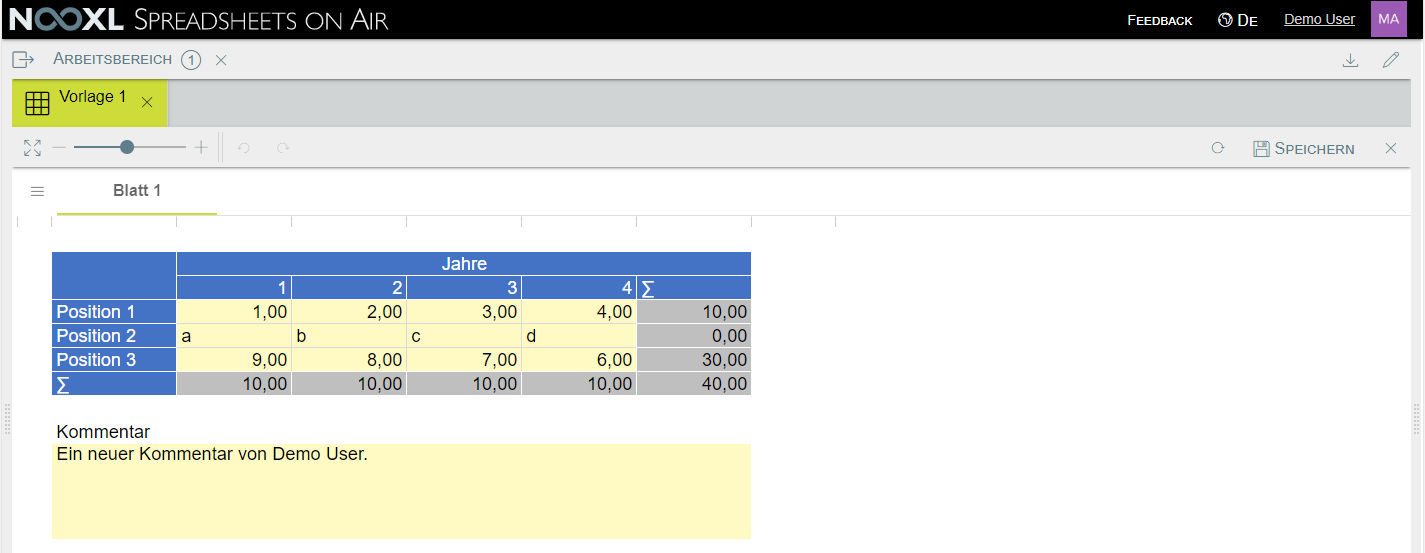
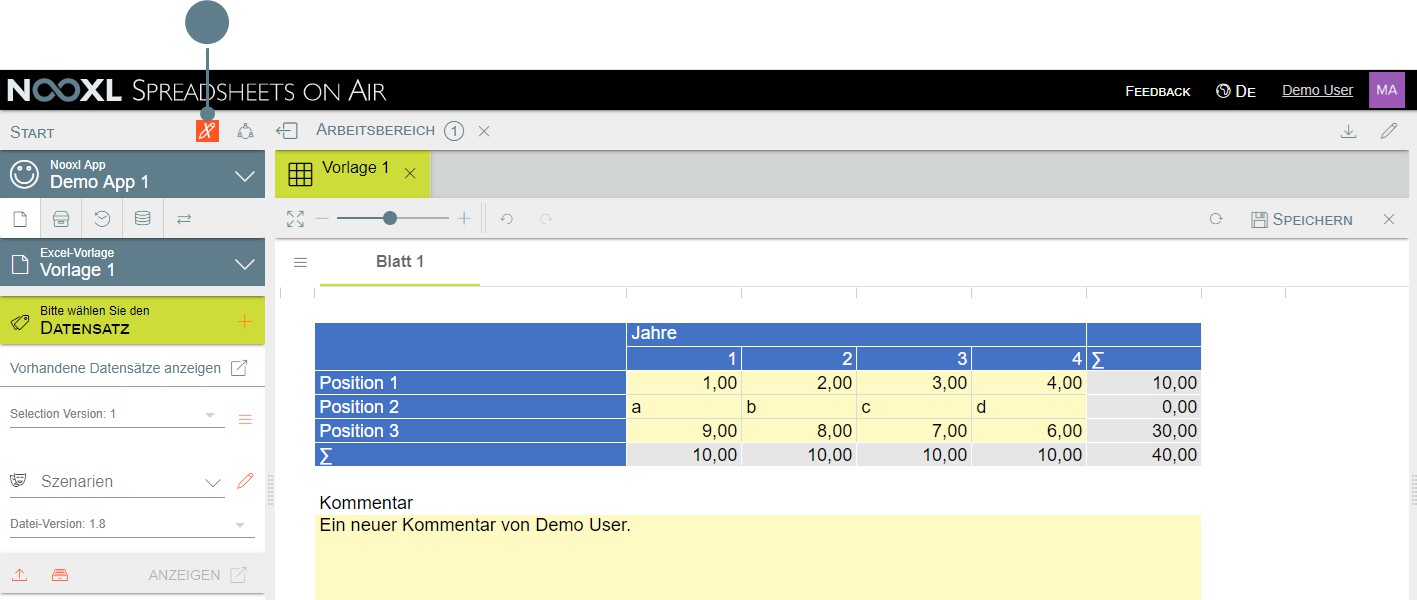
After leaving the design mode, load the template into Nooxl. The first thing you notice here is that the background color of the selected cell has changed. For more information, see chapter Allow user input via input colors .
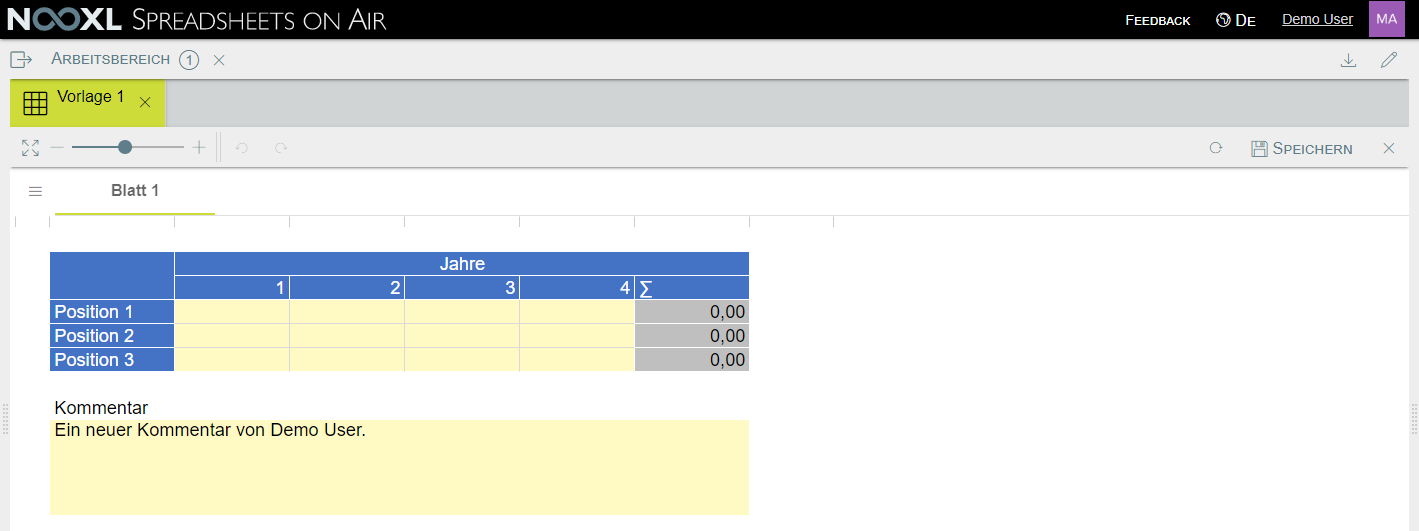
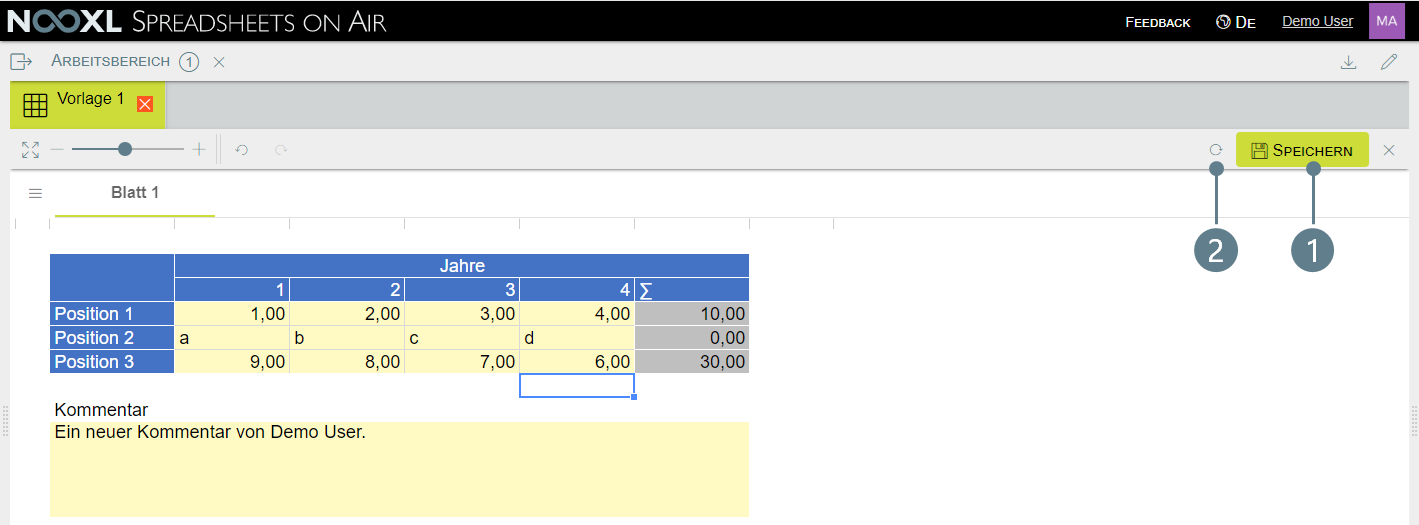
Enter a comment in the previously connected cell (1) and press save (2).
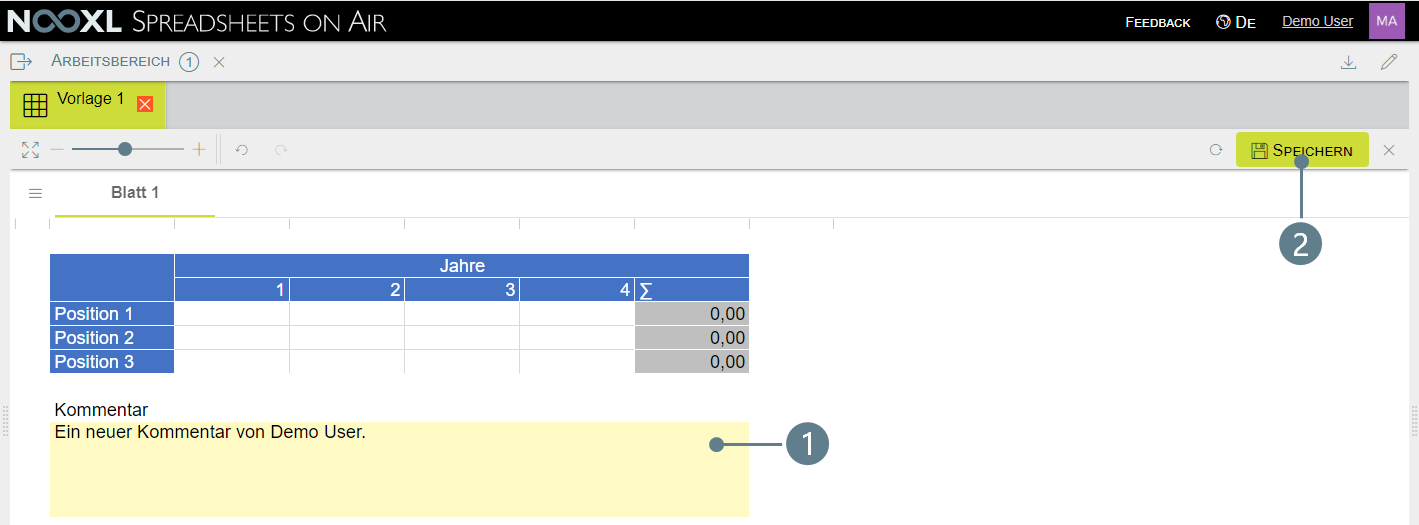
Then click on the button to reload the calculation.

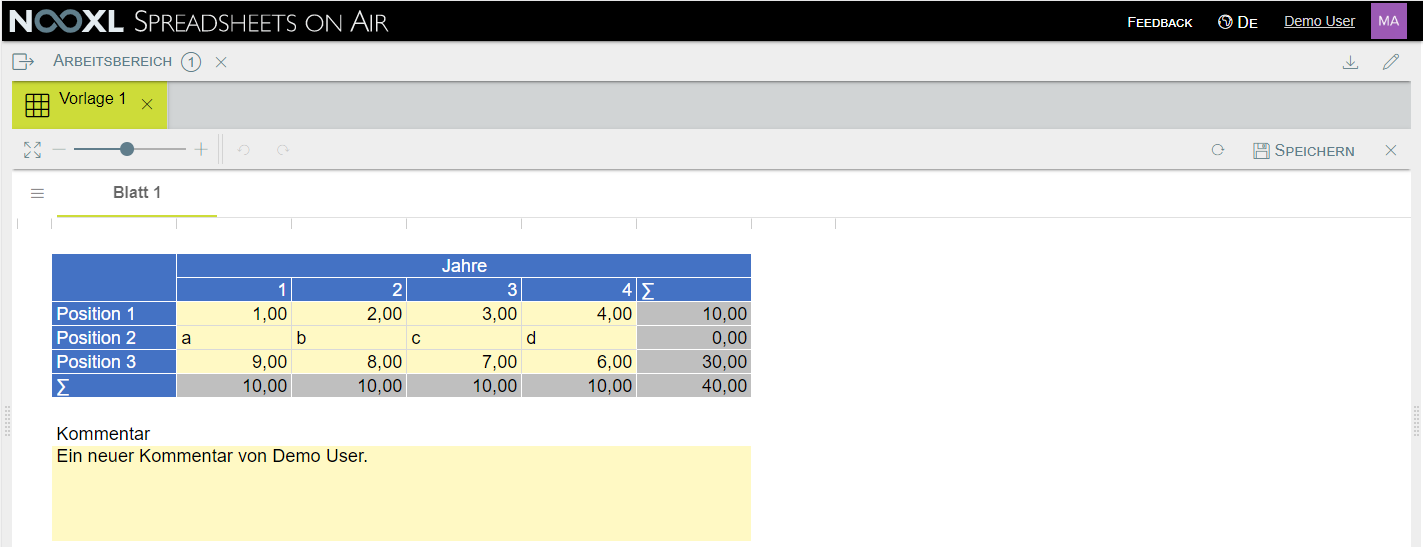
The previously entered comment is displayed again.
Connecting an area to the database using a wizard
After we have successfully connected a single cell, we will now release an area with several cells for user input.
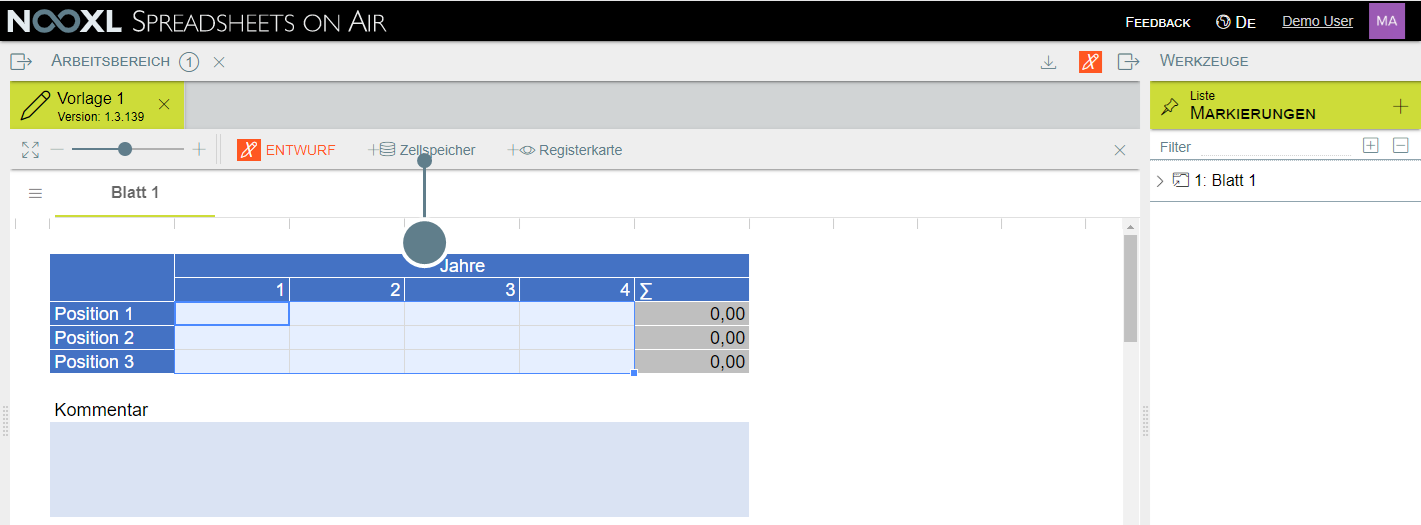
To do this, we go back to the draft mode of the template and use the mouse to select all cells belonging to years 1 to 4 and positions 1 to 3 so that they are displayed with a dark blue frame.

With the marker on these cells, we click on "+cell memory" in the wizard area.
In the wizard's dialog box, we specify a name for the marker (1), for example "Values", and then click Next (2).
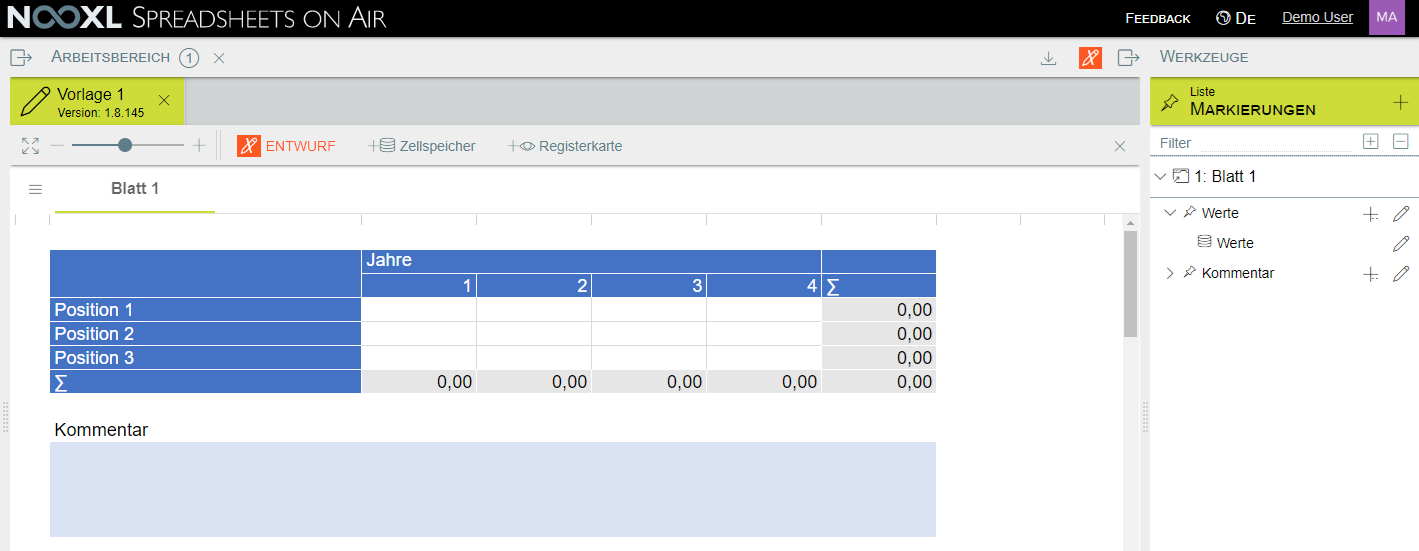
Open the hierarchy by clicking on the ">" symbol to the left of the "Sheet 1" entry (1) and then click on the "Values" marker (2). This highlights the cells in the work area that belong to the selection in red (3).
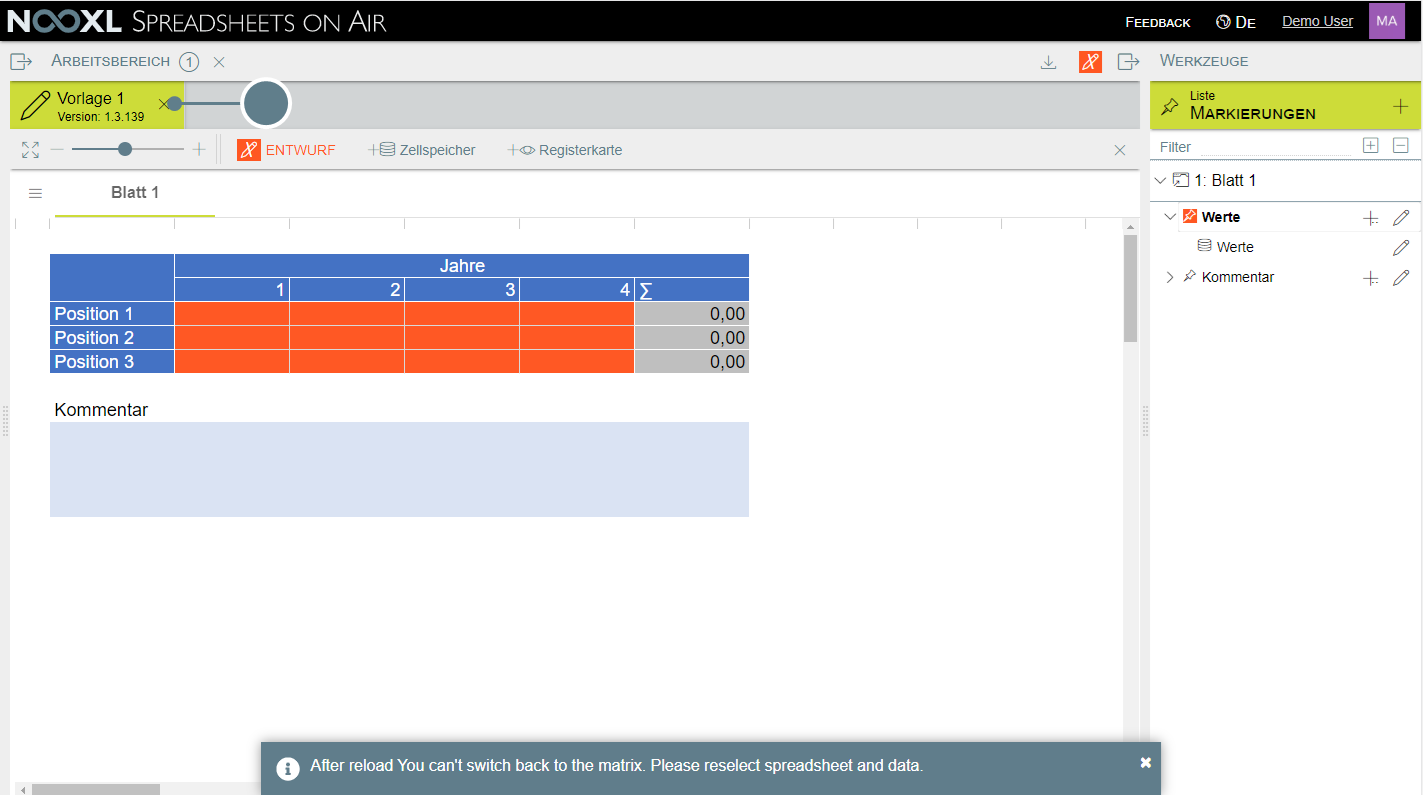
Now click on one of the two red pins to exit the design mode and test the connected cell.
If you get the following message from Nooxl
After reload You can’t switch back to the matrix. Please reselect spreadsheet and data.
close the template via the "x" and open the record via the left menu area .
After you have reloaded the template in Nooxl, you can see that the now selected cells have also received a different color from the system.
To test the range, enter any value in each cell, save the template (1) and then reload it (2).
After reloading the saved data set, the entries can still be found in the correct cells.
Allow user input via input colors
Nooxl allows user input only in cells that have been approved for this purpose by the designer or administrator and which therefore have specific background colors. If a user enters something in other cells, the input of the user is ignored.
The allowed color codes can be edited per Nooxl account. Cells marked as cell storage will automatically get the correct background color defined for input fields, regardless of the background color defined in the Excel template.
Tip
If a template was exported from Nooxl, this cell style contains templates, three of which use the correct background color(s) for input cells:
Enter.Light
Enter.Normal
Enter.Strong
Upload an updated template
If you want to make changes to the Excel logic of a template integrated in Nooxl, proceed as follows.
First download the current version of the template from Nooxl by opening the template in draft mode and clicking the button "Download as Excel file
You can then open the template in Excel and edit it as usual.
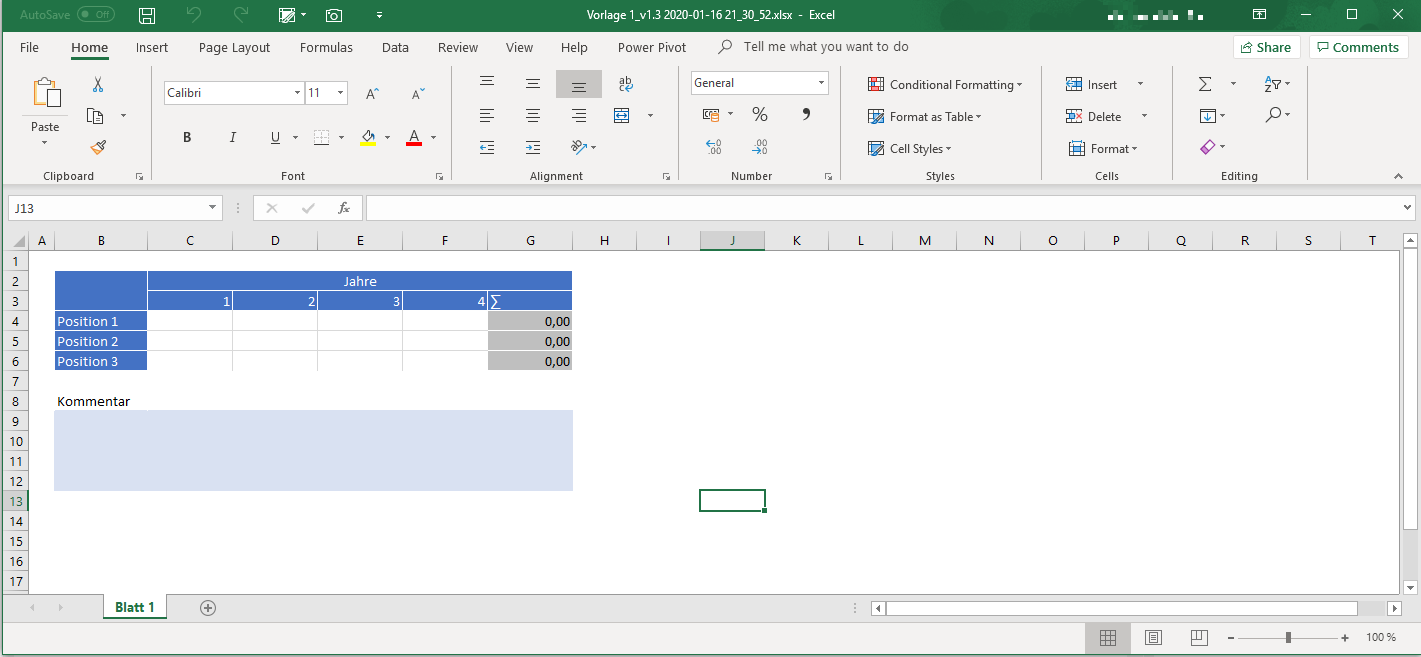
For our example template, we would like to add a totals line in line 7, covering the three items for the individual years. In addition, we want to move the comment cell and the corresponding label one line down so that there is still an empty line between the table and the comment.
Save the customized template and close Excel. Back in Nooxl we leave the design mode of the template by clicking on the "X".

Next, make sure that you are in the record selection of the template (Show button is visible).
In the dataset selection of the template we now activate the draft mode of the app by clicking on the pencil.
In draft mode we can click on the button "Upload Excel file as template".
Then we come back to the dialog, which we know from the initial upload of the template, click on "Select file" and select our updated template from our computer.
Afterwards, we can again enter a reason for the change (1), where we indicate that a "Totals row for the items was added" and then finally confirm the upload of the file (2).
After we have stored the updated template in Nooxl, we can display the dataset again to check that the previously entered data still appear in the intended places and that our adaptation to Excel logic is also displayed.
Defining data records
The entries in the templates are stored in so-called data records. Depending on the template, there can be different numbers of data records with individual contents.
Let us imagine that the template from the previous examples contains a plan that plans the three positions over the next four years. The comment field is used to provide a brief explanation of the assumptions behind the forecast.
We would like to carry out our planning for three different scenarios:
- Scenario 1
- Scenario 2
- Scenario 3
Since each scenario is based on different assumptions, we need a separate data set for each scenario.
Creating Catalogs
To realize our scenario selection, first of all a Nooxl catalog must be created. To do this, open the left navigation and click on the tab "Catalogues and Elements".

Switch to the draft mode of the app by clicking on the button with the pencil.

You can then use the red plus to create a new catalog.

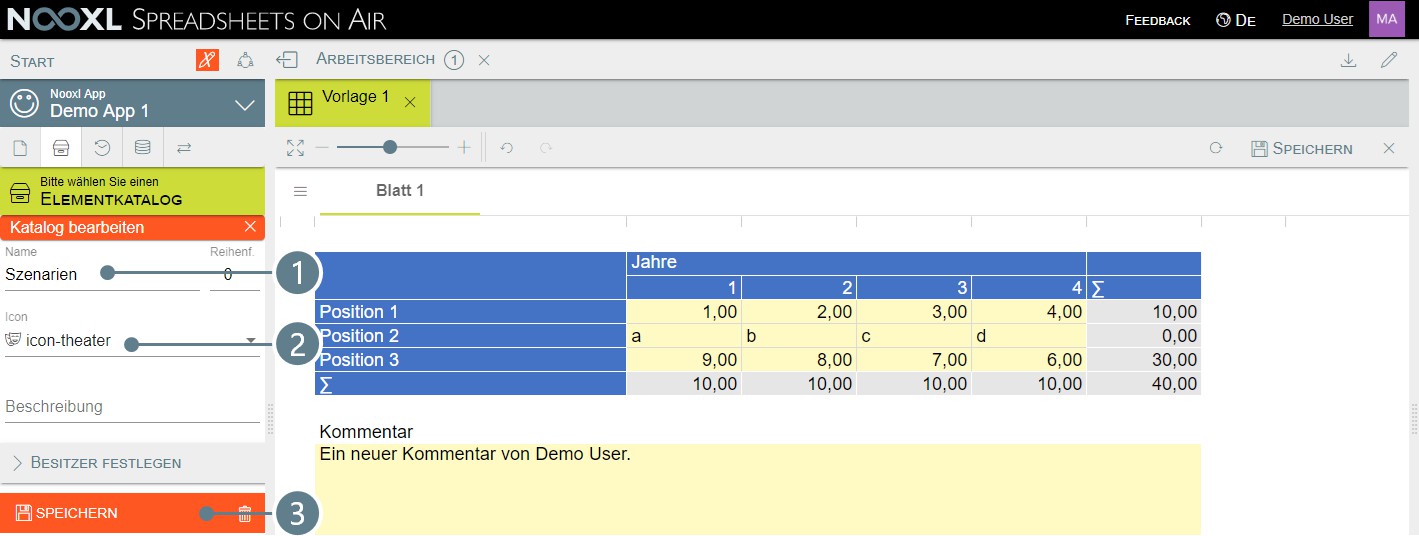
In the investment mask, enter "Scenarios" (1) as the name of the catalog. As icon I have chosen the "icon- theater" (2).
If you have opened the icon selection, you can type "the" on your keyboard and the selection will automatically jump to the correct icon.
Once the name has been assigned and an icon selected, click on Save (3).
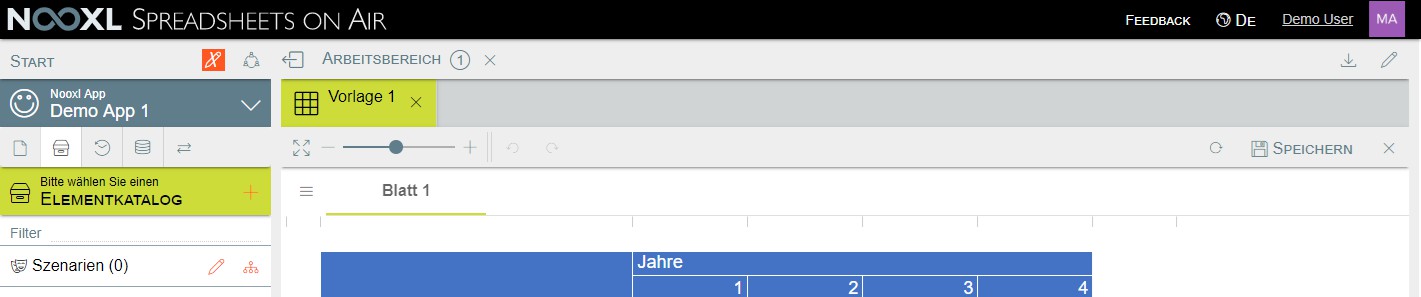
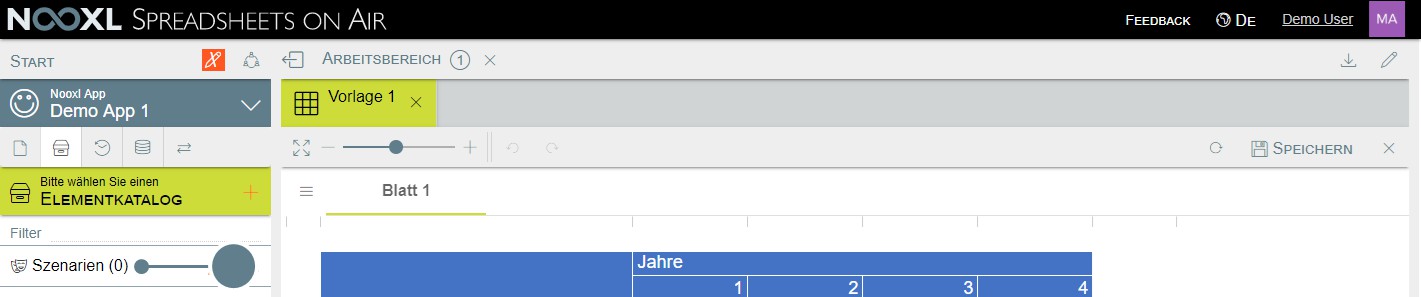
After you have created the catalog, you will come back to the catalog overview and can see it.
The next step is to create the three desired scenarios as elements in this catalog.
Creating elements
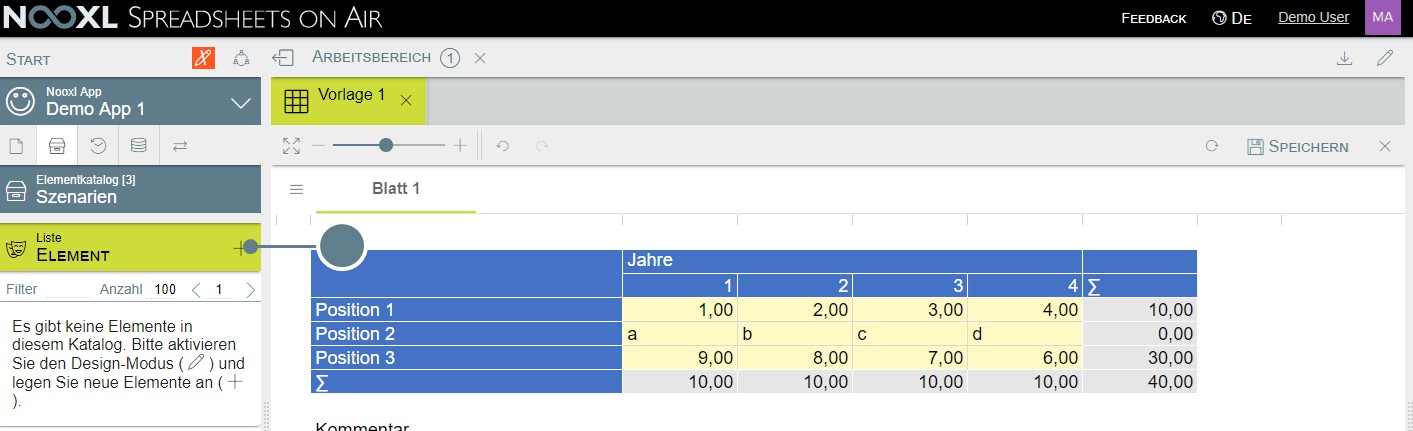
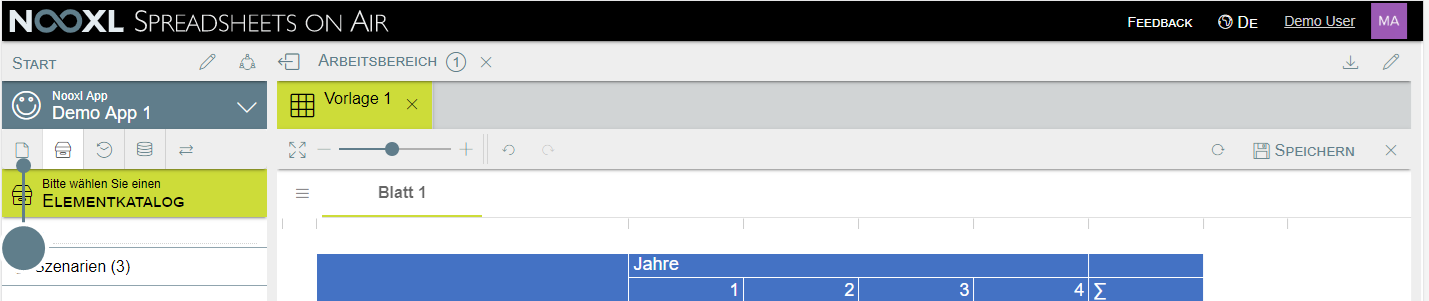
In the catalogue selection please click on the new catalogue scenarios to open it.
Here you can now create new elements by clicking on the plus.
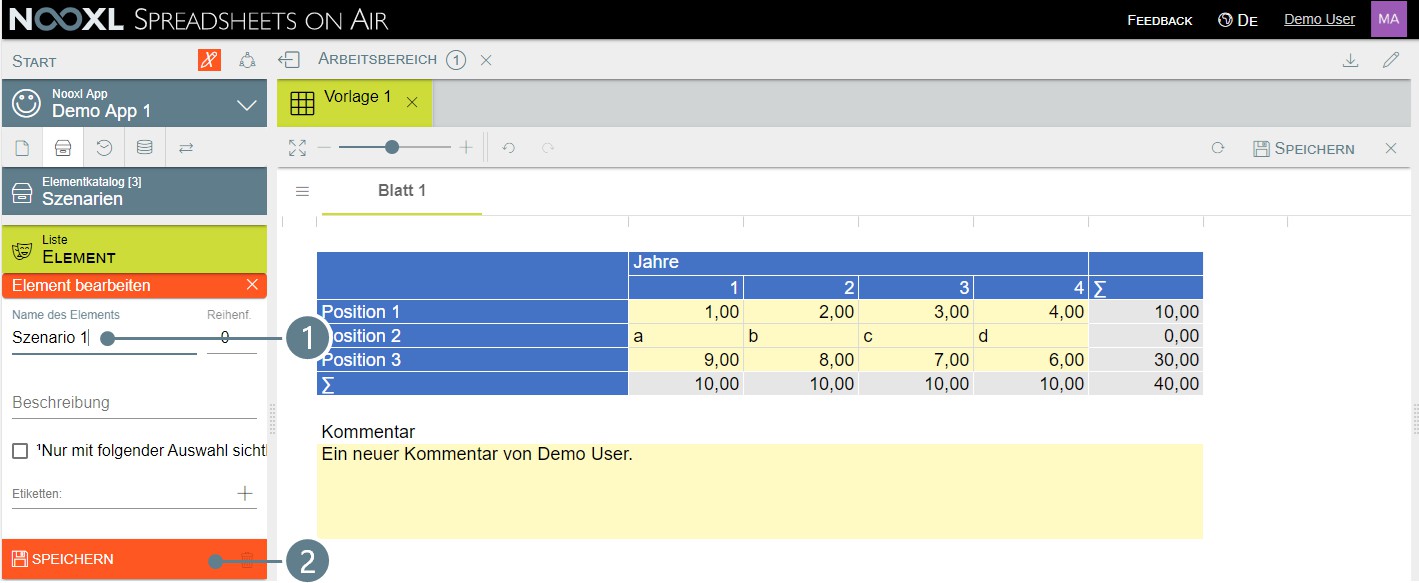
In the asset mask for catalog elements, please enter "Scenario 1" as "Name of the element" (1) and then click on Save (2) to create the element.
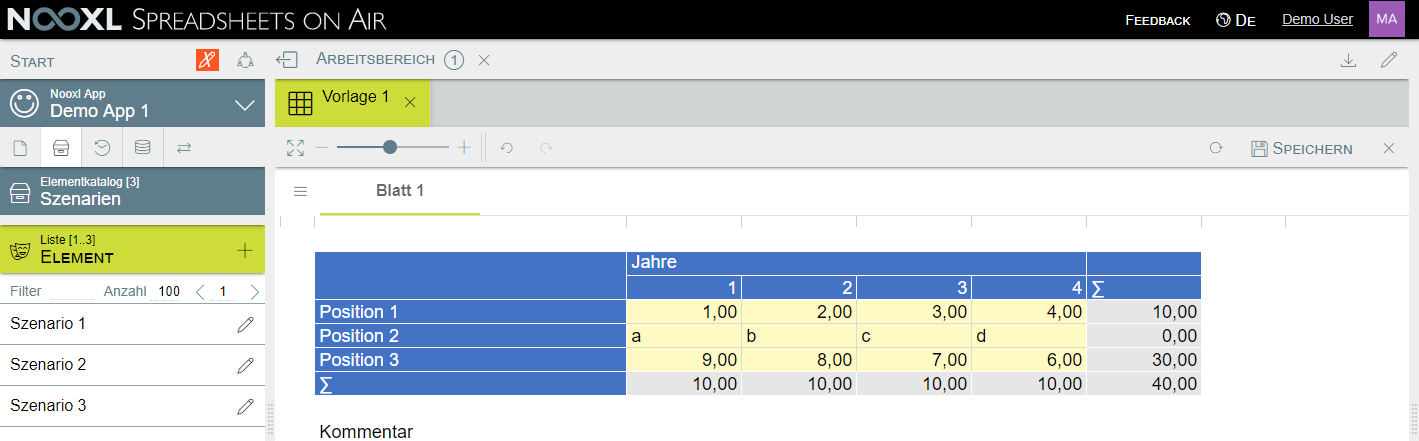
Please repeat this process for the elements "Scenario 2" and "Scenario 3" so that you have the following elements in your catalog.
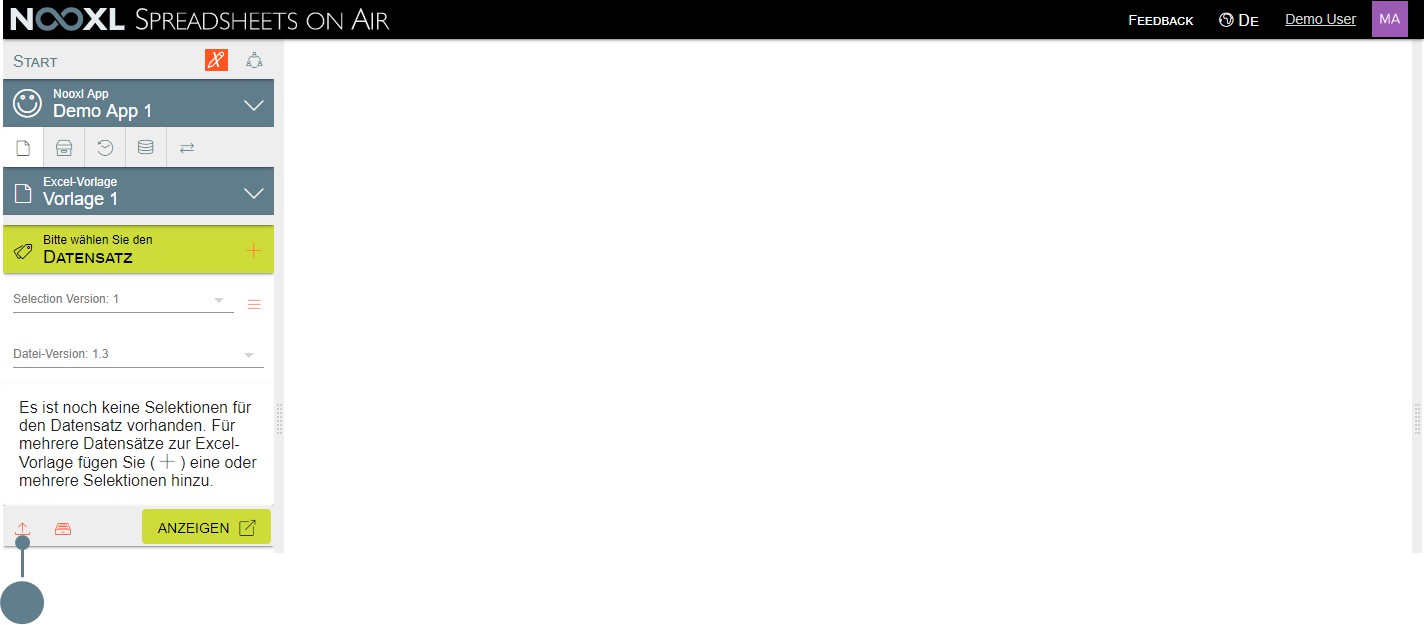
Creating a selection
To use our catalog in the template to identify different records, we now need to create a selection and assign it to the template. For this we return to the "Excel Template" section of Nooxl.
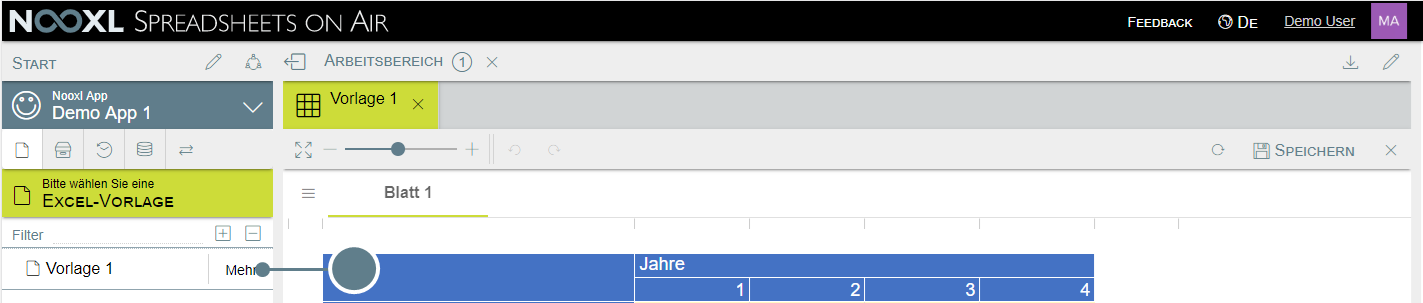
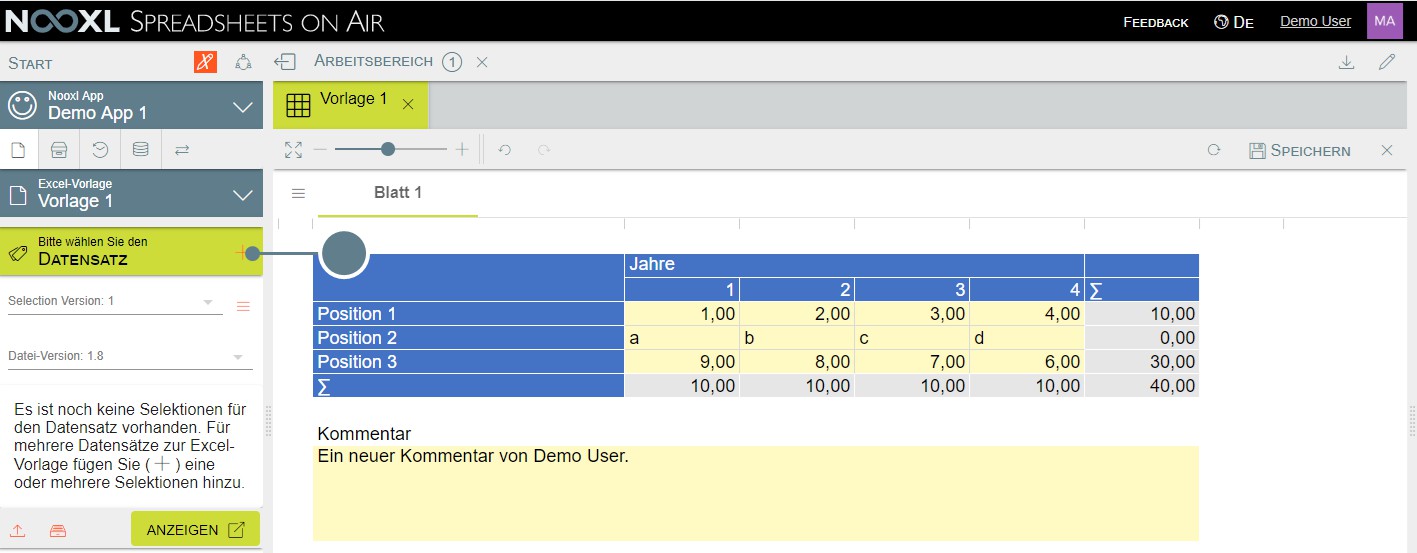
Next we click on "More" to the right of our template to get to the data set selection.
To create a new selection and add it as a selection, the design mode of the app must be activated. This is done by clicking on the pencil so that it is displayed in red.
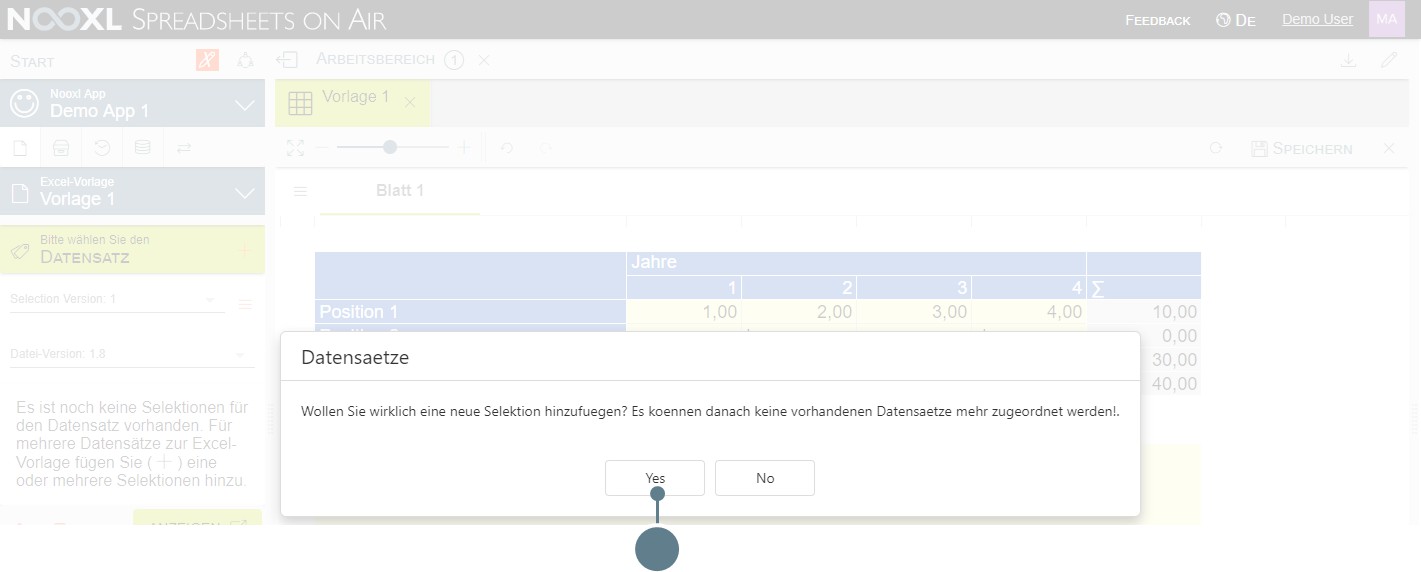
In draft mode a new selection can be added to the record by clicking on the red plus.
The system then warns you that by adding new selections, the existing data records can no longer be assigned to the template. Please confirm this warning by clicking on "Yes".
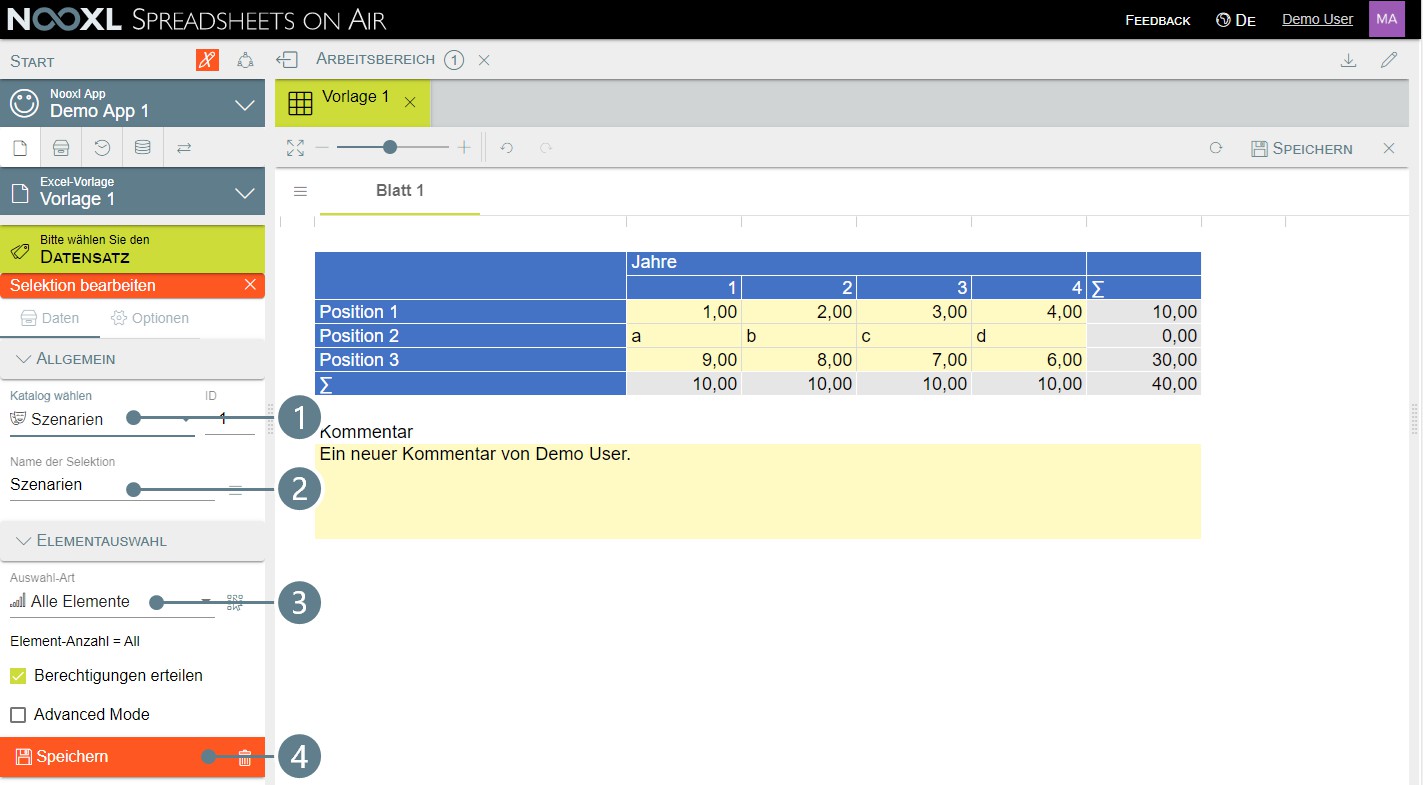
Now you can select the previously created "Scenarios" catalog (1). Nooxl automatically fills the field "Name of selection" (2) with the name of the selection.
In the Element selection area, Nooxl selects "All elements" (3) as selection type, so that you can complete the creation of the selection directly by clicking on Save (4).
Now leave the draft mode to test the new data set selection.
The selection Scenarios (1) now appears in the dataset selection and as long as no element has been selected here, the button for displaying the dataset is grayed out (2).

Fill data records with sample data
In order to have sample data for further use cases, please fill the data records of template 1 with the following contents.
Scenario 1
| years | ||||
|---|---|---|---|---|
| 1 | 2 | 3 | 4 | |
| Position 1 | 100 | 101,50 | 102 | 103.75 |
| Position 2 | 20 | 22 | 24 | 26 |
| Position 3 | 250 | 260 | 270 | 280 |
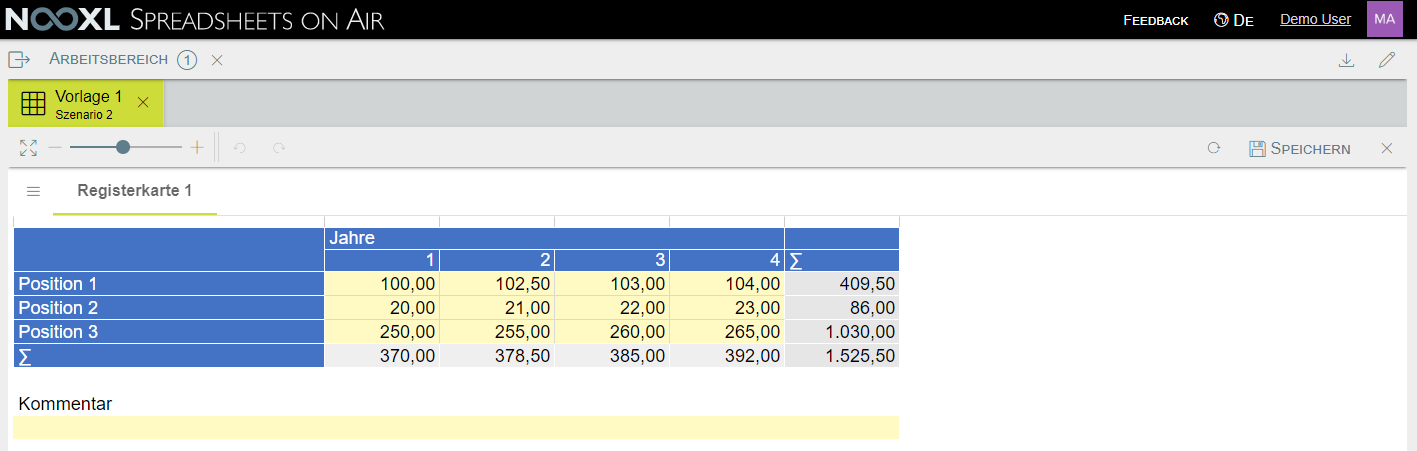
Scenario 2
| years | ||||
|---|---|---|---|---|
| 1 | 2 | 3 | 4 | |
| Position 1 | 100 | 102.50 | 103 | 104 |
| Position 2 | 20 | 21 | 22 | 23 |
| Position 3 | 250 | 255 | 260 | 265 |
Comment: The contents of scenario 2.
Scenario 3
| years | ||||
|---|---|---|---|---|
| 1 | 2 | 3 | 4 | |
| Position 1 | 100 | 104 | 107 | 110 |
| Position 2 | 20 | 24 | 28 | 30 |
| Position 3 | 250 | 265 | 280 | 295 |
Comment: The contents of scenario 3.
Customize and create markers
Everywhere in your app, where you want to use special Nooxl functionalities, so-called markers are used. These markers consist of one or more cells of the template and each marker can be added with further functionalities.
These are for example read and or write connections to the database, definition of views, extended business logic with Nooxl functions etc.
The tool area
In addition to the wizard for creating cell memories , they can also be created and customized using the tools area, which appears on the right side in the design mode of a template.
In the list of tools in the left menu area, the following element types are displayed as a hierarchy:
Excel sheet of the template
Markers within the Excel sheet
Entries within the marker
Entries determine the functionality of the respective marker. The following entries can be created in a selection:
Tab
Cell memory entry
Function
In the following, the available functionalities of the tool area are presented:
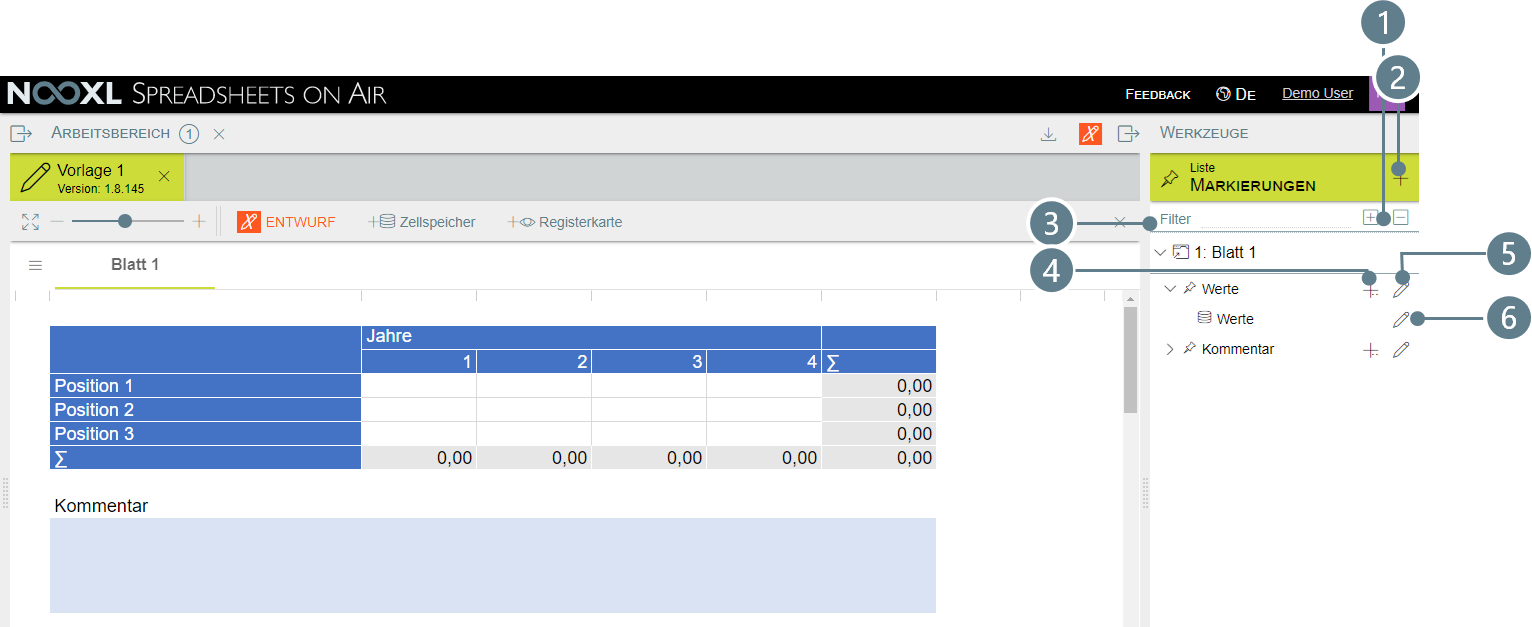
- Expand or collapse all hierarchy elements in the list
- Create a new marker for the selected cells
- Search for a marker or entry
- Add an entry to the marker
- Edit the selection
- Edit the entry
Creating a write cell memory using the tools
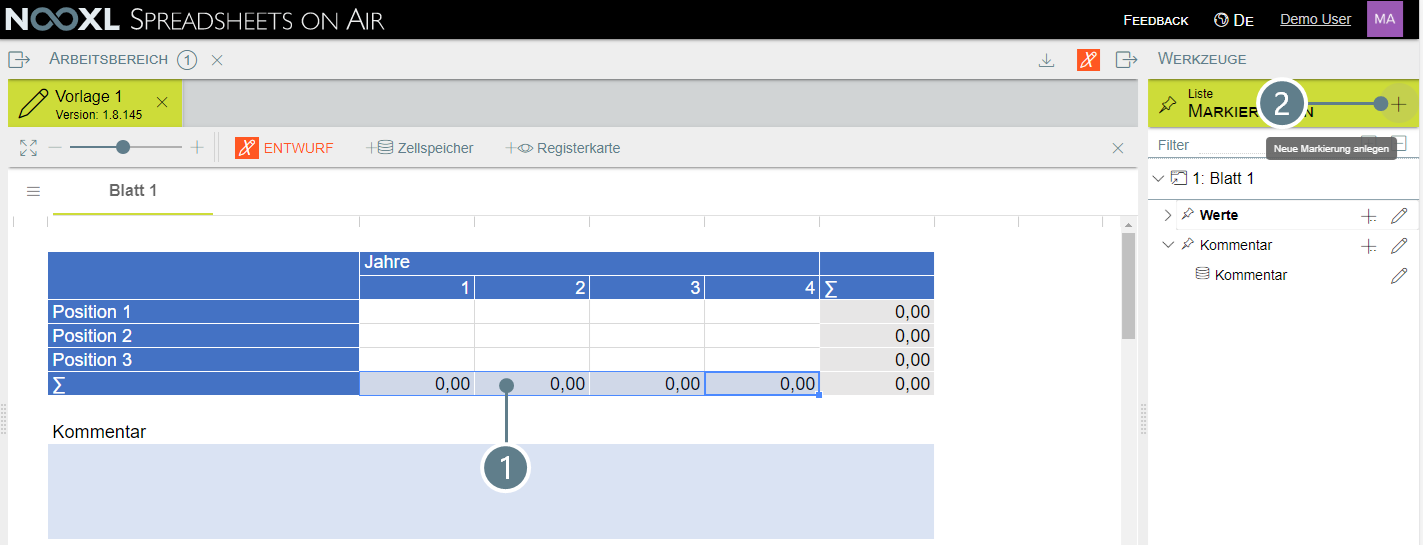
In the following we will connect the sum row of template 1 as a writing cell memory entry via the tools. The cells may only be write, since their contents are calculated using Excel logic.
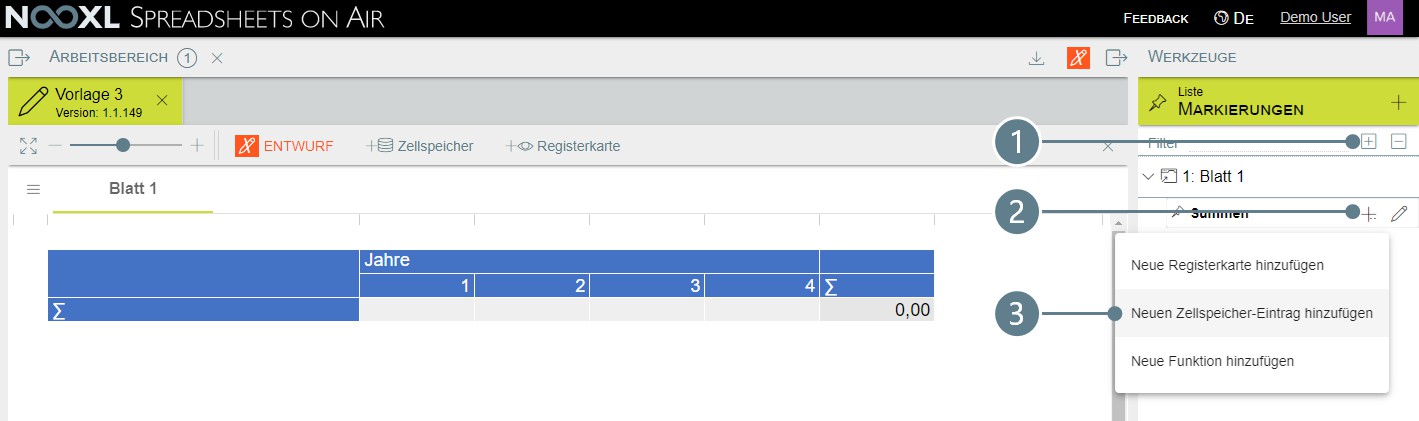
Use the mouse to first select the four cells of the totals row (1) and then click on the plus at markers (2) to create a new marker for the cell.
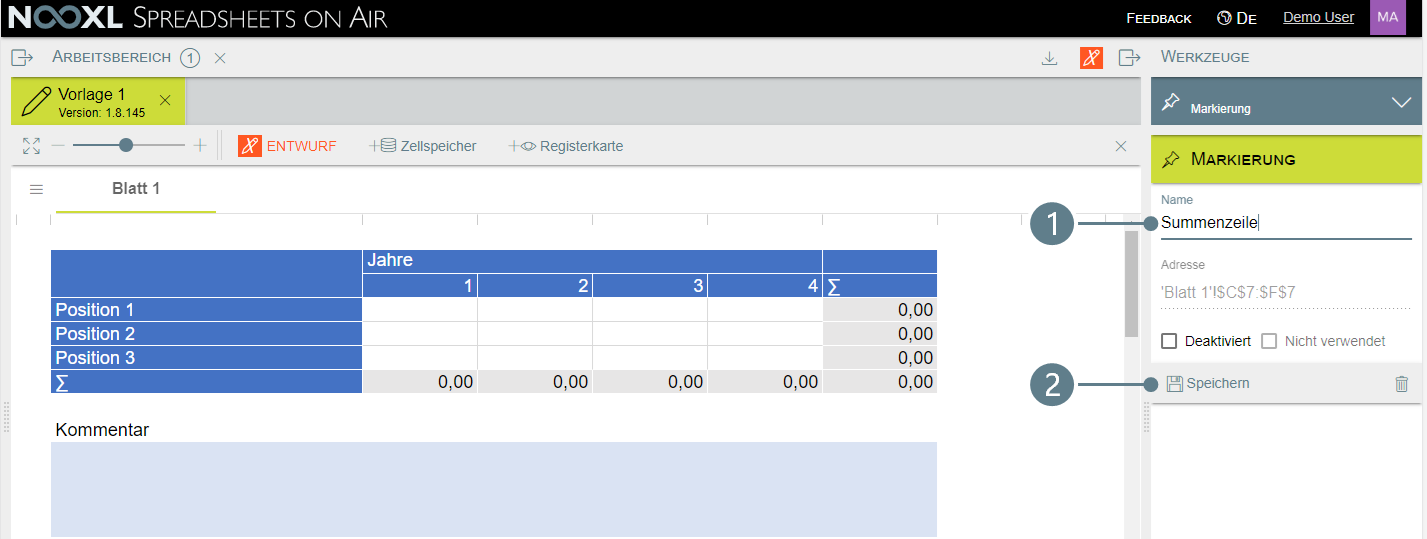
Enter "Sum row" (1) as name and then click Save (2).
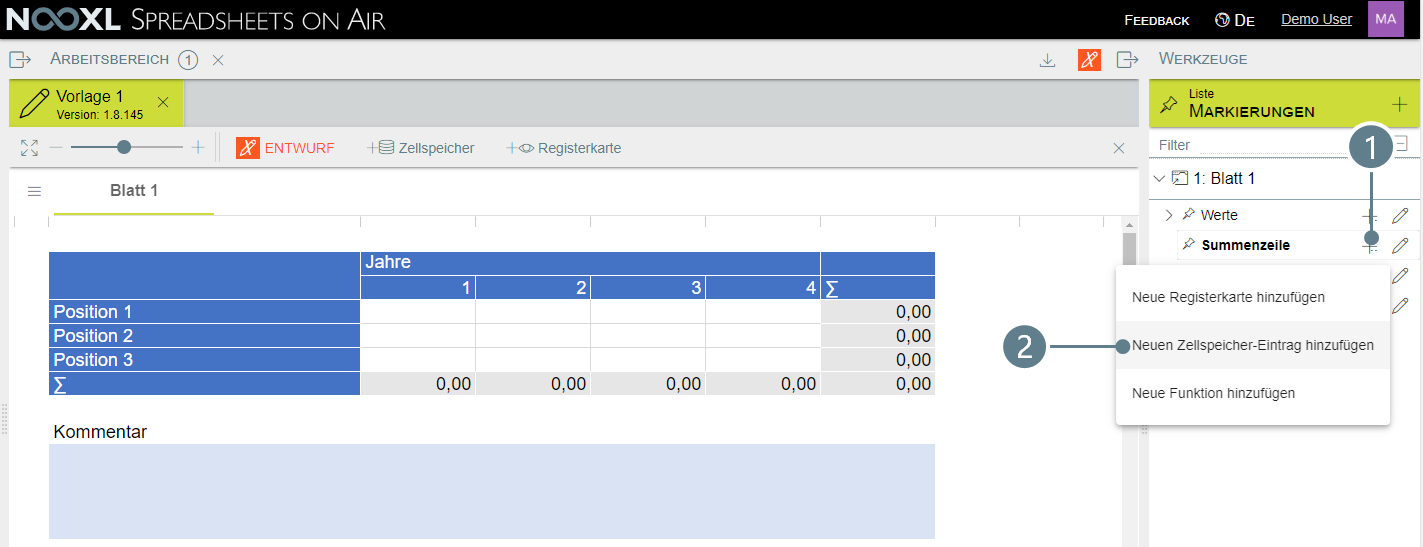
Click on the plus to the right of the "Totals row" marker (1) and select "Add new cell memory entry" (2) from the context menu that opens.
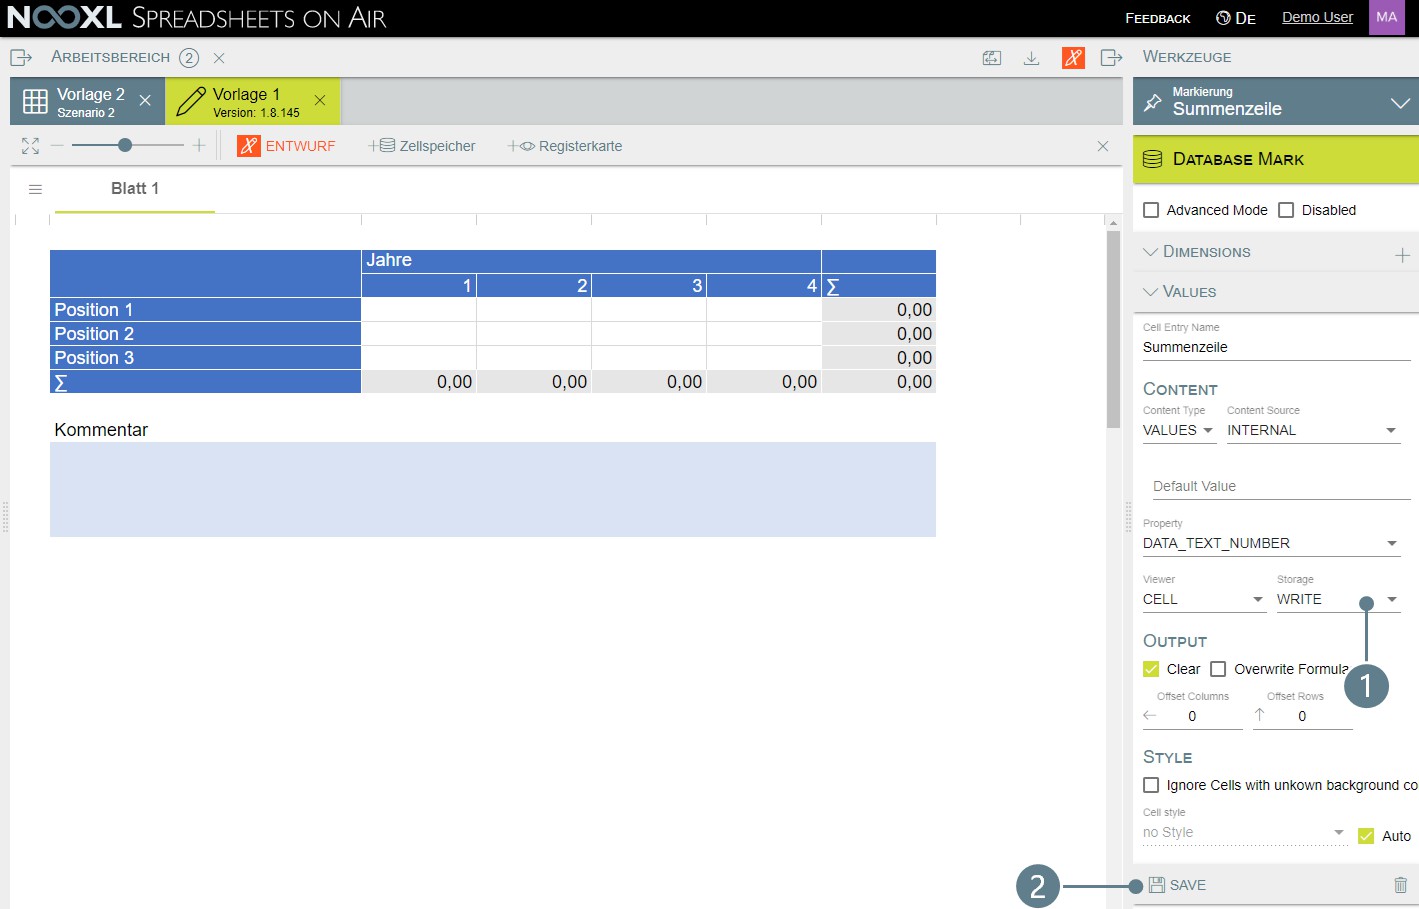
In the menu that now opens, select "WRITE" (1) from the "Storage" item in the selection menu and then click on "Save" (2).
Adjust selection "Scenarios" and recalculate data records
So that the values of the sum row are also saved in the Nooxl database, the three data records must be saved again.
This can be done manually or with the function Calculate records by Nooxl. In order to
calculate all data sets at the same time, the selection of the data sets must be adjusted.
To do this, open the left navigation and activate the draft mode of the app.
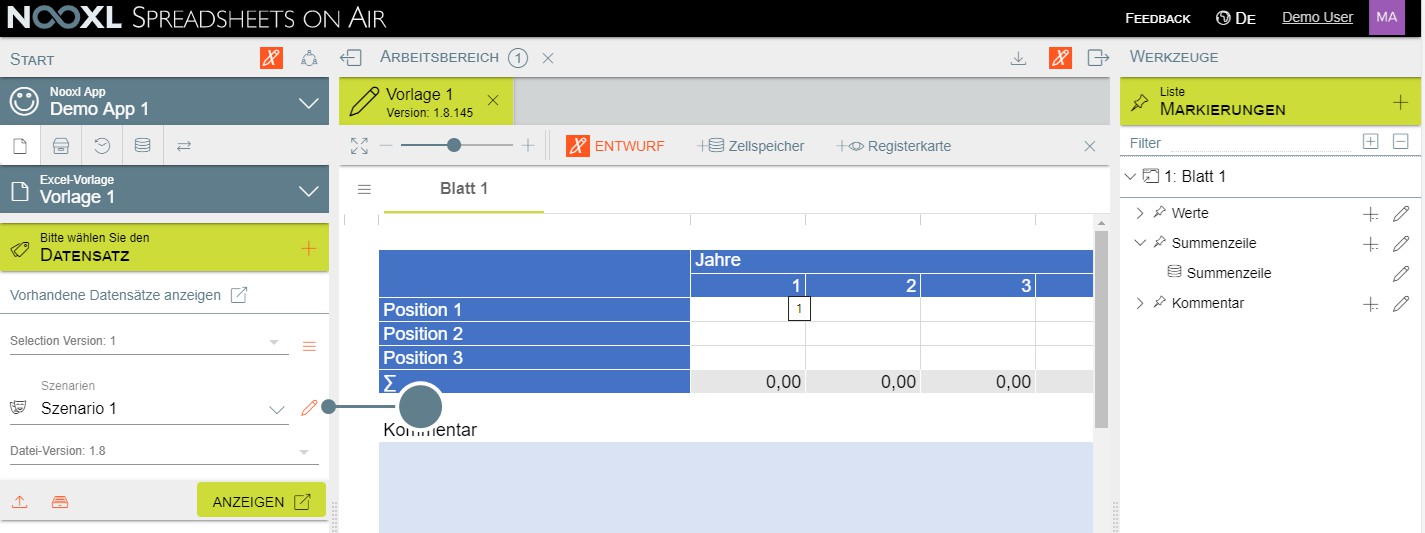
A click on the red pen to the right of the selection opens the dialog to adjust it.
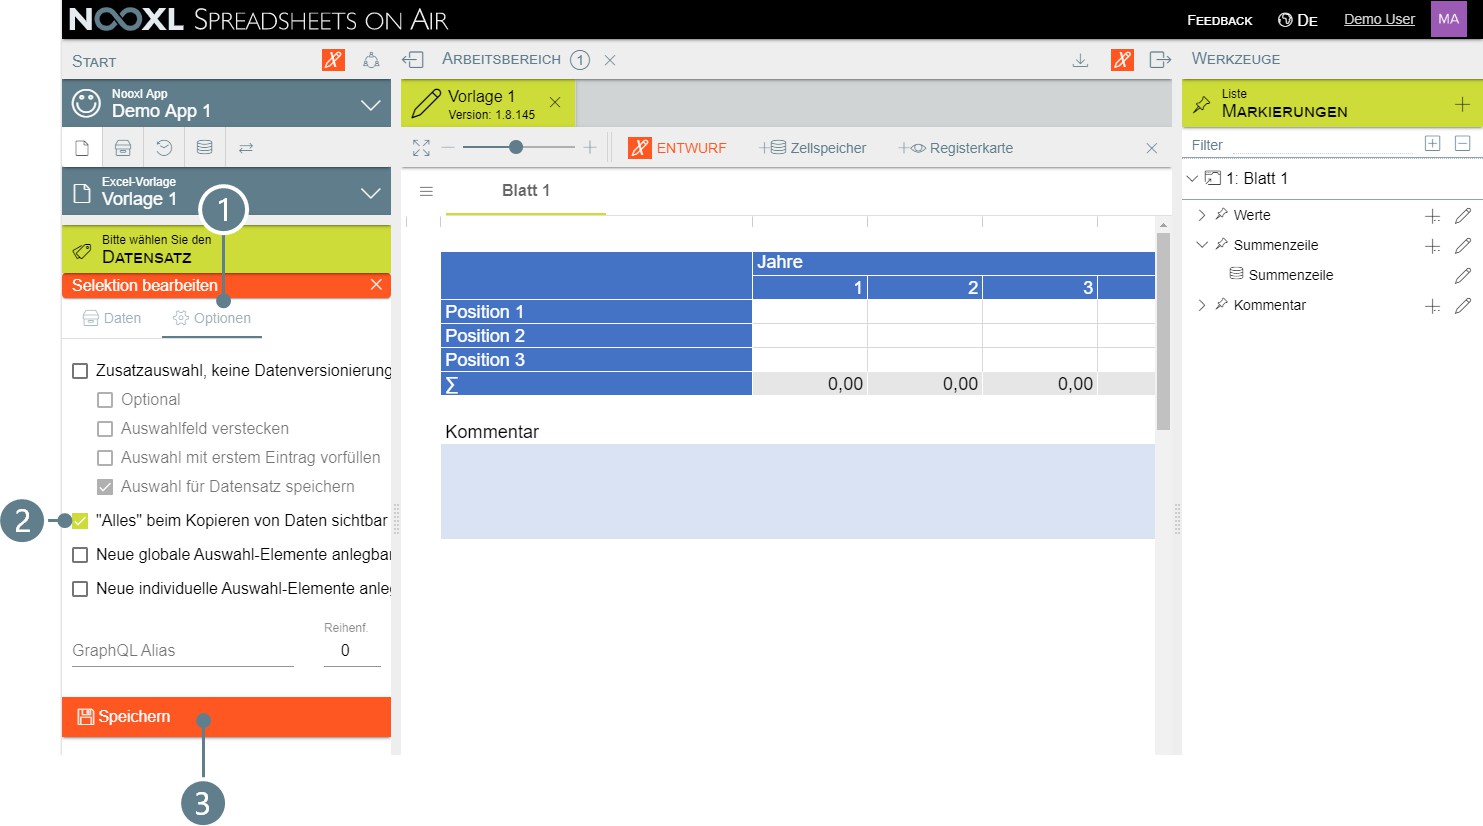
Switch to the "Options" tab in the editing dialog (1), check the option "All visible when copying data" (2) and save the changes (3).
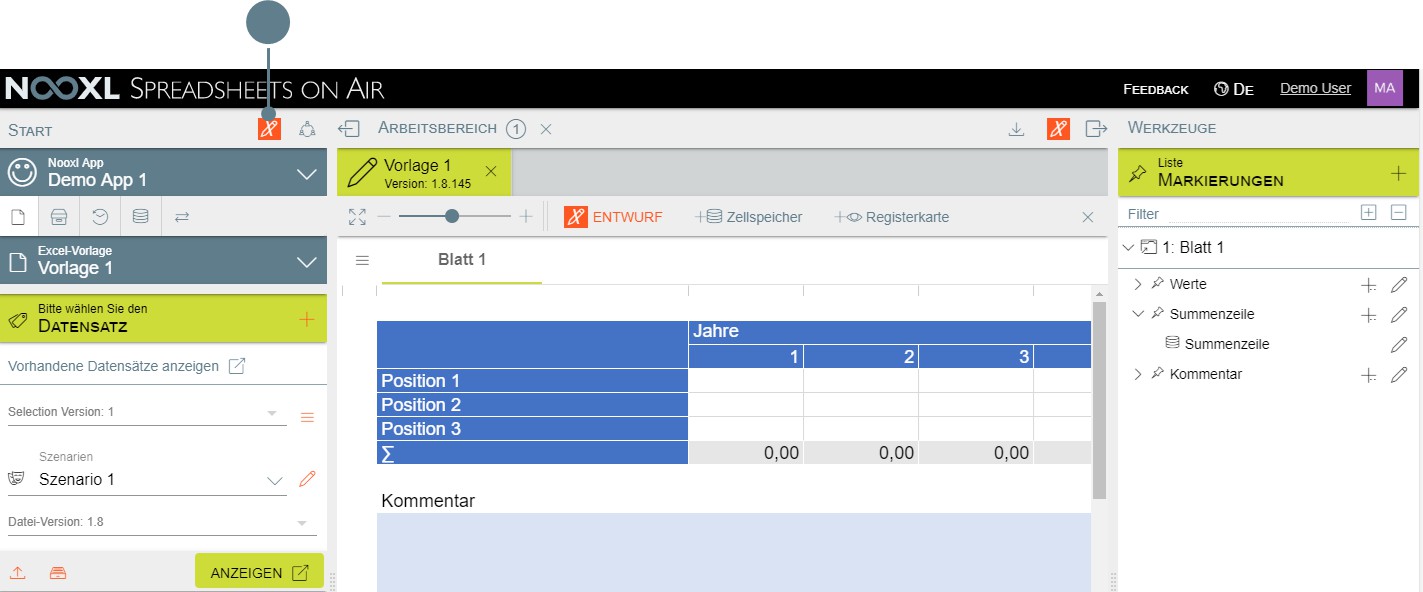
Afterwards you can leave the draft mode by clicking on the red pencil.
Then follow the description Copy and calculate records to recalculate the records.
Create tabs via wizard
If you create and upload a new Excel file as a template in Nooxl, Nooxl will display the sheets contained in it one to one. This means:
- Content
- Order
- Designation
If you want to change this, for example hide certain sheets from the users or distribute the contents of an Excel sheet between two views in Nooxl, you must create tabs.
Tab pages are also necessary if you want to show and hide rows or columns dynamically or if you want to fix rows and columns.
Create a new tab page
To create a new tab, open the template in draft mode . Then use the mouse to select all cells that you want to be visible in the new tab page.
Now click on the "+tab" wizard at the top of the design mode.
In the dialog that opens, assign a name with which the new tab should be displayed in Nooxl (1) and then click Next to create it.
Now leave the design mode and open a record of the template to check the result.
Import cell contents from another template
In the following exercise we will read the totals row from template 1 into two new templates. For this exercise we need an Excel file with the following content:

Vorlage2.xlsx
In the first part of the exercise, we create template 2, in which a scenario is set as a data record and the respective totals row is read from template 1.
In the second part we create template 3, which uses the identical Excel file as a starting point. Here, however, the scenario is not selected before it is displayed, but the totals rows of all existing scenarios are listed below each other.
Template 1: Read totals row for scenario
Perform the following steps independently:
- Upload the Excel file as "Template 2" in Nooxl
- add the selection scenarios as data record selection
- then open them in draft mode
Select the four cells for years 1 to 4 with the mouse (1). Then create a new selection using the tools in the area on the right (2).
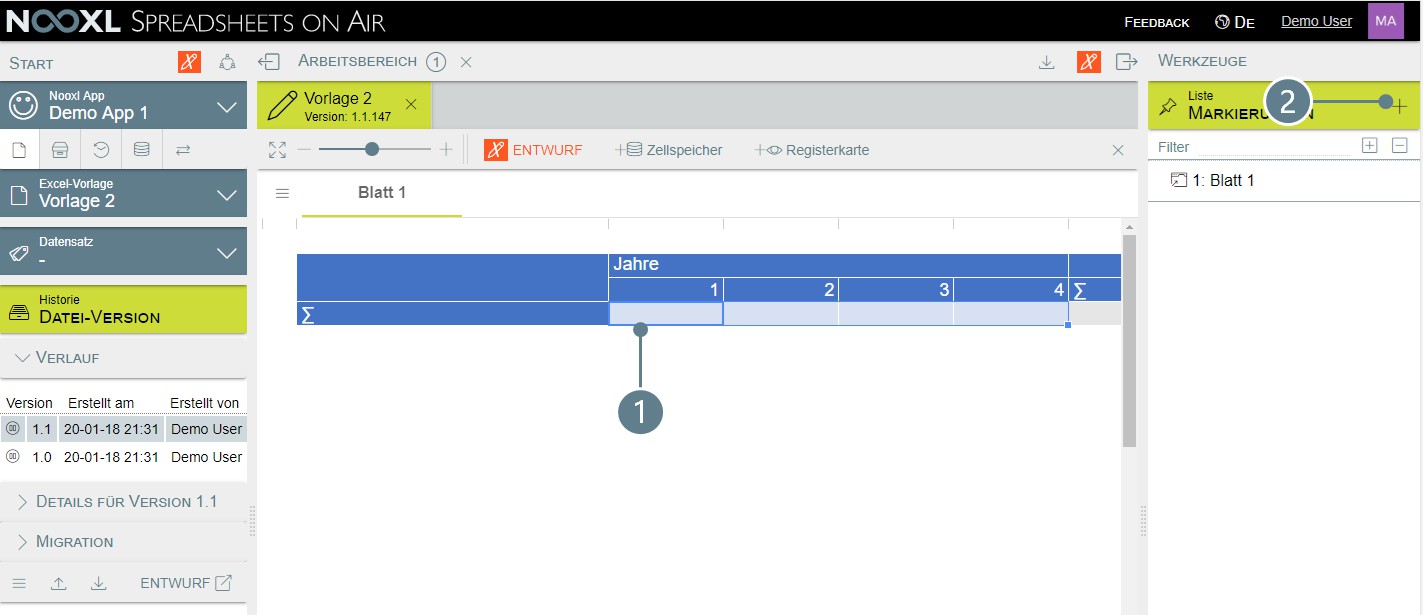
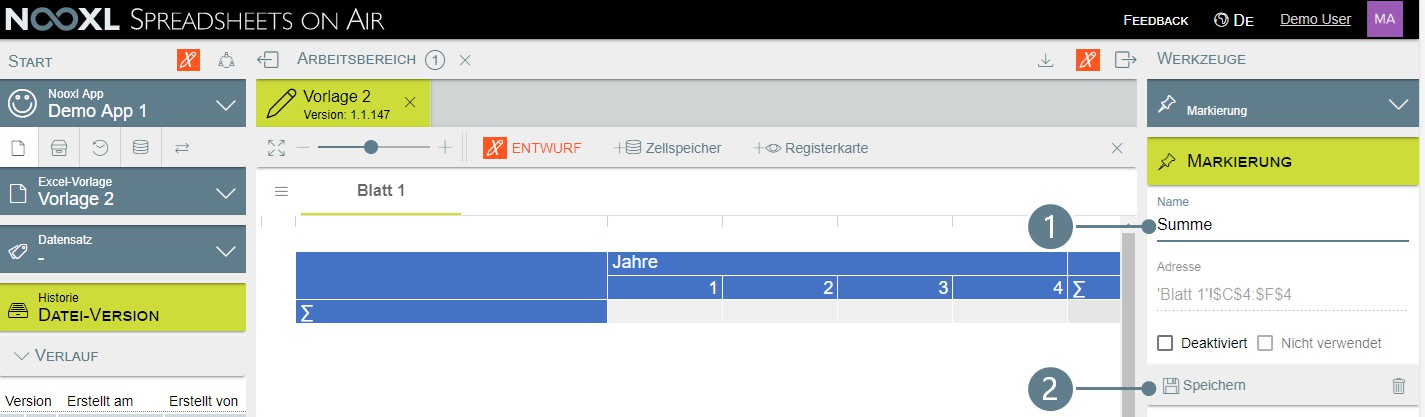
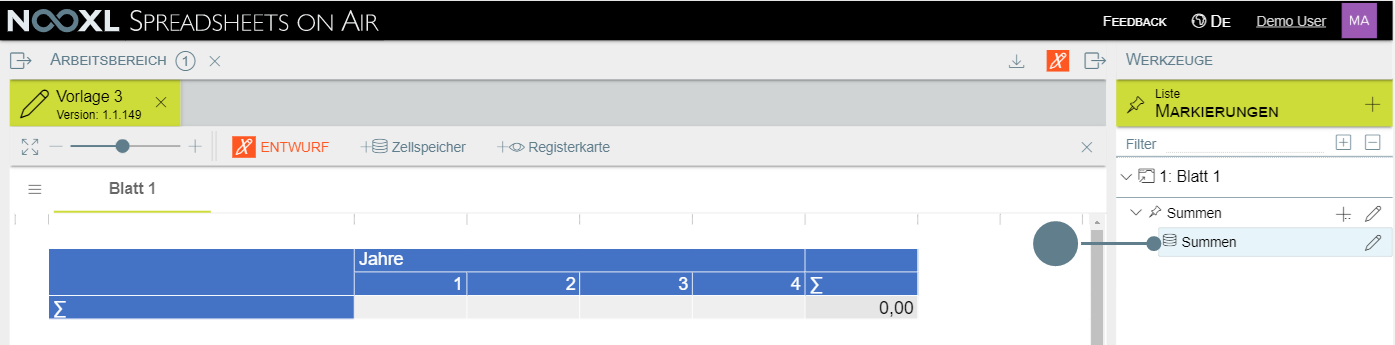
Enter "Sum" (1) as the name and then click on Save (2) to create the marker.
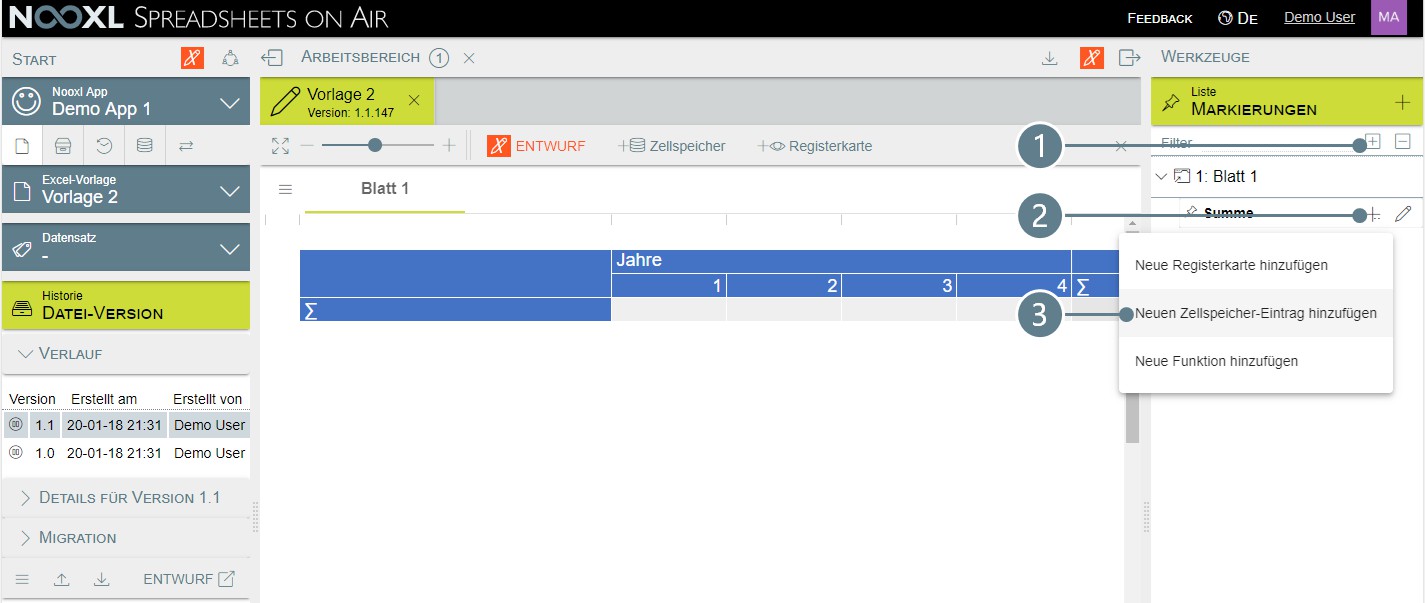
Click on the "+" above the tools area (1) to open all hierarchies. Then select the "+" to the right of the previously created marker (2) and then click "Add new cell memory entry" (3) in the menu that opens.
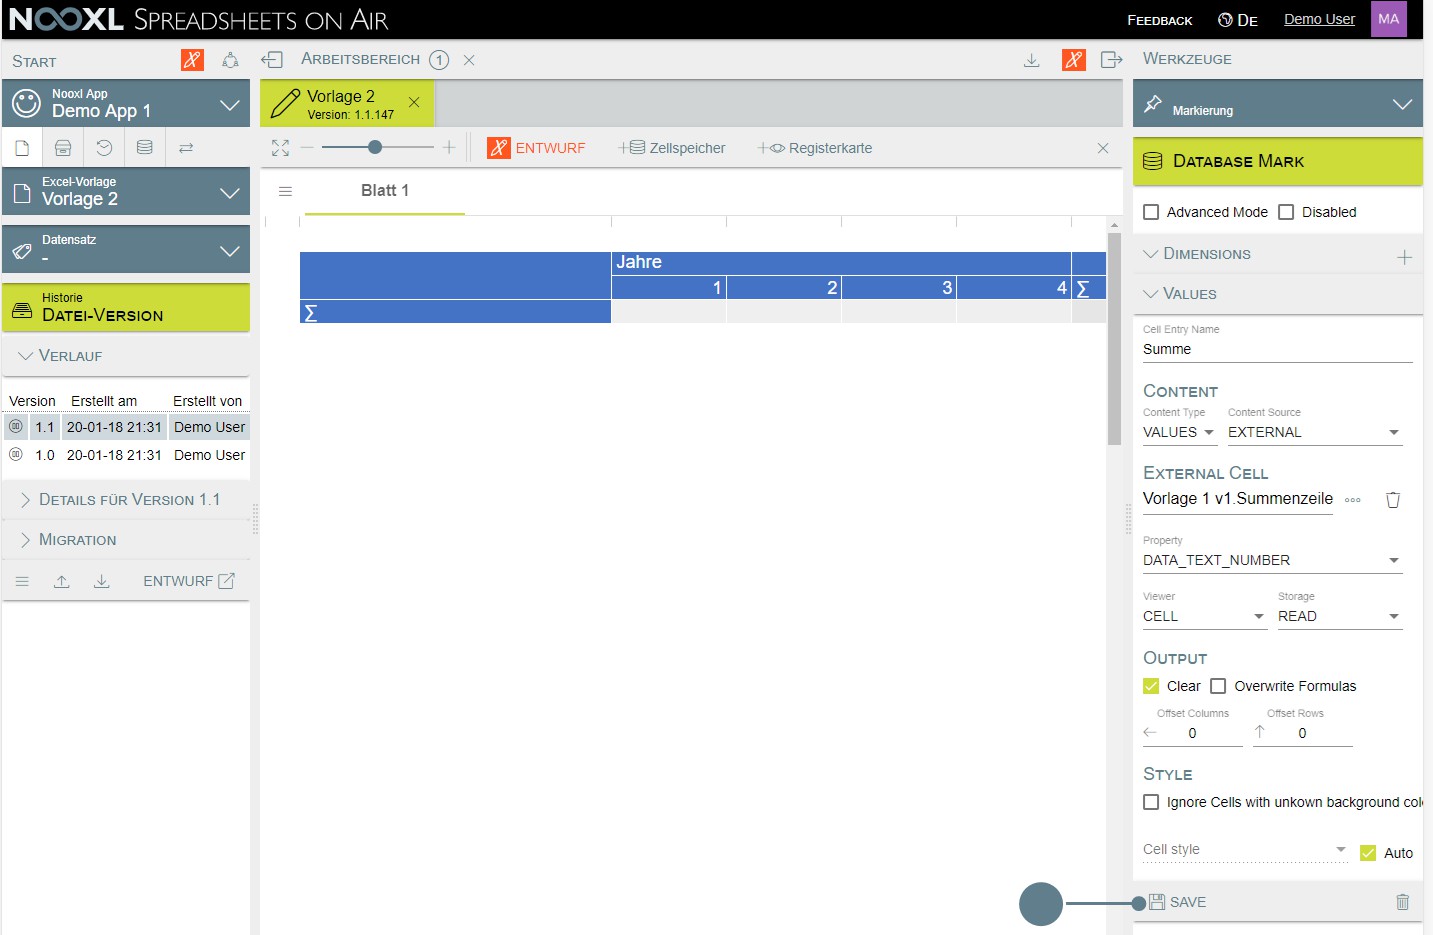
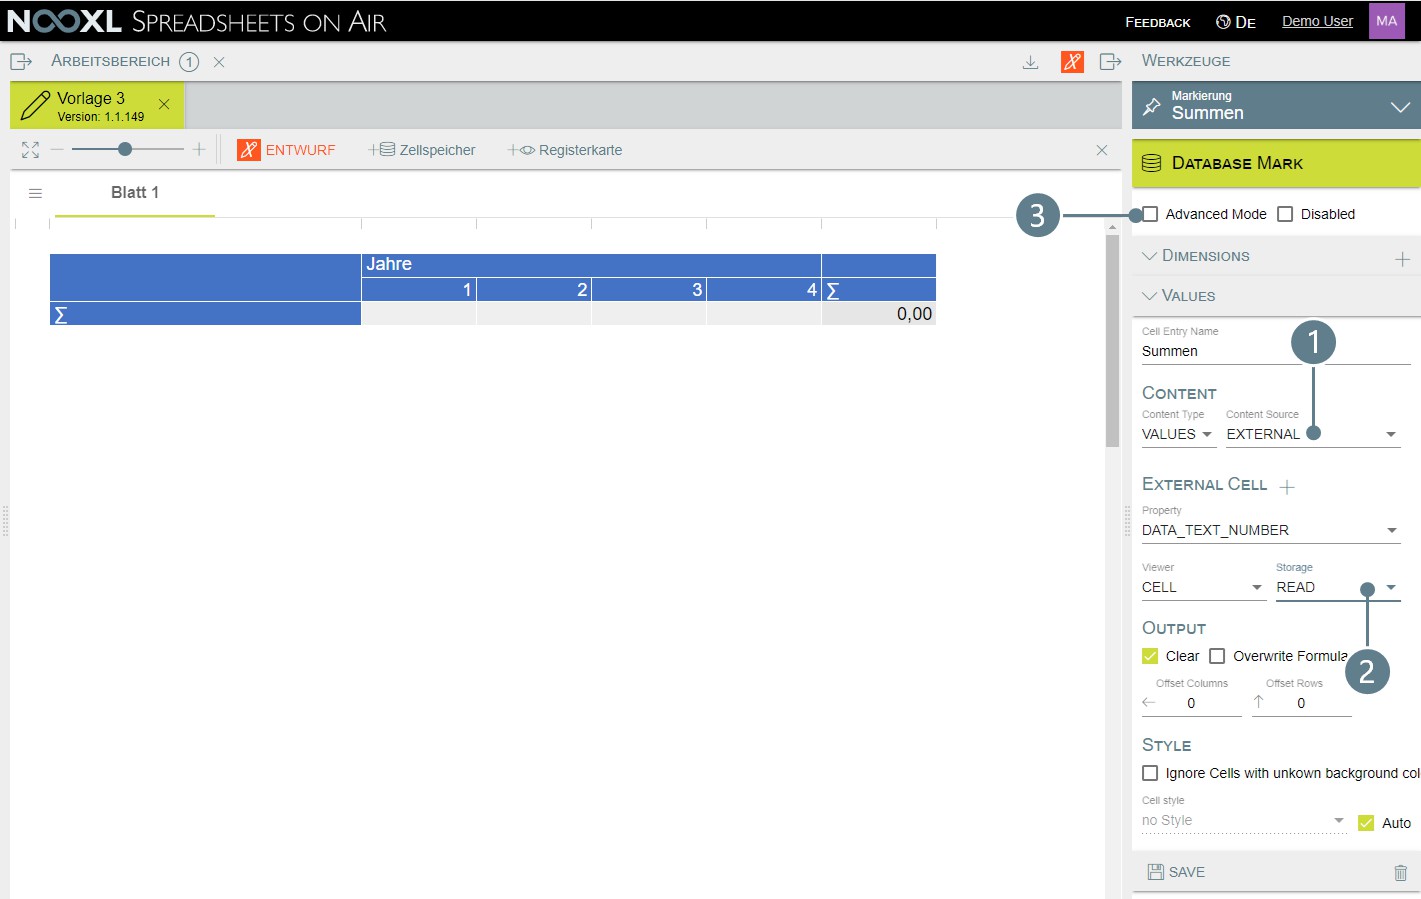
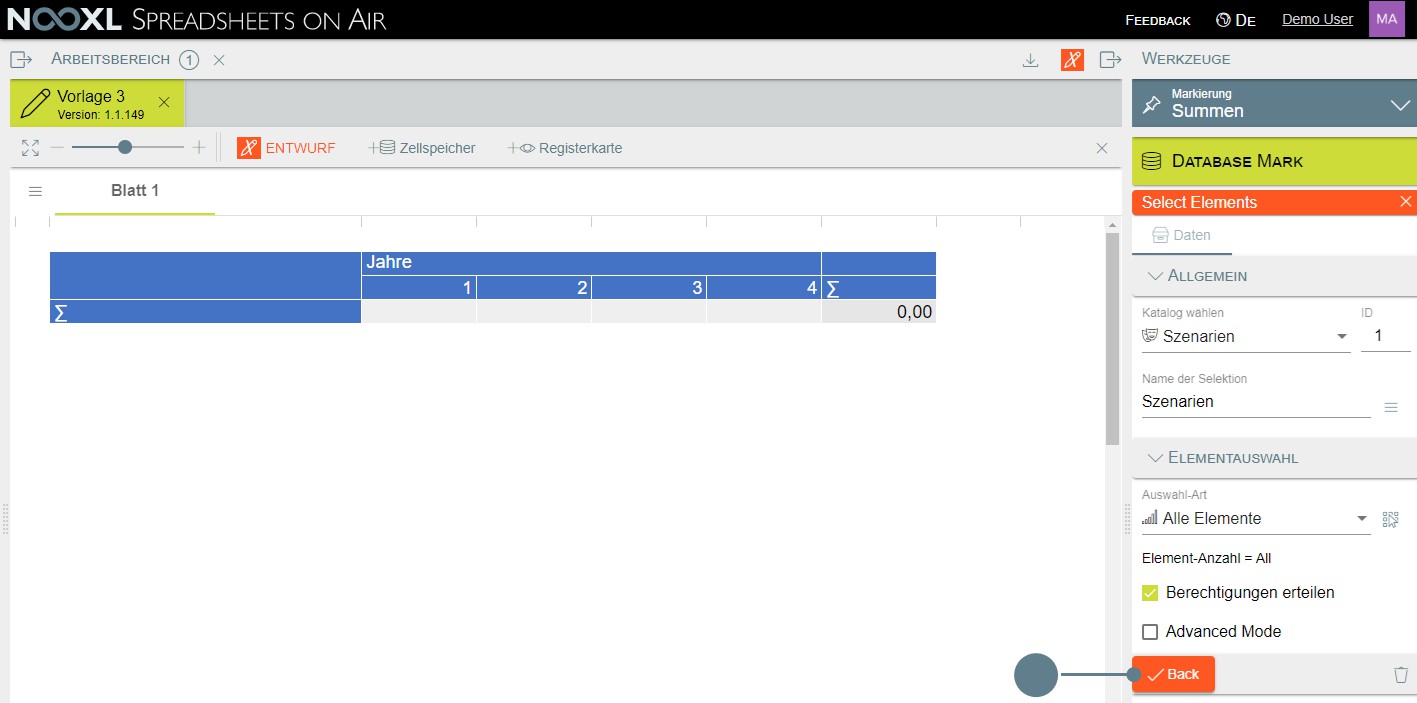
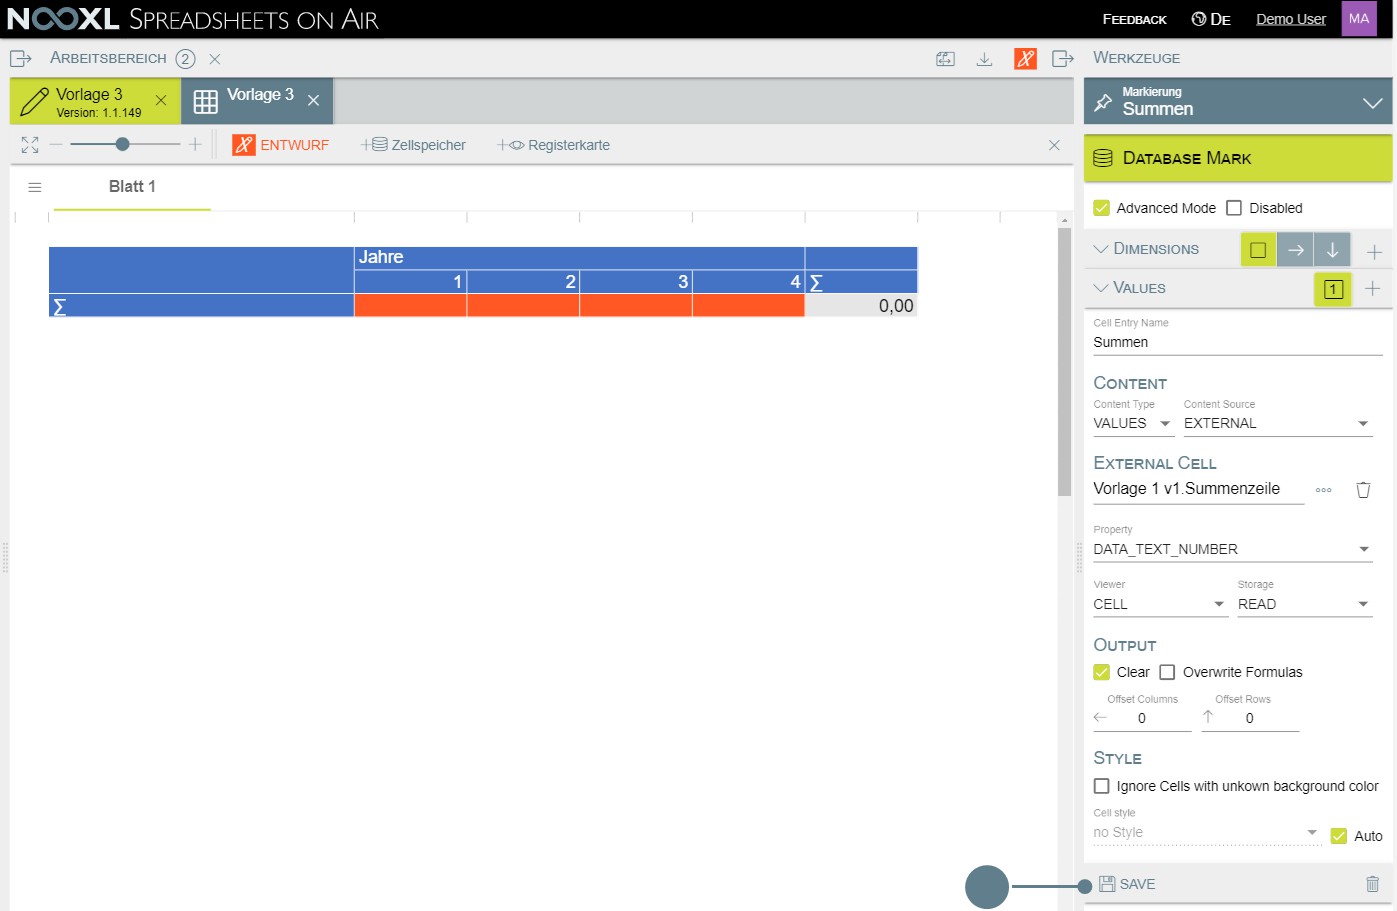
To read the data from the totals row of template 1, change the Content Source to "EXTERNAL" (1) in the "Database Mark" menu that now opens, select "READ" (2) from the Storage item and then click on the "+" to the right of External Cell (3).
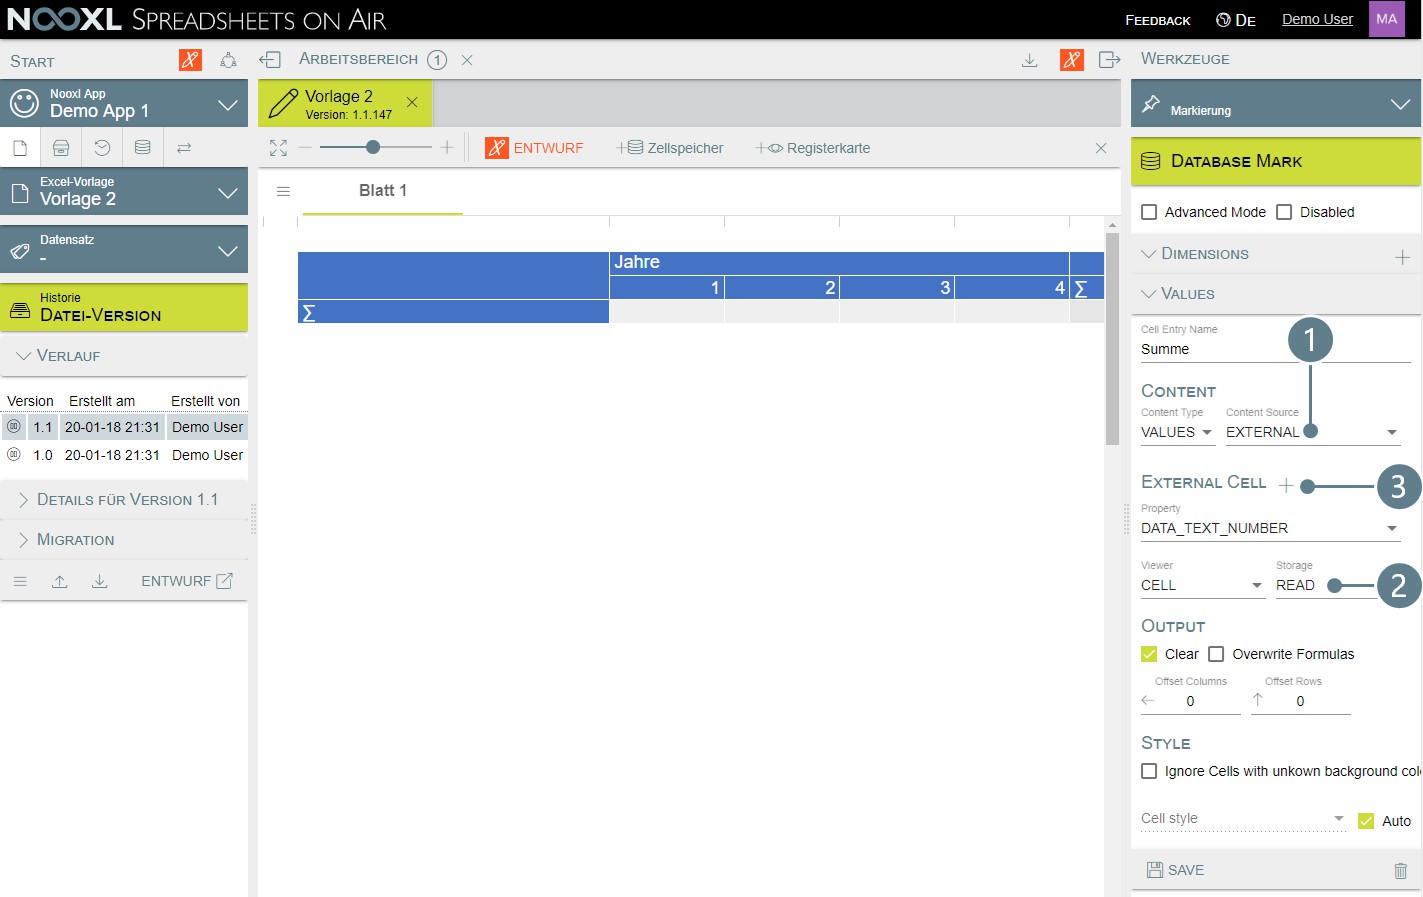
In the "External Cell" area of the dialog you make the following settings:
- External Matrix: Template 1 v1
- Data Entry: Totals row
With this you refer Nooxl to the marker whose contents you want to read.
In the "External Data Links" area, you must now define how the various dimensions of the data record to be read correspond to those of the template to be read:
- Index Down → Index Down
- Index Right → Indes Right
- Scenarios → Scenarios
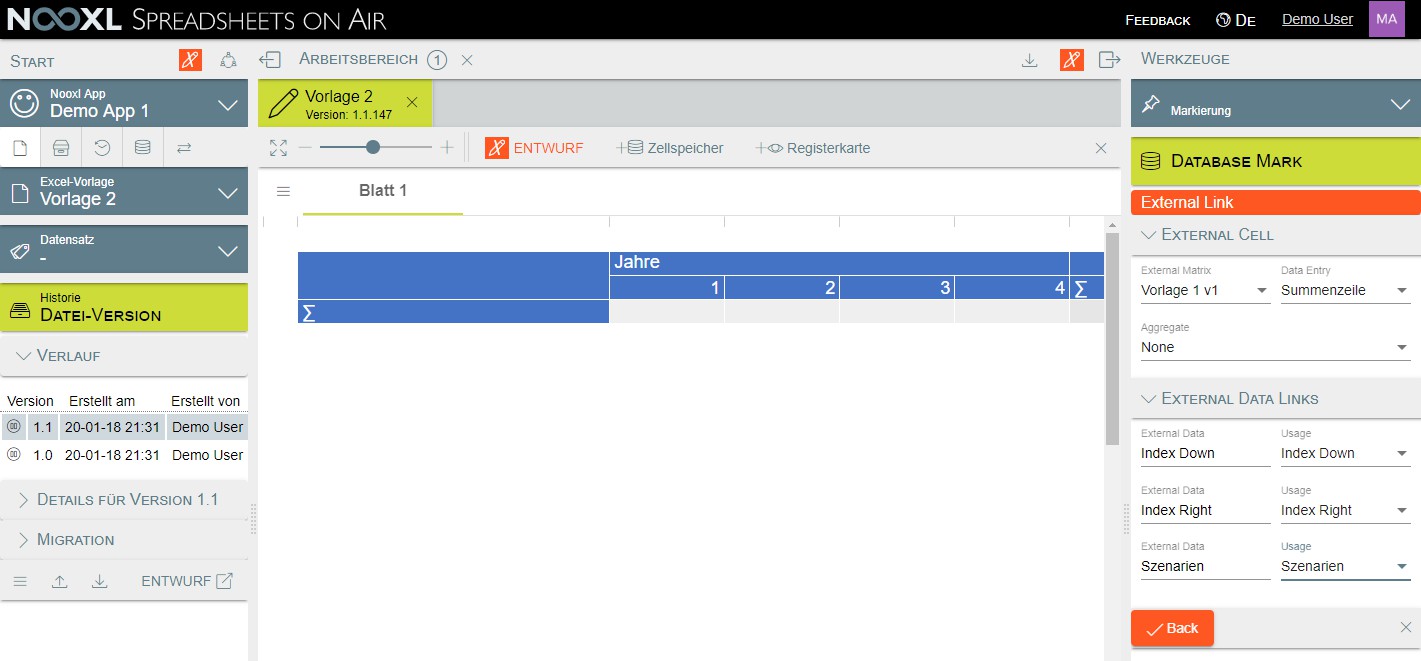
Then click Back to exit the dialog.

In the Database Mark, click Save to save your adjustments.
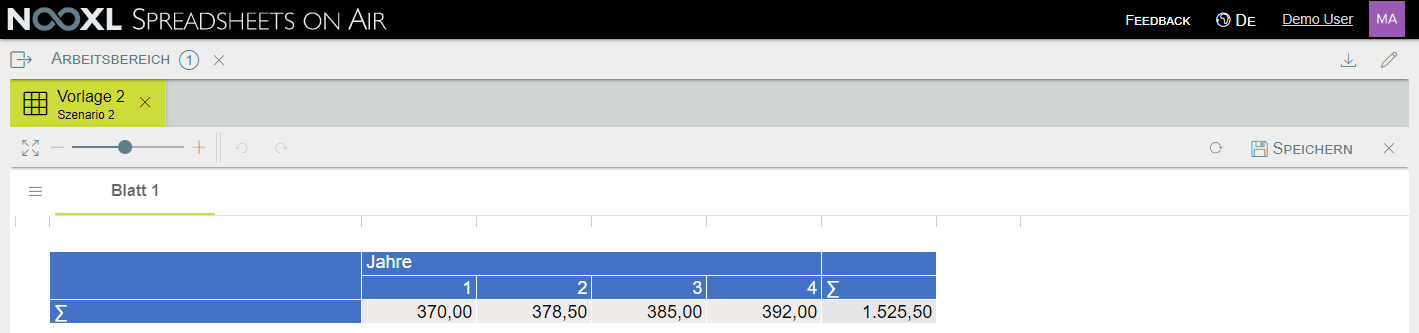
Now that you have connected the totals row, leave the draft mode of template 2 and open one of the data records to check that the data is read in correctly.
Template 2: Read the totals row for all scenarios under each other
Perform the following steps independently:
- Upload the Excel file as "Template 3" in Nooxl
- add the selection scenarios as data record selection
- then open them in draft mode
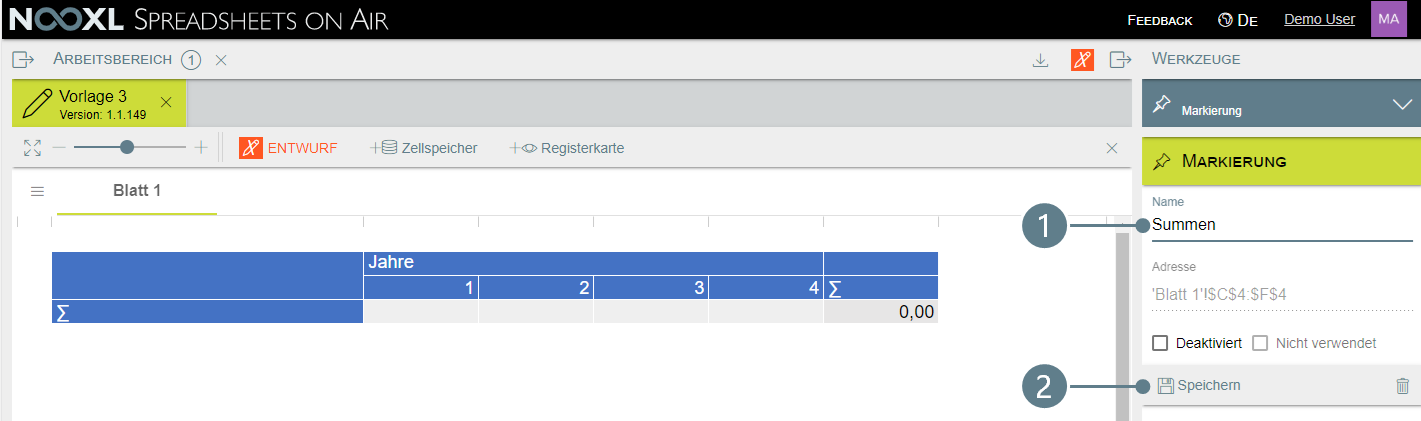
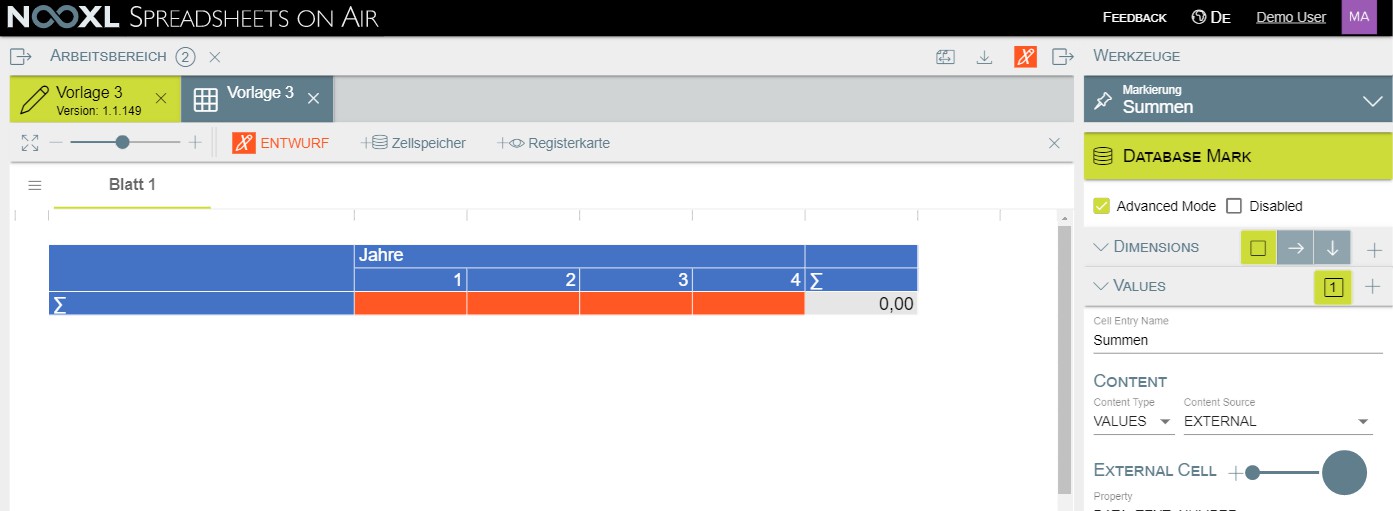
Select the four cells for years 1 to 4 with the mouse (1). Then create a new selection using the tools in the area on the right (2).

Name the new marker "Totals" (1) and click Save (2).
In the tools area, click on the "+" in the upper area (1) to expand all entries. Then click the "+" to the right of the previously created marker (2) and then click "Add new cell memory entry" (3).
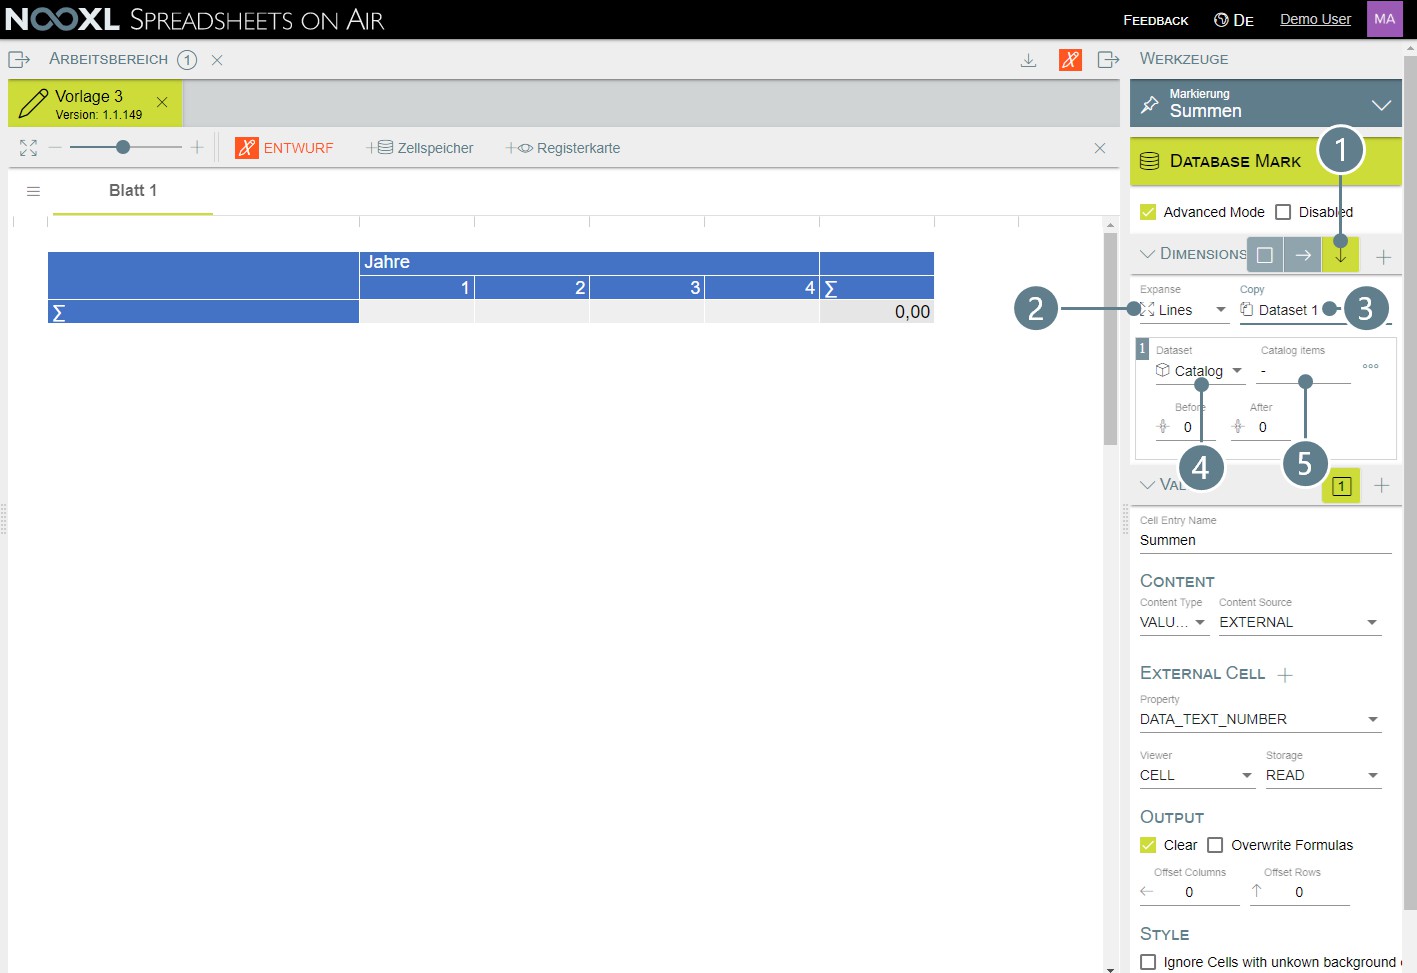
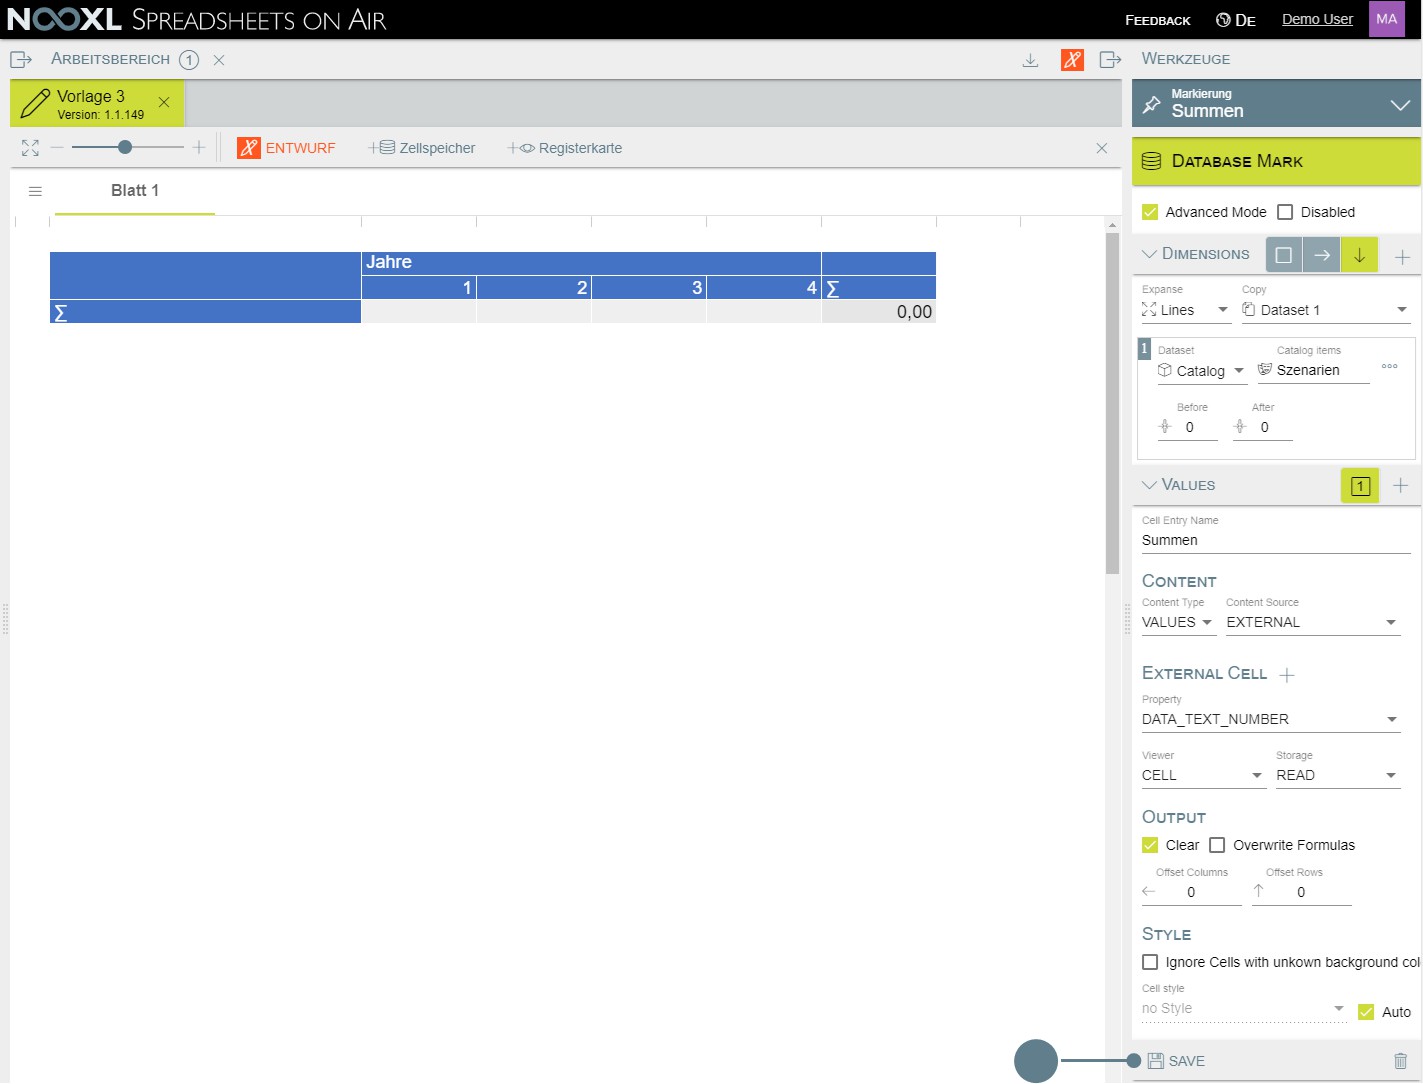
Set the Content Source to EXTERNAL (1), the Storage to READ (2) and then check the Advanced Mode (3).
- In the Dimensions area, click "↓" to indicate to Nooxl that you want to create a vertical dimension
- Set Expanse to "Insert complete Lines"
- For Copy, select Dataset 1, which together with (2) ensures that a new row is inserted for each element of the data set
- Select "Catalog" at Dataset
- Then click on the "-" at Catalog Items
Select the scenarios (1) as catalog and click on the three horizontal bars to the right of "Selection name" (2) to open the menu in which you can "Reuse existing selection...". (3) click on it.
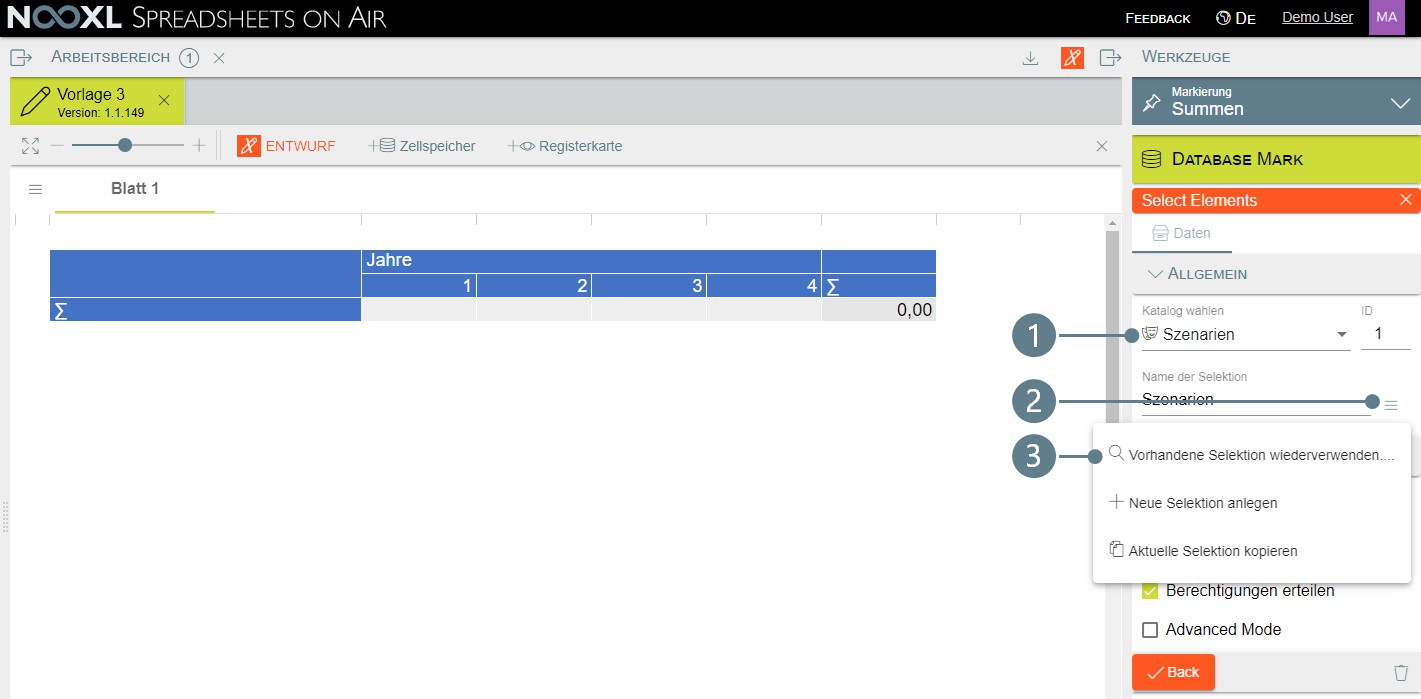
Click on "Scenarios".

Close the dialog by clicking on "Back".
Save your settings by clicking "Save".
Open the cell memory entry again by clicking on it in the list.
In the Dimensions area, open the vertical dimension again by clicking on "↓" (1) and then create another
dataset for this dimension by clicking on the "+" (2).
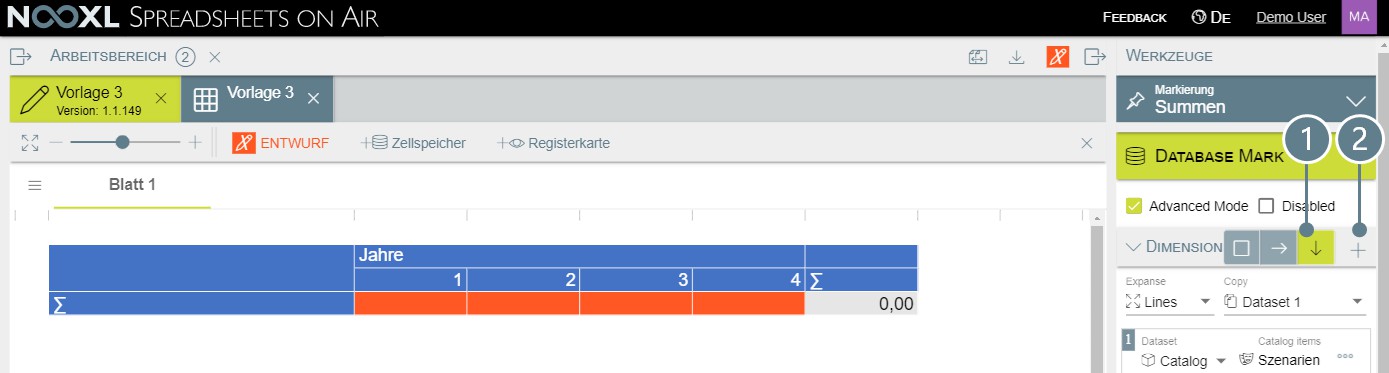
Save the changes and reopen the cell memory entry. This is necessary so that the dimensions created are available for the reference to the external data cells.
Then click the "+" next to External Cell.
Make the following entries in the External Cell section:
- External Matrix: Template 1 v1
- Data Entry: Totals row
In External Data Links:
- Index Down → Index Down-2
- Index Right → Index Right
- External Data → Scenarios
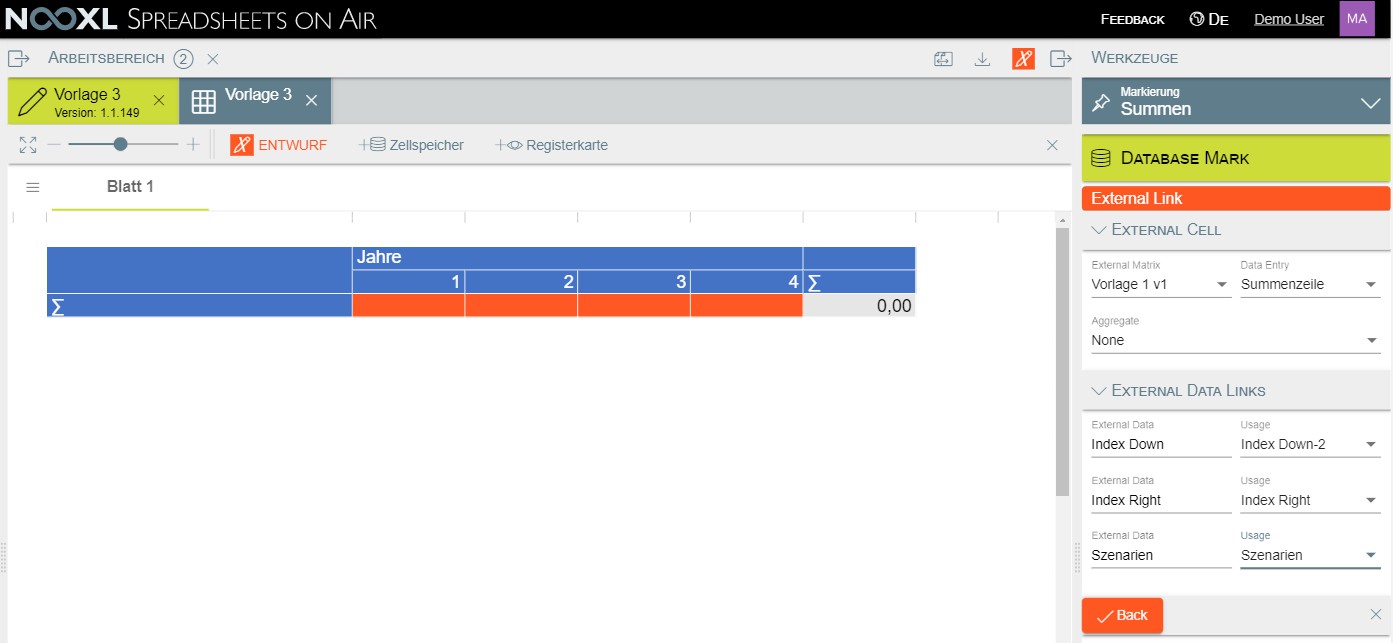
Then click Back to exit the dialog.
In the Database Mark, click Save to save your adjustments.
Now open template 3 to check the current status.
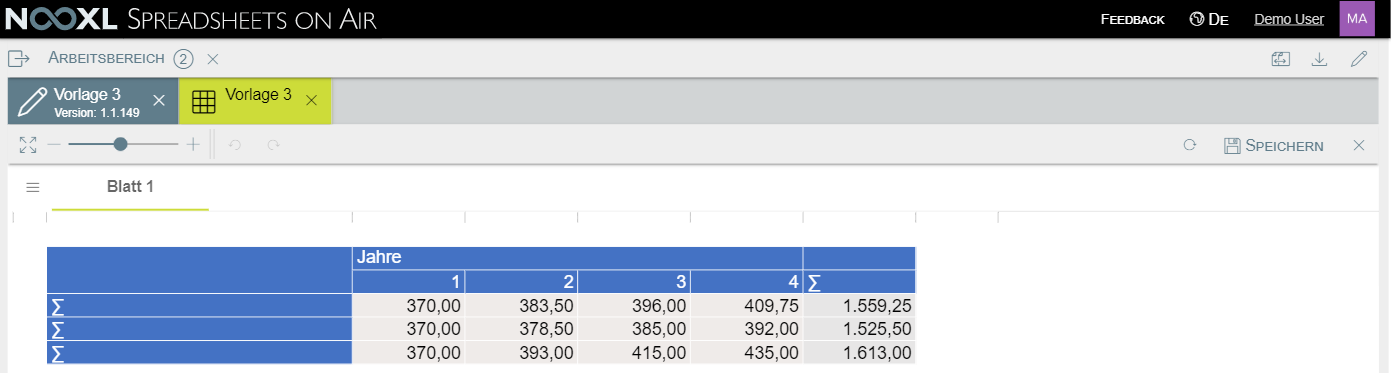
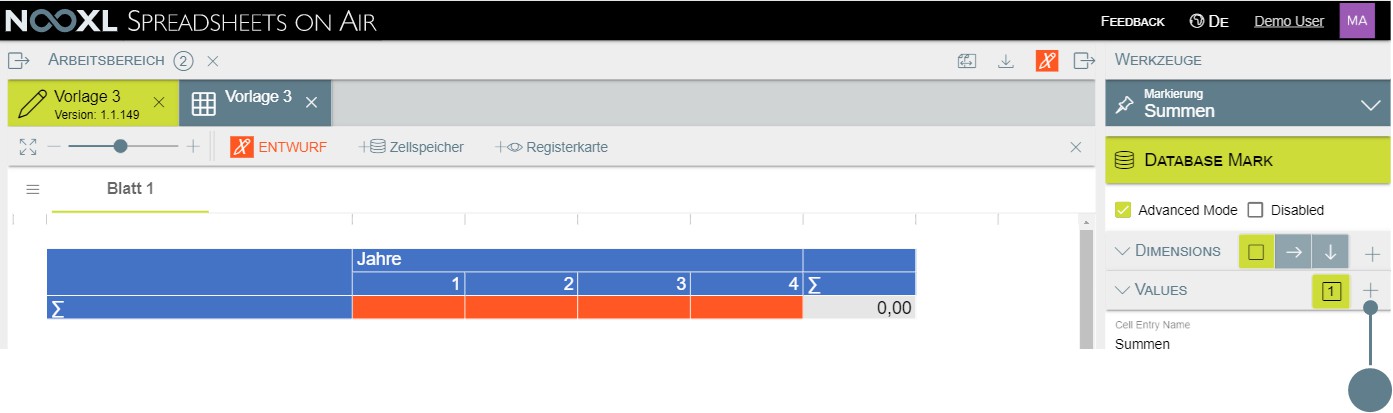
As you can see the reading of the values works, but the information to which scenarios they belong is missing. In the last step we will read in the scenario names at the place of the "Σ".
Open the cell memory entry again and click on the "+" to the right of the 1 in the Values area.
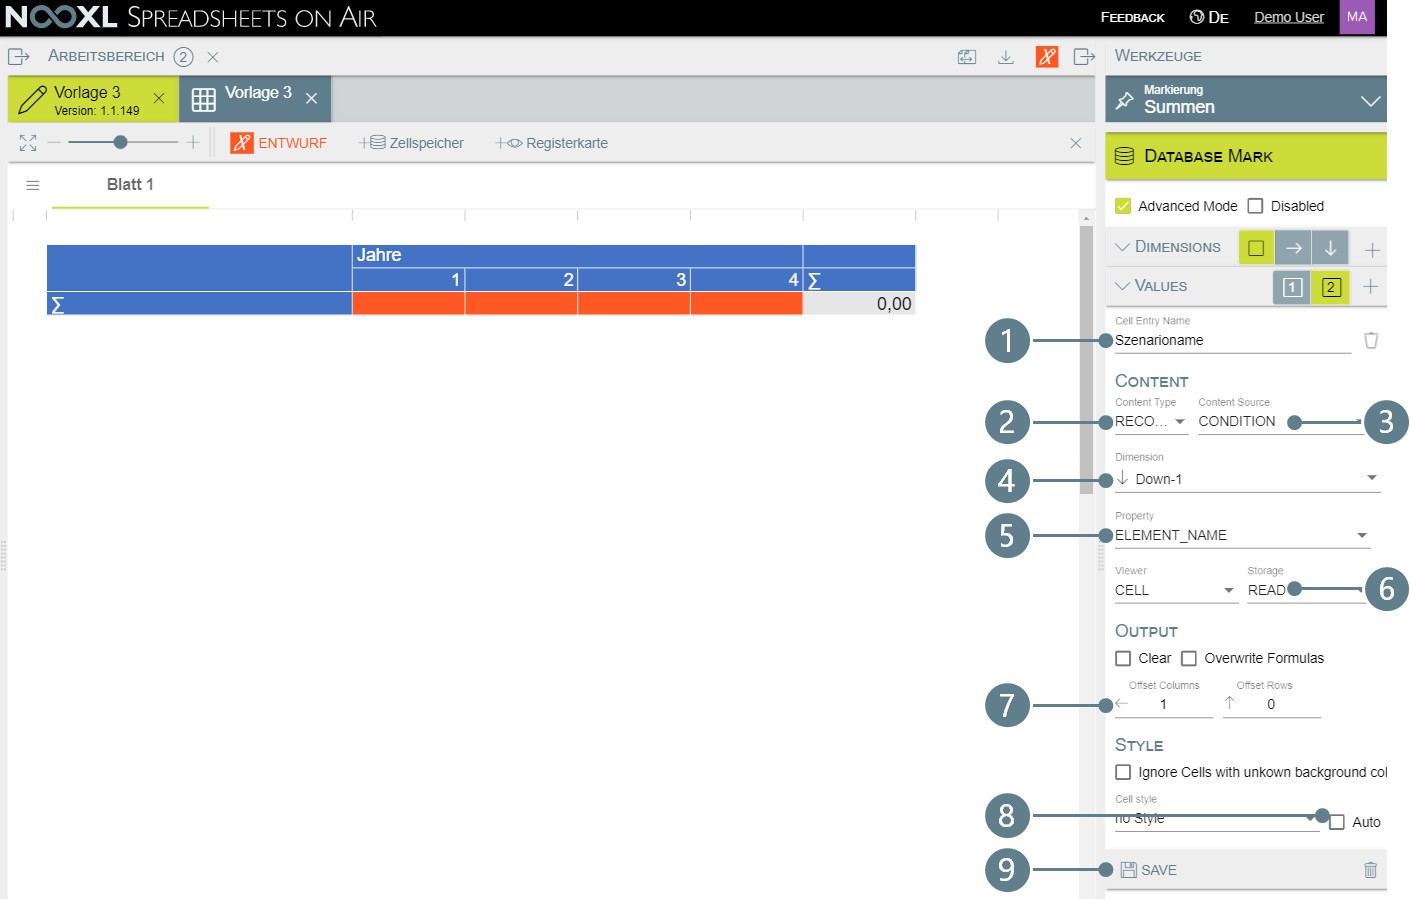
Make the following entries for the created value range:
- Cell Entry Name: scenario name
- Content Type: RECORD
- Content Source: CONDITION
- Dimension: ↓ Down-1
- Property: ELEMENT_NAME
- Storage: READ
- Offset Columns: 1
- Cell style: remove the check mark for Auto
- Save changes by clicking on Save
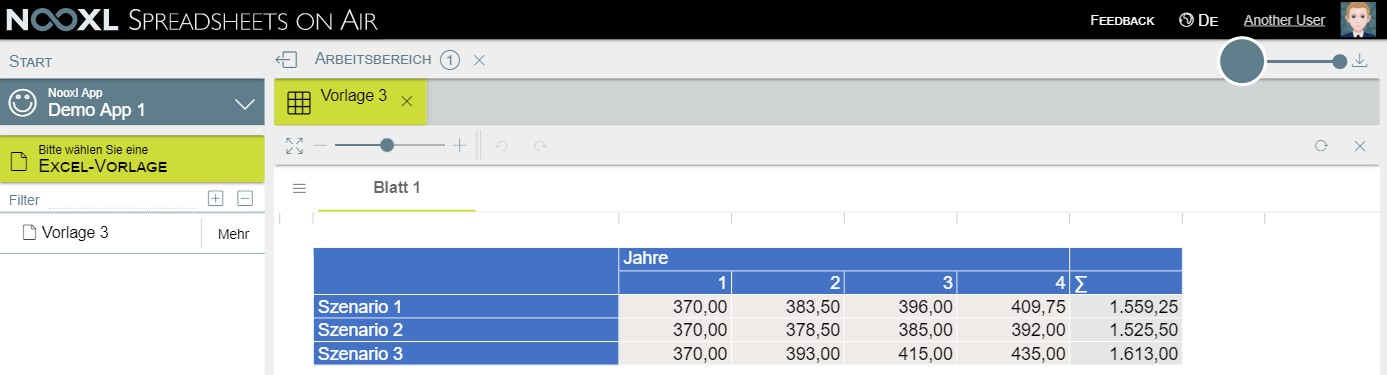
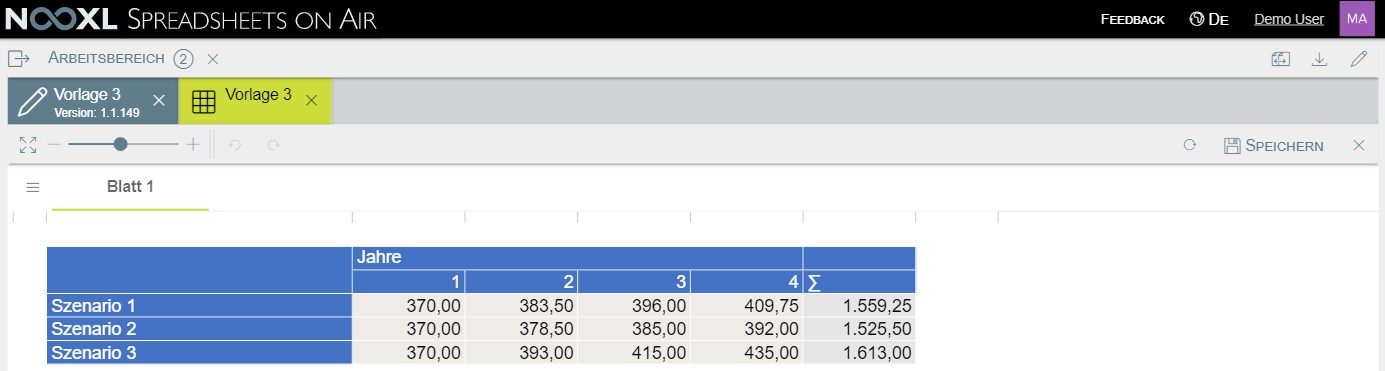
If template 3 is now reloaded, the result looks like this.
Set permissions
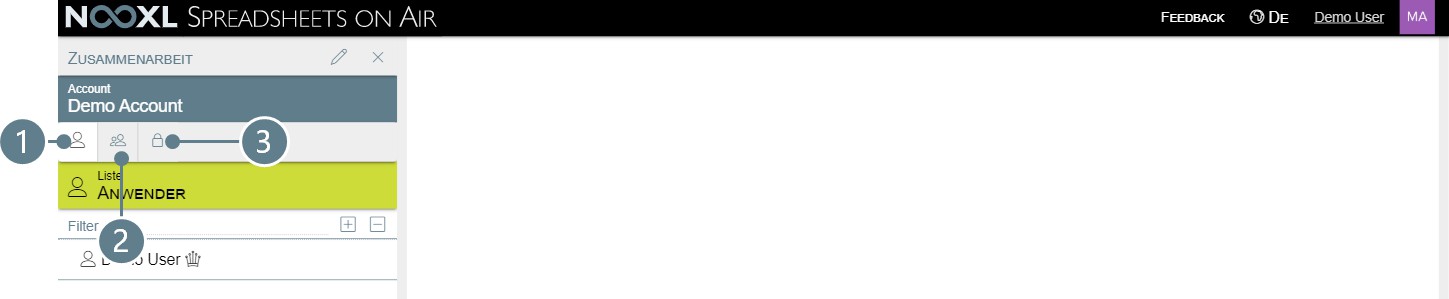
The permissions for the apps are set in the "Collaboration" section.
On three tabs you have the possibility to store users (1), groups (2) and the respective permissions for users and/or groups (3).
For the following steps we assume that you already have a second user in your app
and want to authorize this user now.
Create a group and add users to it
We will not give the rights directly to the user, but we will create a group beforehand and authorize it so that the assigned rights are "reusable" in case a second user is added to the app who should have the same rights.
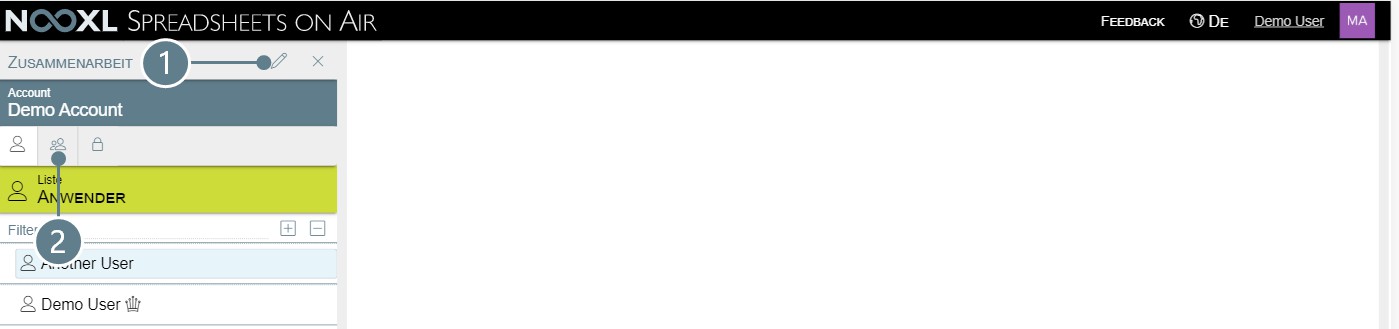
First activate the design mode (1) and then switch to the tab for groups (2) in the collaboration area.
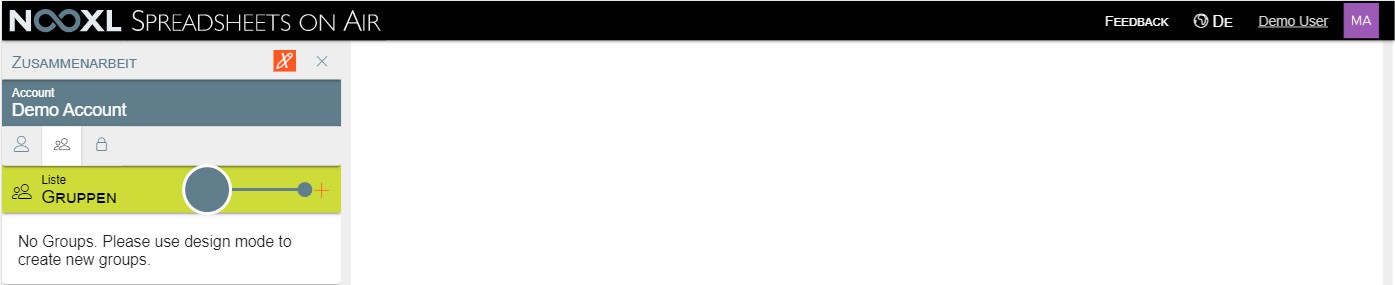
To create a new group, click on the red "+".
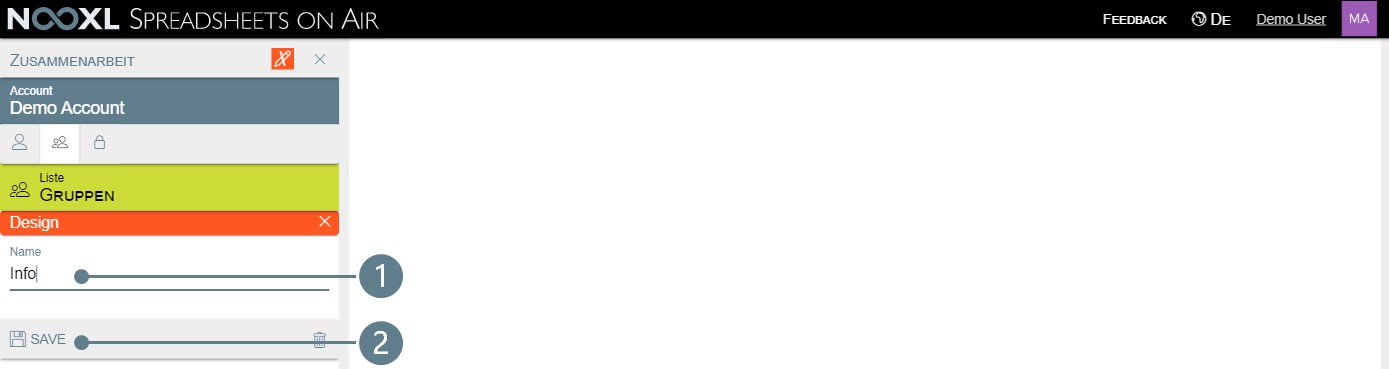
Name the group "Info" (1) and click Save (2).
Click on the button "Add or remove users".

Select the user to be assigned to the group (1) and then click on "↑" to save the setting (2).
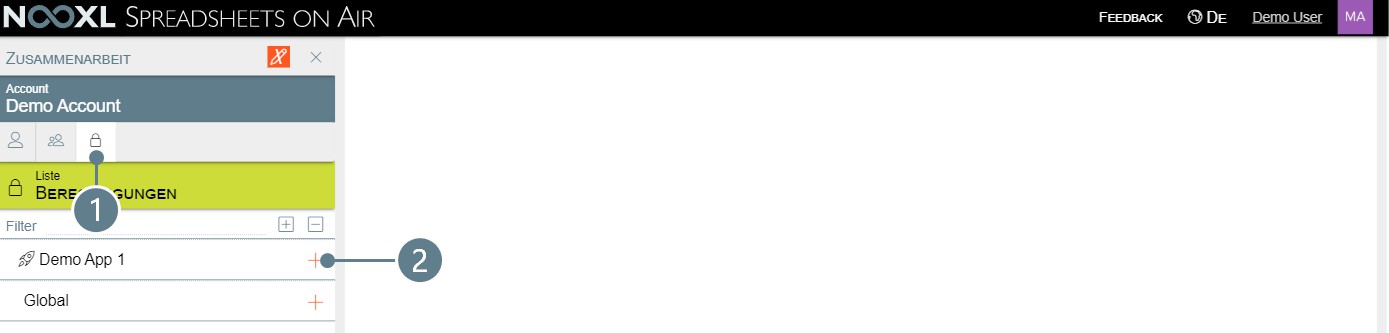
Set permissions
To now grant the group permissions in the app, switch to the "Permissions" tab (1) and click on the red "+" to the right of your app (2).
If you have several apps and want to authorize a group for all apps at the same time, you can give the rights under "Global".
First we give the user the permission to view our app. To do this, set the permissions as follows and click on Save (3):
Gruppe/Benutzer: Info
Erlaubnis: App → Verwenden Sie die App
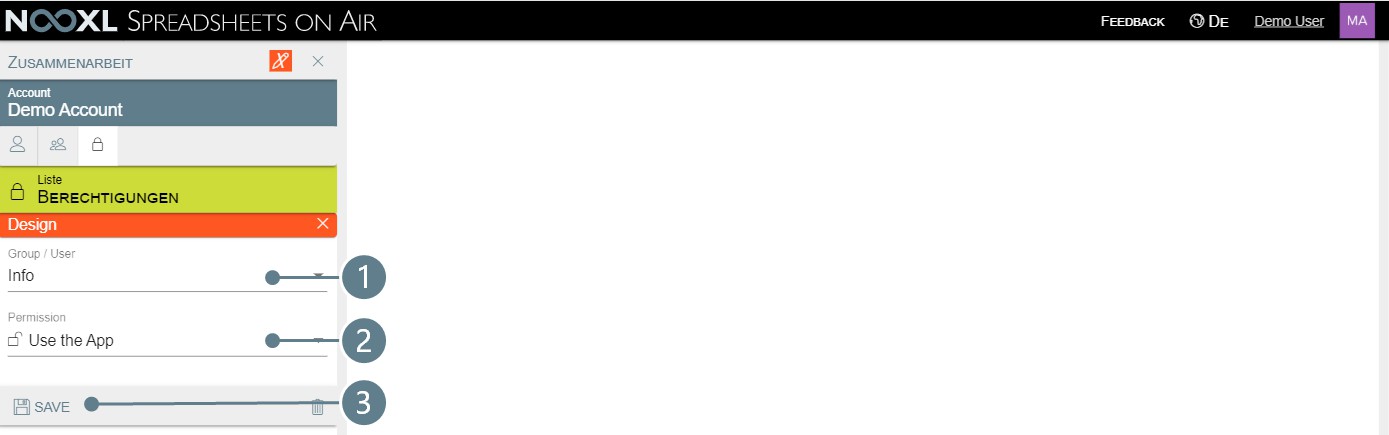
With this authorization the user can already log in to their app, but does not see templates or similar.
Next, we still authorize the user to see our template 3 with the totals rows. To do this, click again on the red "+" next to the app and set the permissions as follows
- Group/ User: Info
- Permission: Spreadsheet → Open Spreadsheet
- Resource Data: Template 3
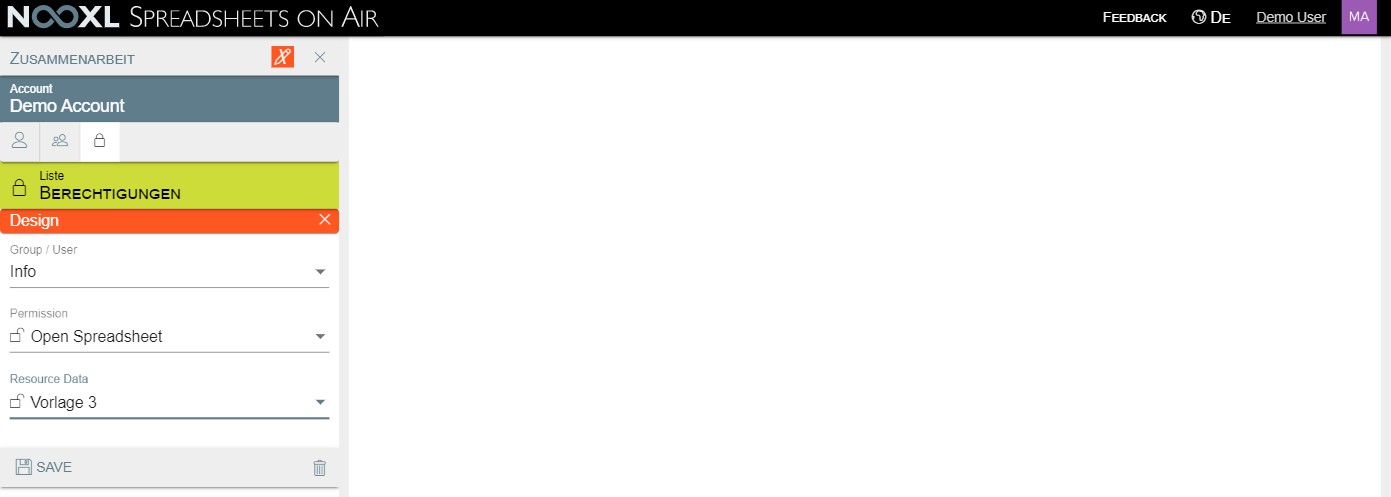
The user can now see the template in the navigation menu on the left and also view the data.
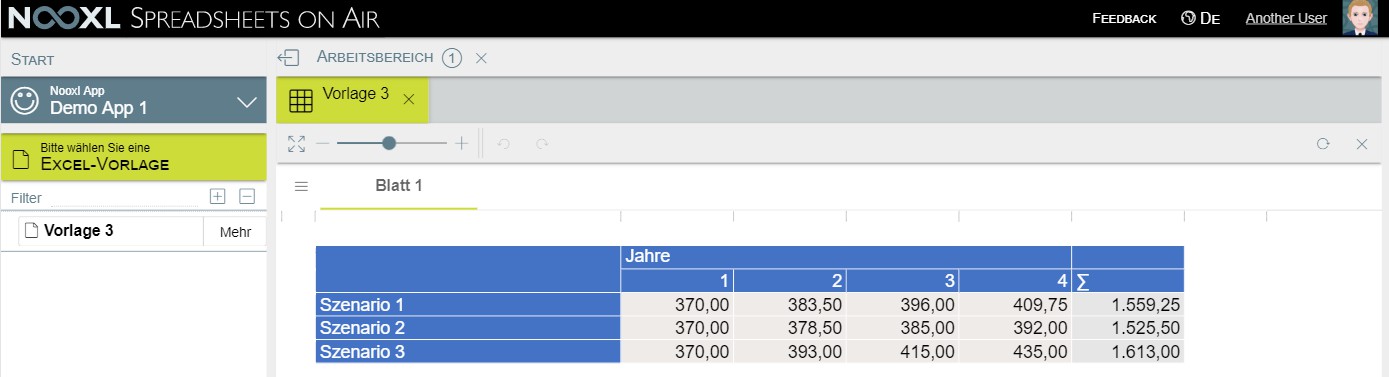
In addition, he should have the possibility to export the template to Excel in order to reuse the content. To do this, create a third permission with the following contents:
- Gruppe/Benutzer: Info
- Erlaubnis: Tabellenkalkulation → Tabellenkalkulationsformel exportieren
- Ressourcendaten: Vorlage 3
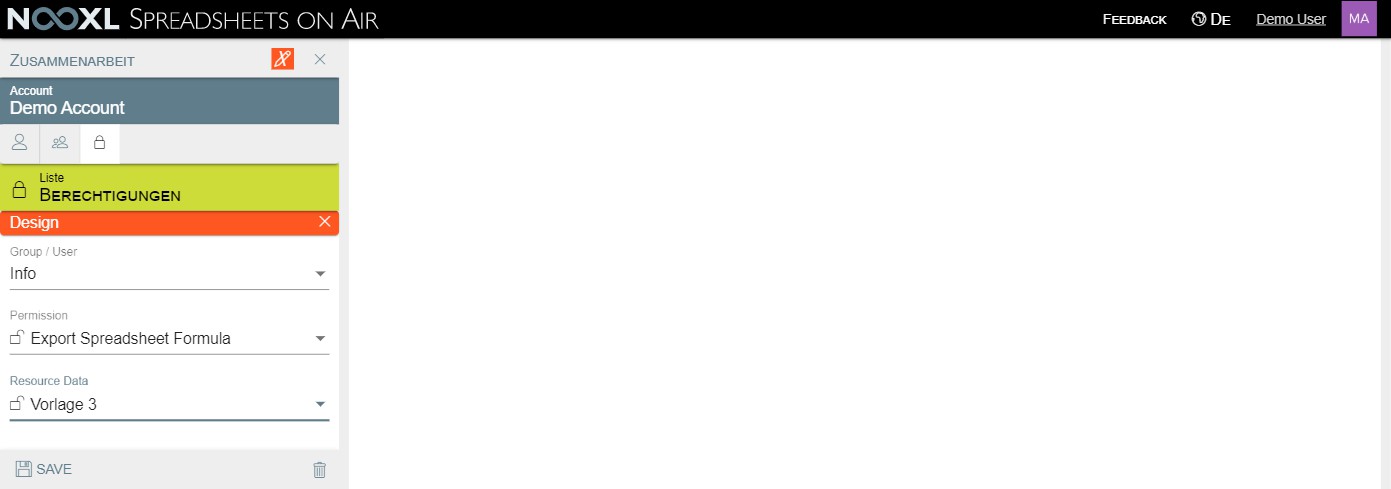
Now the user also gets the "Export to Excel" button in the upper right corner of the template.