Sections
A section anchor marks one or more cells in a model. On its own it has no behavior — it is a shell. You bring it to life by adding one or more sections, each of which gives the marked cells a Nooxl capability such as storing data, running logic, reading from another source, or controlling what users see.
In older documentation and the API, a section anchor is called a markup (or marking), and the individual sections are the various markup types.
Create a section anchor
- Open a model and enter its template Design mode ().
- Select the cells you want to mark with the mouse.
- In the right-hand Tools area, click the plus next to Markings.
- Give the anchor a name and Save.
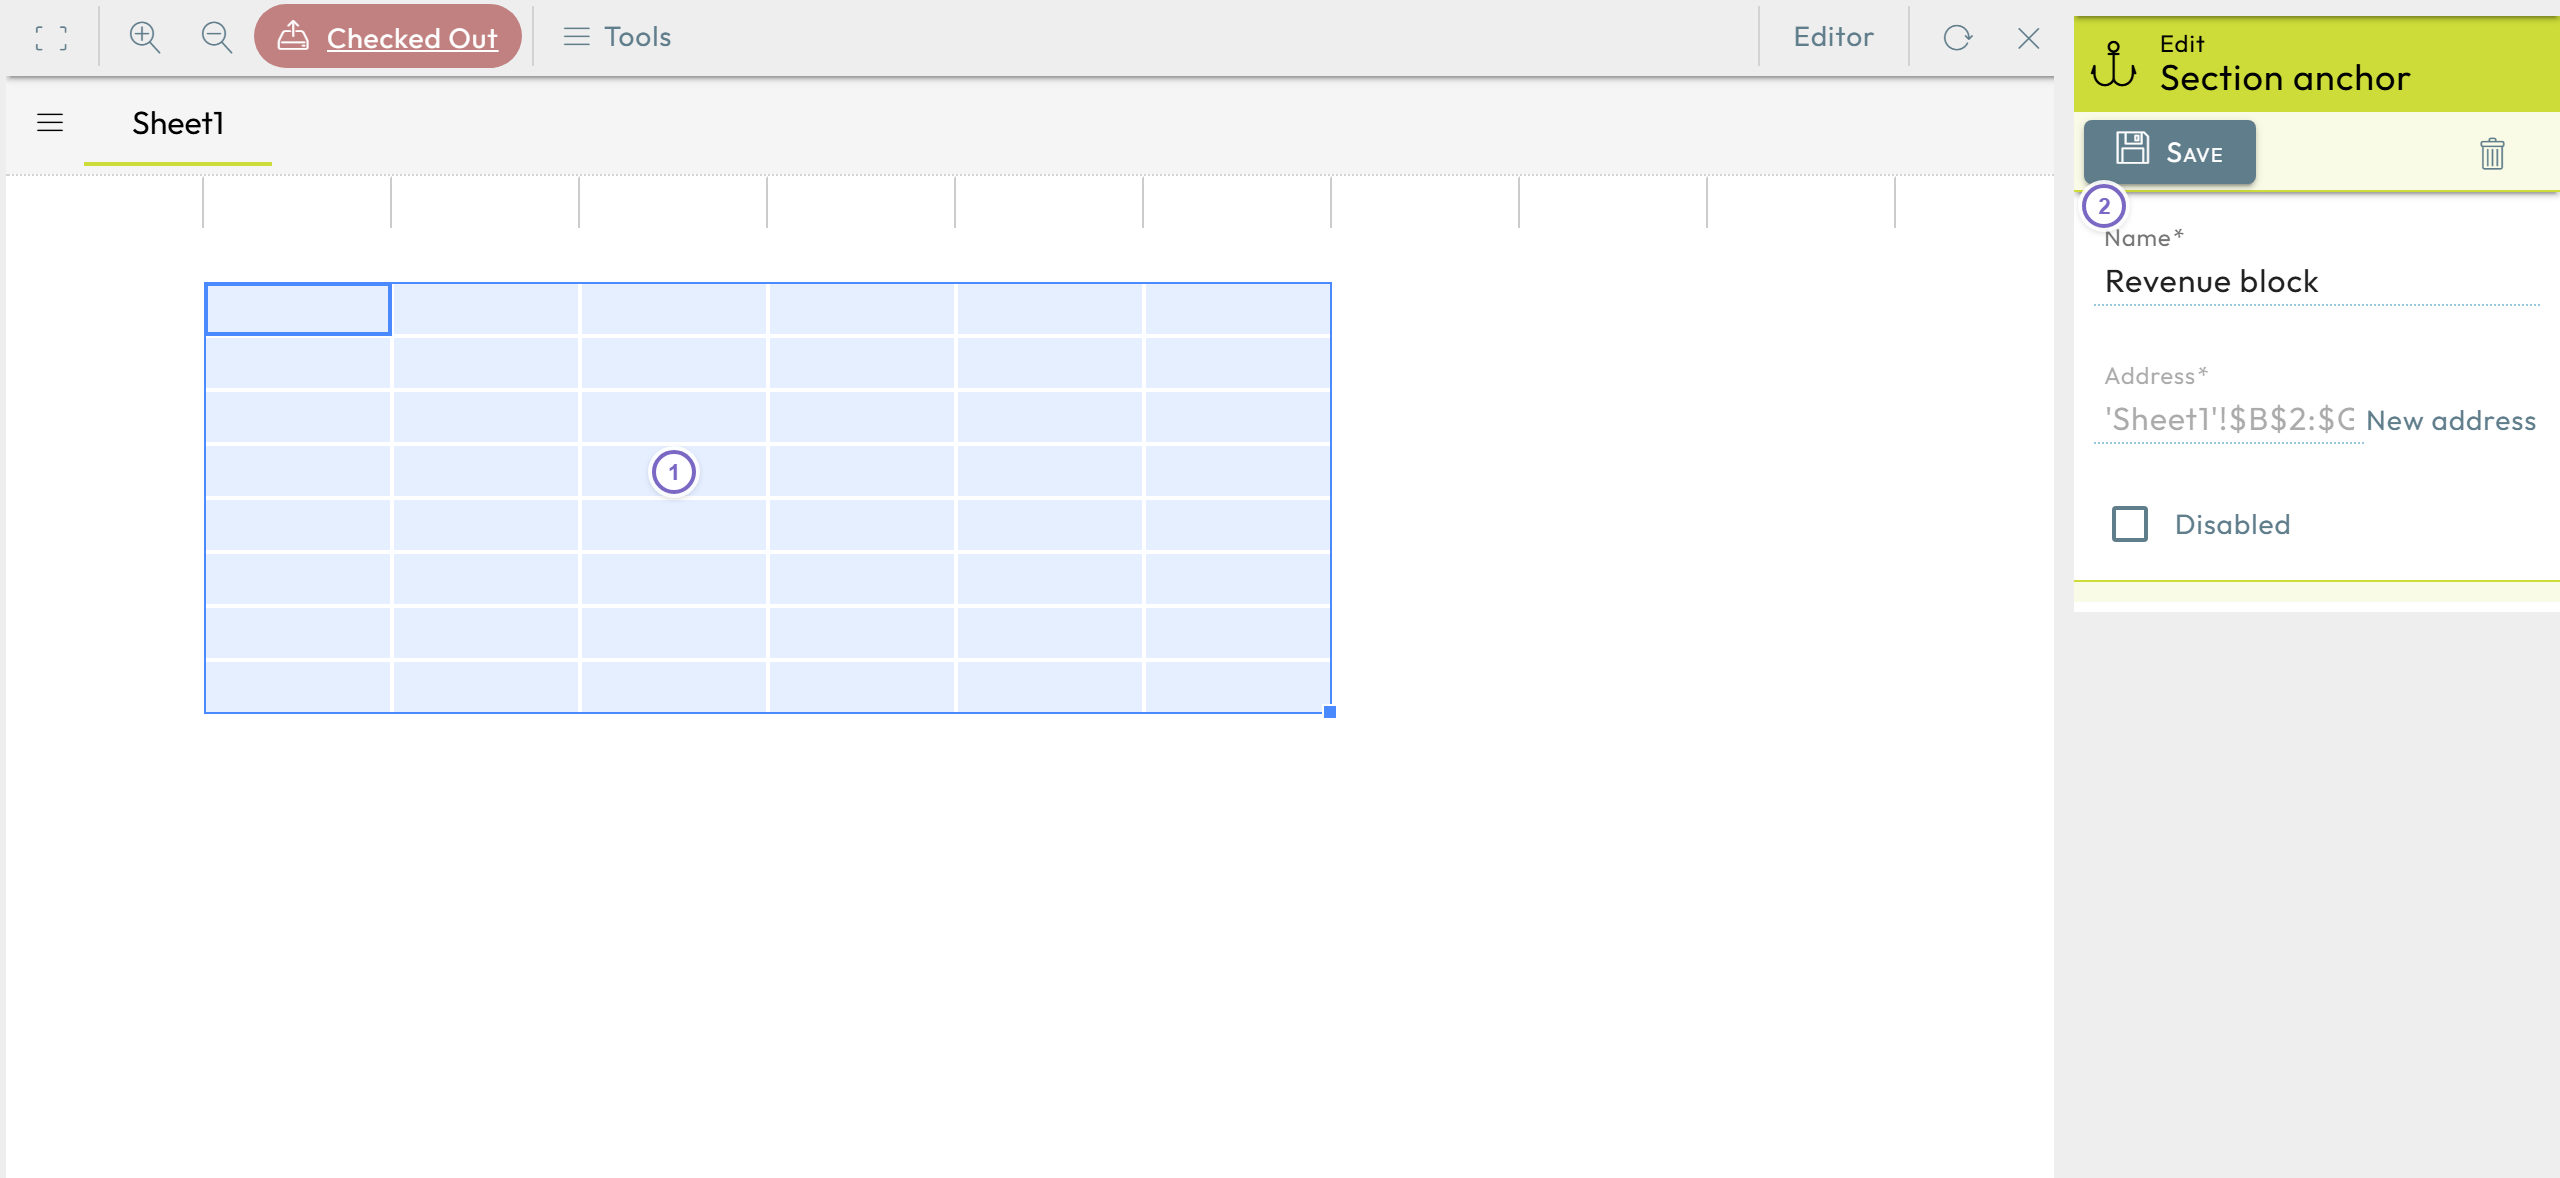
- 1 Select the cells to mark.
- 2 Add the section anchor and name it.
If a section anchor is set to Inactive, it and all of its sections are ignored — useful while you finish configuring it. If cells backing an anchor are deleted from the spreadsheet, the anchor is reported as missing on upload and shown crossed out in the Tools list.
Add a section to the anchor
Expand the sheet in the Tools area, then use the button next to the anchor to add functionality. The available section types are:
| Section | What it does |
|---|---|
| Cell storage | Store and read cell data in the database (internal or external, with dimensions). |
| Cell action | Run extended program logic on cells (functions, modifications). |
| Query | Read data from another model or an external data query into cells. |
| Tab view | Define what is shown in Work mode (tabs, frozen panes, dynamic hiding). |
| Image viewer | Show pictures and charts from the model. |
| Automation | Run background processing of tasks (JobRanges). |
| Permissions | Grant workflow-based permissions that change with a status. |
| Cell storage bindings | Connect cells to the cell storage that backs them. |