Notes
Purpose
Notes are the functional documentation of your Nooxl App: Markdown texts that you attach to the app itself or to a single model, and that are shown right next to the element they describe. Notes live in the Notes tab of the tools panel on the right, support images and diagrams, and keep a version history of every change.
When to use
- Document what a model calculates, which cells are inputs, and which business rules apply.
- Keep app-wide conventions and onboarding information where your colleagues work.
- Give AI agents human-written context: the Nooxl AI agent can read and write notes, external agents can read them through the Sheet MCP.
Prerequisites
- A Nooxl App is open.
- Permission View documentation to read notes, Edit documentation to create, change, or delete them (see Permissions).
The Notes tab is a young feature and can be switched off per installation. If the tab is missing next to Sections and AI Agent, ask your administrator to enable it.
Step by step
1. Open the Notes tab
Open the tools panel on the right and switch to Notes. Every element that can carry documentation gets its own collapsible panel: the app first, then each model you have open. The panel of the element you last worked in is expanded automatically; expanding a panel loads its notes.
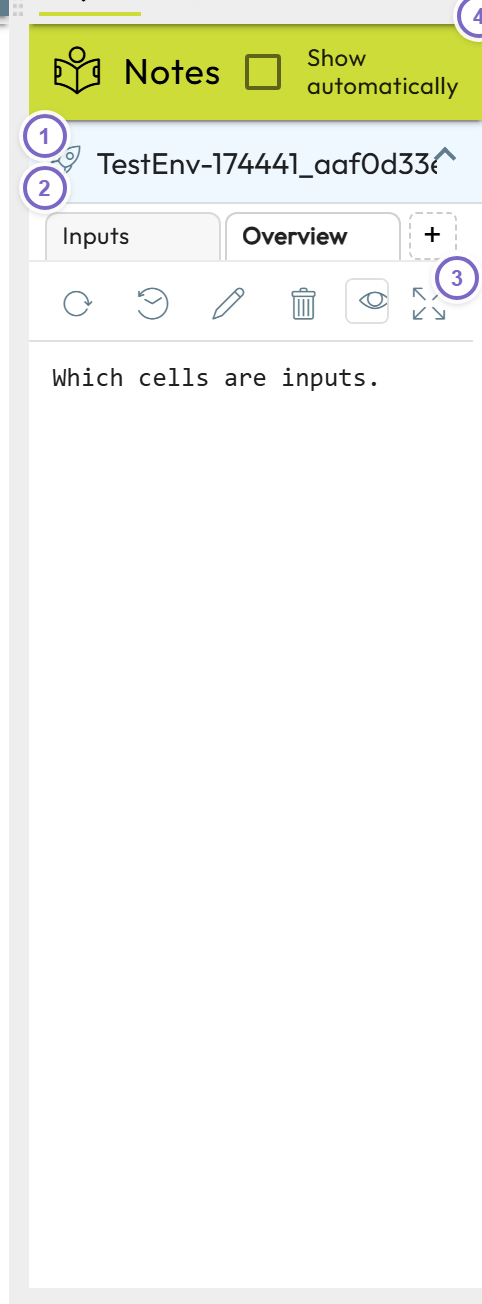
- 1 One panel per element — the app and every open model.
- 2 One tab per note, plus + for a new one.
- 3 Toolbar: reload, version history, edit, delete, view toggle, fullscreen.
- 4 Show automatically — see step 7.
2. Create a note
An element can carry several notes, each with its own title (the tabs are sorted alphabetically).
- Click + in the tab row of the element's panel.
- Enter a Title.
- Write the content, then Save.
3. Write the content
Two view modes share the same content — switch with the toggle in the toolbar:
- Preview (eye icon): a what-you-see-is-what-you-get editor. Type text, use the toolbars and slash commands for headings, lists, tables, quotes, and code blocks.
- Markdown (code icon): the raw Markdown source in a plain text area, for pasting or editing text by hand.
Two extras are worth knowing:
- Images: paste or drop an image into the preview editor. It is stored with the note, so it stays available to everyone who reads it. Save the note once before adding the first image. Allowed are PNG, JPEG, GIF, WebP, and SVG, up to 5 MB per image and 50 MB per note.
- Diagrams: a code block with the language
mermaidis rendered as a diagram. While editing you see the code with a preview toggle; readers see the finished diagram.
4. Save — or save as a new version
The save button in the edit bar is a split button:
- Save keeps polishing the version you are currently working on: as long as you were the last author, your changes are folded into your latest history entry instead of filling the history with every intermediate state.
- Save as new version (menu next to Save) always writes a new history entry. Use it when you finish a round of changes, and fill in Change note (optional) so that colleagues see why the text changed.
5. Look at older versions
Open the version history (clock icon) to get the versions of the selected note, newest first, each with its date and change note. Selecting an entry shows that text read-only, with a banner naming the version's date. Select the newest entry to return to the current text.
To bring an old text back, preview it, switch to the Markdown view, copy the text, return to the current version, and paste it there — then Save as new version.
6. Read and edit in fullscreen
The expand icon opens the note in a fullscreen dialog with an additional Both mode that shows the Markdown source and the rendered preview side by side. Editing, saving, and the change note work exactly as in the panel.
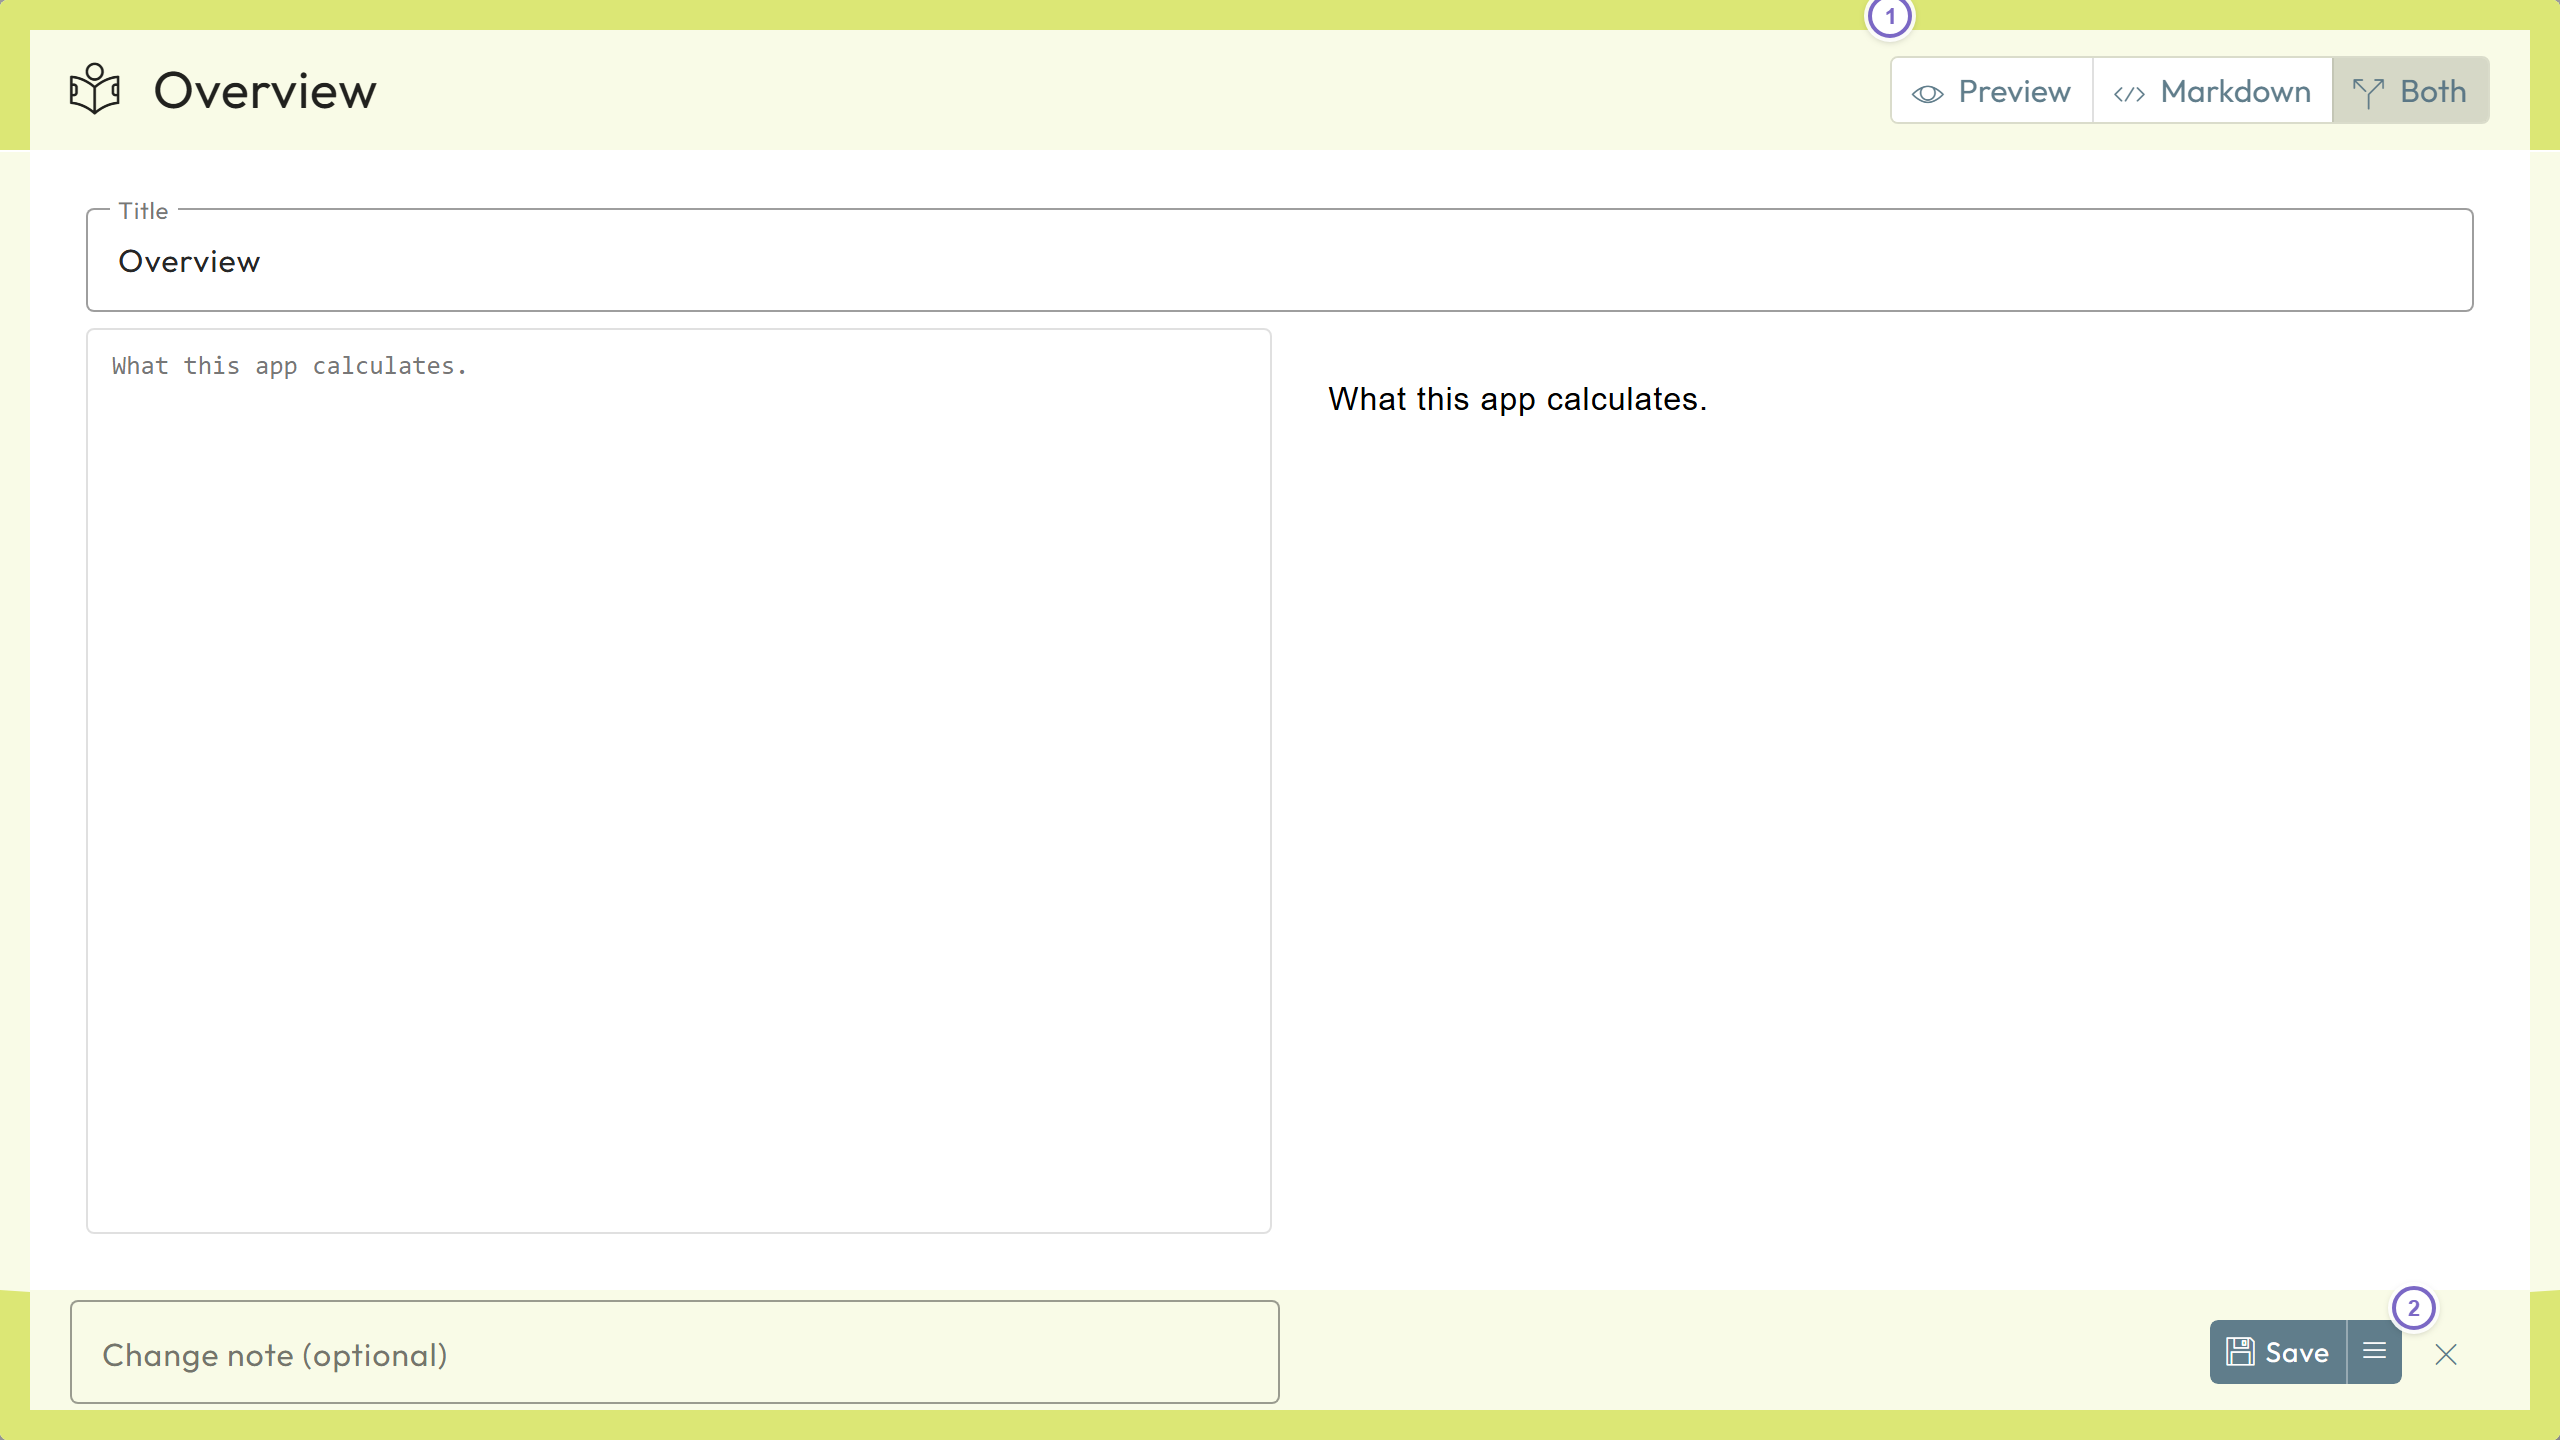
- 1 View toggle: Preview, Markdown, Both.
- 2 Save, or save as a new version with a change note.
7. Show documentation automatically
With Show automatically in the header of the Notes tab, the tools panel opens by itself as soon as you activate an element that has documentation — handy for readers who should not miss the notes. The panel collapses again when you close that element, and if you collapse it yourself, it stays closed for that element. The setting is remembered in your browser and does not apply while a model is open in Design mode.
Tips and pitfalls
- The documentation of a model belongs to its template version. When a new version is created, its notes are copied along, including images and version history — so each version keeps documentation that matches its logic.
- Notes are not part of the spreadsheet: they are neither exported to Excel nor visible to formulas.
- If someone else saved the note while you were editing, saving is refused with a conflict message. Reload the note (refresh icon) and apply your changes again.
- A single note holds about 1 MB of Markdown. Split large documentation into several notes instead of one huge text.
- Deleting a note also removes its version history and its images. You are asked to confirm by note title.
- Changes made by the AI agent always create a new history version, so you can always see what the agent wrote.
Related
- Nooxl AI agent — reads notes as context and can write them.
- Sheet MCP capabilities —
notes_listandnotes_readfor external agents (read-only). - Permissions
- Template versioning