Import templates
An import template is a special Excel file attached to a model version. It defines how an external file (Excel, CSV, or TXT) is extracted, transformed, and loaded into the model — an ETL process your users can repeat with each new file.
This page covers creating the import template and attaching it. For the full end-to-end import workflow, see Import data files via template.
Attach an import template
- Open the model's version management in Design mode and open the version's settings (edit button).
- In the File Import panel, click Add new.
- Fill in the editor (see below) and click Save.
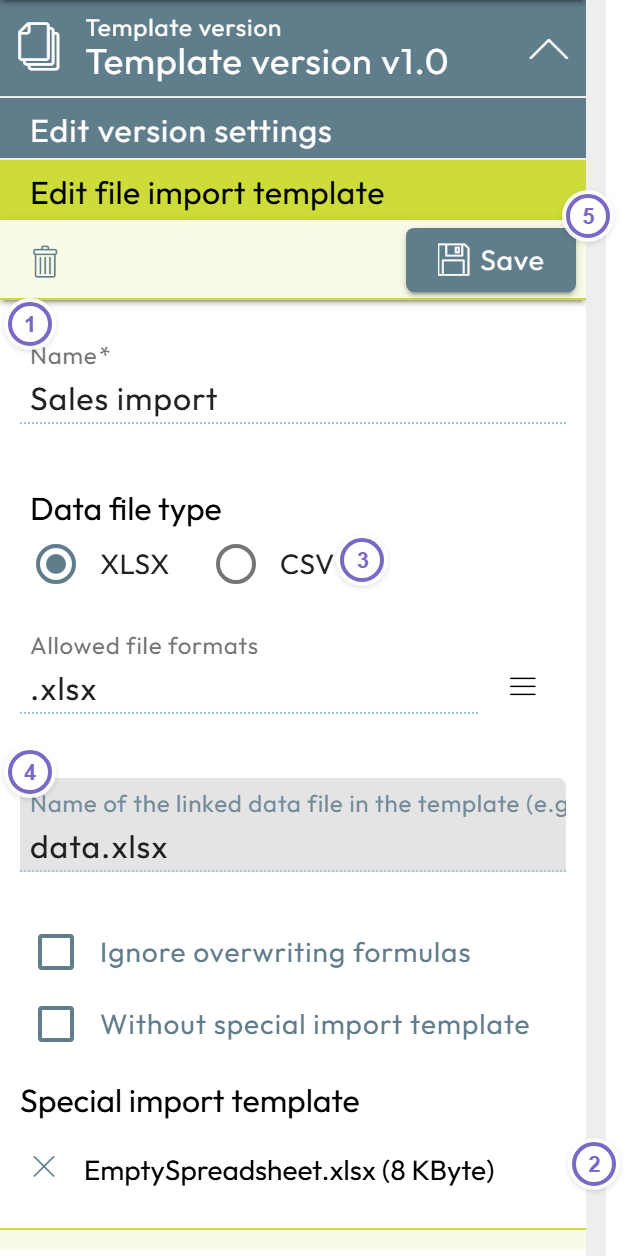
- 1 Enter a name (shown to users in the Import a data file dialog).
- 2 Point Nooxl to the import template
.xlsxfile. - 3 Choose the data file type (Excel or CSV — CSV includes TXT).
- 4 Enter the name of the linked data file used when building the template.
- 5 Click Save.
Dialog fields
| Field | Meaning |
|---|---|
| Name | The import template name shown to users in Import data. |
| File | The import template .xlsx file. |
| Import document type | CSV [csv, txt], max. 10 MB or Excel. |
| CSV separator | The column separator (default comma; can be a pipe | or other). |
| Culture (en-US, de-DE, …) | ISO 639-1 code that defines the decimal separator and date format to expect. |
| Has header | Tick if the data has a header row. |
| UTF7 format | Tick for files with special characters (UTF-7/UTF-8); otherwise the file is treated as ANSI. |
Name of the linked data file (e.g. data.xlsx) | The example file name used while building the template; replaced at run time with the user's actual file. |
note
When the import template is based on a CSV/TXT file, you still build it with an Excel example file. Make sure the sheet containing your data is named CSV (all caps).